Entertain the Possibilities - Home cooking becomes a special occasion; Get recipes, photos, tips and playlists
  • Blog
  • About

Thirsty? Try Easy to Make, Cold Brew, Flavored Iced Tea

7/27/2017

1 Comment

 
Cold-Brew Raspberry Iced Tea
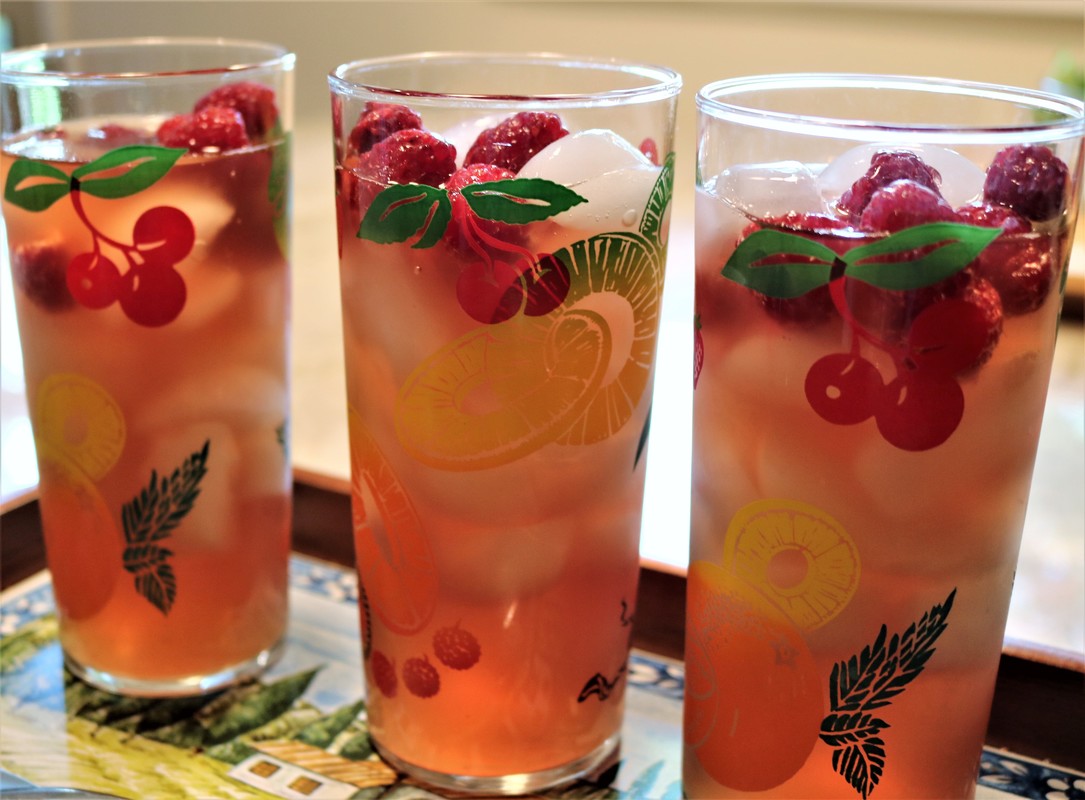
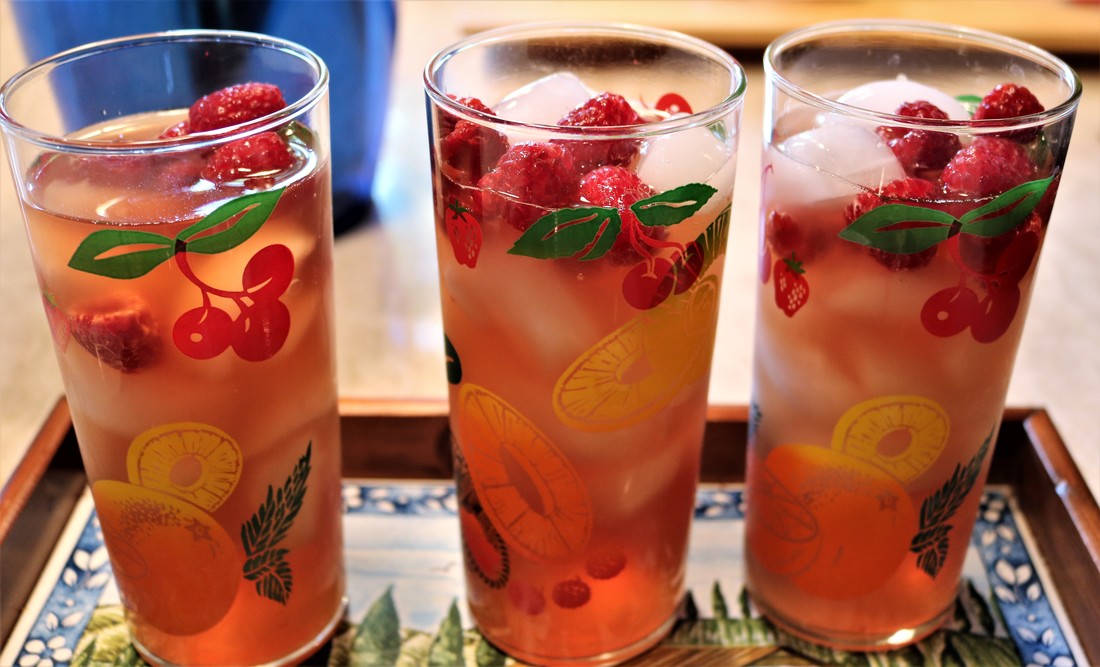
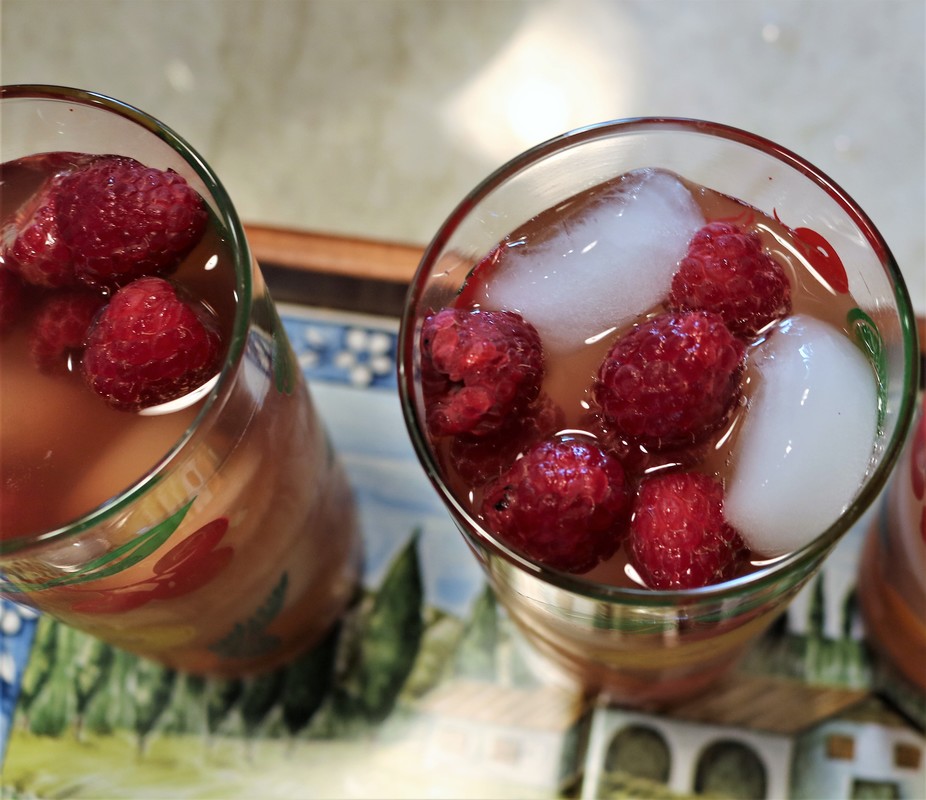
So refreshing! Try a glass of cold-brewed raspberry iced tea -- aaaaah!
I’m a dedicated coffee drinker out of love and necessity. I need/want/crave that morning jolt to get me going. Hot tea fills a key role on sick days and sometimes as a soothing after-dinner cuppa. But iced tea is a whole other animal. A cool, crisp, refreshing animal – so what would that be, an otter?
​
Here’s a quote I like about iced tea from author Vera Nazarian: 
“Imagine a delicious glass of summer iced tea.
Take a long cool sip. Listen to the ice crackle and clink.
Is the glass part full or part empty?
Take another sip.
And now?” 

​​But okay, literary diversions aside, does anyone really need a recipe for iced tea? I mean, come on, this is pretty basic, right? 
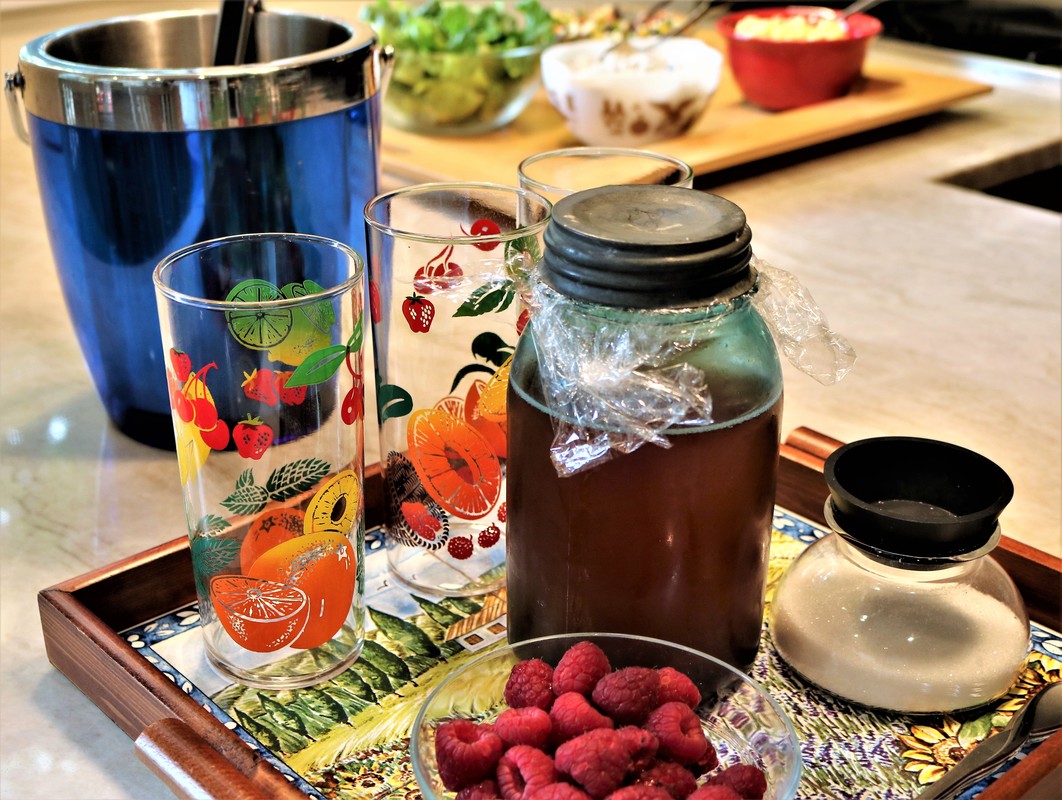
Yes and no. I found a lot to like in this recipe from The Yummy Life including a process that requires no boiling water and the option to vary the flavors from sweet to savory and everything in between. You infuse a jar of cold water and tea bags with whatever flavorings you desire and let it cold-brew in the fridge overnight. 
Picture
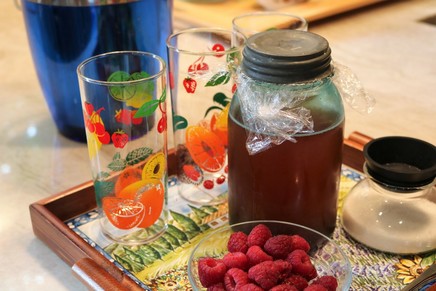
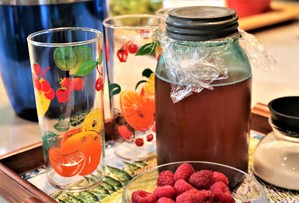
Pretty blue mason jars (vintage of course!) are perfect for tea. Click the photo to see more
I used my vintage blue mason jars to make and serve the tea. The aqua-colored glass is so pretty, and I like knowing that the 100-year old jars still work well and look even better!

​For a closer look at the antique blue canning jars available for purchase in my online shop Entertaining Vintage please click on the photo. 

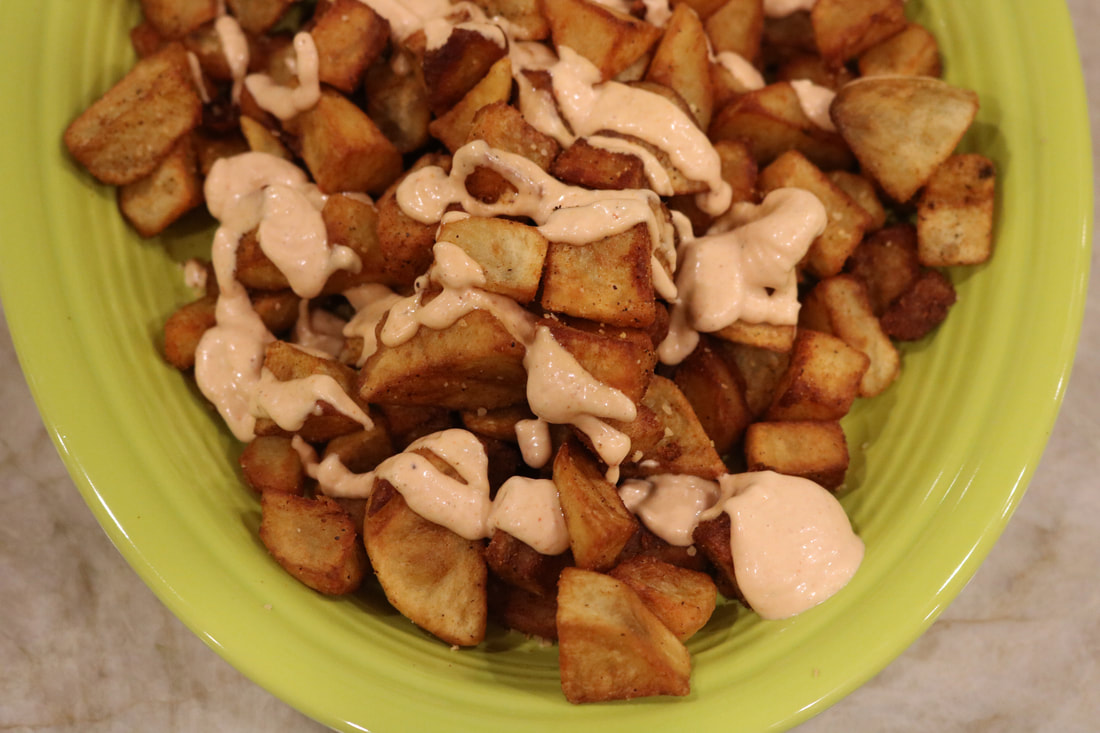
I made a pouch with cheesecloth and kitchen twine, ladled a big spoonful of raspberry jam inside, added it to the tea jar, and refrigerated it overnight. The next day I removed the teabags and the cheesecloth, leaving behind only delicious raspberry tea that had a little sweetness and no raspberry seeds to plague my dental work. Delish!

Next time I’ll do a batch with fresh ginger slices. Or fruit and herbs together – strawberries and basil would be an excellent combo! Please click on the photos to enlarge them and read the captions.
Print The Recipe- Flavored Refrigerator Iced Tea
File Size: 593 kb
File Type: pdf
Download File

Flavored Refrigerator Iced Tea
Recipe source: The Yummy Life
 
INGREDIENTS:
  • 4 tea bags or 4 teaspoons loose leaf tea
  • 4 cups tap or room temperature water
To Add Flavors, Choose From:
  • 1/2 cup fruit jam or preserves – RECOMMENDED: ½ cup raspberry jam
  • 1 cup fruit juice/drink (pomegranate juice, apricot nectar, black cherry juice, grapefruit & orange juice, apple cider, etc.)
  • 1/3 cup thawed frozen juice/drink concentrate (lemonade, orange juice, etc.)
  • Spices (2 cinnamon sticks, 1 teaspoon whole cloves, 2 tablespoons crushed crystallized ginger, etc.)
  • Sprig of fresh herbs (mint, lavender, rosemary, basil, thyme), chopped
  • 1 teaspoon extract (vanilla or almond)
  • 2-4 tablespoons flavored syrups/sauces (maple, blueberry, caramel, etc.)
  • Additional sweeteners to taste, if desired (sugar, simple syrup, honey, agave syrup, etc.)
  • Shot of alcohol (rum, flavored liqueurs, etc.) per glass of flavored tea

DIRECTIONS:
  • Use a 1-quart Mason jar or pitcher. A tea basket or ball is needed for adding flavors using jam/preserves, herbs, or spices.
  • NOTE: Don’t have a tea basket or tea ball? Me neither. You can make a cheesecloth pouch to contain the flavorings. Cut the cheesecloth to the proper size – make sure to allow enough for a double layer of cloth. Douse the cheesecloth in water, then squeeze it out and place the flavoring in the middle of the cloth. Pull the ends together and wrap the cloth firmly closed with a piece of kitchen twine. Cut the twine long enough so it will hang outside the jar while the tea brews.
  • If using tea bags: Hang tea bags inside pitcher or jar with strings hanging over the rim (for easy removal later). Add jam/preserves or spices to tea basket or ball and insert in pitcher or jar. Add fruit juices or extracts to jar/pitcher. Add water making sure that tea and added flavorings are immersed, cover, and put in fridge for 6-12 hours. Remove tea bags, basket, or balls and serve.
  • If using loose leaf tea: Add 4 teaspoons tea leaves to a tea basket, tea ball or tea filter bag. Add flavors and water as described above.
Cold-Brew Raspberry Iced Tea
What is your favorite summertime sipper? Share the deets in the Comments.
1 Comment

Savory Bites: Patatas Bravas

7/24/2017

2 Comments

 
Patatas Bravas
Patatas Bravas - the perfect Spanish appetizer
The Occasion: Dinner party appetizers with a Spanish flair. Or munchies to go with a few beers. Really, what occasion doesn’t call for fried potatoes?!

Ever since our vacation to Spain earlier this year we’ve hosted a few dinner parties modeled after Spanish style meals and socializing. By this I mean that meals are leisurely, highly social with lively conversation prized as much or more than the food and drink, multi-course with lots of small bites, and may last for many hours.

What Makes This Special? The potatoes are cooked twice, resulting in OMG DELICIOUS – golden and crispy outside and tender inside. Nuff said. No wait, the sauce is also awesome. Now it’s nuff said.
The Playlist: Patatas Bravas translates to Fierce Potatoes in English, referring to the spices that appear in the dish three ways. Let’s give a listen to Fierce People by German electronic duo Blank & Jones as you read on.
Patatas BravasCrisp-tender patatas bravas with luscious paprika-spiced dipping sauce
Serve With: Spanish wine or gin-tonics. We like this white Rioja which is rich with flavor but also light and refreshing – Lopez de Haro. Vermouth is also a trendy cocktail in Spain right now. It’s not to my taste, but you do you.

Set the Table: I like to serve the sauce for the patatas bravas separately, in a small bowl or squeeze bottle like you would find at a burger joint for ketchup. One time I drizzled the sauce over the potatoes on the platter – so pretty, but some of the luscious tater crispiness was lost. It’s best to squeeze a little sauce onto the plate and dip the potatoes in before each bite. 

The Verdict: This is neither fast nor easy (but not difficult either, more of a medium effort) and it gets messy as the hot oil bubbles and spatters. Make it anyway. This oh-so-worth-it dish will turn any meal into a special occasion and make your friends very happy.
​
As noted, the potatoes are dubbed ‘fierce’ thanks to a paprika-heavy spice mix that appears three times: first in the potatoes’ boiling water; next when the potatoes are tossed in a spice-salt blend after being fried; and finally in the savory dipping sauce. It’s more about flavor than burn-your-face-off hot, but you can adjust the seasonings up or down to suit your preference. Please click on the photos to enlarge them and read the captions.
Print The Recipe- Chef John's Patatas Bravas
File Size: 592 kb
File Type: pdf
Download File

Chef John's Patatas Bravas
Recipe source: Chef John via Allrecipes
 
INGREDIENTS:

Dipping Sauce:
  • 1 clove garlic, minced, or more to taste
  • ½ teaspoon smoked paprika
  • 1 pinch salt
  • 8 ounces mayonnaise
  • ½ ounce sherry vinegar, or more to taste
  • 1 ¼ teaspoons tomato paste
  • ¼ teaspoon ground chipotle peppers
  • 1 pinch cayenne pepper, or more to taste
Spice Blend:
  • 1 tablespoon kosher salt
  •  ½ teaspoon ground black pepper
  • ½ teaspoon smoked paprika
  • ½ teaspoon ground chipotle peppers
Potatoes:
  • 64 ounces cold water
  • 1 tablespoon salt
  • 1 teaspoon smoked paprika
  • 1 teaspoon ground cumin
  • 2 bay leaves
  • 2 pounds russet potatoes, peeled and cut into 1-inch cubes
  • 16 ounces vegetable oil for frying
 
DIRECTIONS:
  • For the dipping sauce: Combine garlic, 1/2 teaspoon smoked paprika, and a pinch of salt in a mortar and pestle or mash together in a small bowl until smooth. Then add the garlic mix to a food processor along with mayonnaise, sherry vinegar, tomato paste, 1/4 teaspoon chipotle chile powder, and cayenne pepper until combined. Cover and refrigerate the dipping sauce.
  • Note: You may wish to serve the dipping sauce from a squeeze bottle or a small serving bowl with a spoon.
  • For the spice blend: Mix 1 tablespoon salt, black pepper, 1/2 teaspoon smoked paprika, and 1/2 teaspoon chipotle chile powder together in a small bowl. Set spice blend aside.
  • For the potatoes: Pour water into a large saucepan and stir 1 tablespoon salt, 1 teaspoon smoked paprika, cumin, and bay leaves into water. Bring to a boil, reduce heat to low, and cover; simmer for 10 minutes.
  • Stir potatoes into water-paprika mixture, bring to a boil, and simmer until potatoes are tender but not fully cooked, 4 to 5 minutes. The tip of a paring knife should easily insert into the center of a potato cube.
  • Drain potatoes and transfer to a wire rack to cool completely, about 45 minutes or longer.
  • Note: You can make the recipe ahead this far about 2 hours in advance. Leave the cool, dry potatoes on the wire rack and cover with a clean dish towel.
  • Heat vegetable oil in a large cast iron skillet or Dutch oven to 350 degrees F (175 degrees C). Add cooled potato cubes and cook, stirring frequently, until golden brown, 5 to 6 minutes.
  • Transfer potatoes to a baking sheet lined with paper towels to cool slightly.
  • Toss in a bowl with spice blend.
  • Transfer the seasoned potatoes to a serving platter and pass the dipping sauce.
Patatas Bravas
Do you ever bring home recipes as souvenirs from your vacation? Tell all in the Comments
2 Comments

Fish for Dinner: Arctic Char with Mushrooms and Arugula

7/18/2017

0 Comments

 
Arctic Char with Mushrooms and Arugula
A healthy, quick, and easy dinner -- Arctic Char with Mushrooms and Arugula
The Fish for Dinner feature chronicles my education in the ways of fish-cookery. I grew up avoiding fish other than sticks and was well into adulthood before adding the real deal into my diet, usually at a restaurant. The impetus to cook more fish at home comes from joining a sustainable fish program through Hooked on Fish. I’ll tell you what we made and how we liked it, plus occasionally a few tips and tunes too.
​

The Occasion: Arctic Char with Mushrooms and Arugula is a healthy family dinner for a busy weeknight. Quick and easy, this one comes together in just under 30 minutes (okay, 40 minutes including the herb and veggie chopping).

What Makes This Special? It’s essentially an all-in-one meal, salad and main course together again at last. Not only does it look elegant on the plate but I also appreciate it at clean-up time – consolidated leftovers and fewer dishes to wash.
The Playlist: If it’s a busy weeknight you may not have time or interest for a dinnertime musical interlude. So here’s a quickie to keep you moving during the prep.
Serve With: You don’t need to add anything else, but a few sliced tomatoes on to the plate will provide color, flavor, and nutrients to your salad-fish dinner combo. A cool glass of wine or iced tea will provide hydration and happiness to the diner.  Click on the photos to enlarge them and read the captions.
The Verdict: I really like the mild, sweet flavor of char and its medium-firm, flaky texture -- perfect for a salad presentation. The recipe from Food Network Magazine is quick and super-easy. Use it as a springboard for your own creative ideas. Want to substitute fresh baby spinach or other greens for the arugula? Go right ahead. Craving new flavors with the mushrooms? Swap the mustard and/or vinegar (rice vinegar and wasabi mustard might be nice if you like it spicy!) Different herbs? Sure. There’s no wrong way to do this. We will be doing variations on this fish-salad theme all summer long, even when it’s not a busy weeknight!
Print This Recipe- Arctic Char with Mushrooms and Arugula
File Size: 599 kb
File Type: pdf
Download File

Arctic Char with Mushrooms and Arugula
Recipe source: Food Network Magazine
 
INGREDIENTS:
  • 4 6-ounce skinless arctic char fillets (about 1 inch thick)
  • Kosher salt and freshly ground pepper
  • 4 tablespoons extra-virgin olive oil, plus more for drizzling
  • 8 ounces white button mushrooms, sliced
  • 2 shallots, finely chopped
  • 2 tablespoons red wine vinegar, plus more for drizzling
  • 2 teaspoons whole-grain mustard
  • 1 tablespoon chopped chives
  • 1 tablespoon chopped fresh parsley
  • 2 bunches arugula, trimmed
 
DIRECTIONS:
  • Preheat the oven to 350 degrees.
  • Season the fish with salt and pepper.
  • Heat 1 tablespoon olive oil in a large nonstick skillet over medium-high heat until shimmering. Add the fish and sear until golden on the bottom and cooked halfway through, about 3 minutes.
  • Flip onto a baking sheet and bake until cooked through, 3 to 5 more minutes.
NOTE: If desired, you can skip the oven and continue cooking the fish in the skillet but turn the heat down to medium-low after you flip the fish. Keep a close eye for doneness, approximately 3-4 minutes on the second side.
  • Meanwhile, wipe out the skillet (or get an additional skillet if you choose to continue cooking the fish in the first pan), return to medium-high heat and add the remaining 3 tablespoons oil.
  • Add the mushrooms and cook, without stirring, until browned on one side, about 1 minute. Stir and cook until browned all over, about 3 more minutes.
  • Add the shallots and cook until soft, stirring, about 2 minutes.
  • Whisk in 2 tablespoons vinegar and the mustard and bring to a boil.
  • Remove from the heat and stir in the chives and parsley.
  • Drizzle the arugula with oil and vinegar in a bowl, season with salt and pepper and toss. Divide among plates and serve with the fish. Spoon the mushrooms and pan juices on top.
Arctic Char with Mushrooms and Arugula
What's your favorite all-in-one dinner dish? Share the details in the Comments
0 Comments

Sweet Bites: Crispy Rice Treats with Browned Butter and Crushed Cookies

7/13/2017

1 Comment

 
Crispy Rice Treats with Browned Butter and Crushed Cookies
Update a classic childhood treat with browned butter, sea salt, and crushed cookies - wow!
The Occasion: Be the hero by bringing sweets to work or a volunteer committee meeting.

Are you familiar with that charming Julie-Andrews-as-Mary-Poppins song lyric, “Just a spoonful of sugar makes the medicine go down”? Well, sometimes it’s actually true. Bringing food to a meeting goes a long way toward achieving the desired outcomes (not to mention team morale) and homemade dessert is best of all. You might even call it 'sweetening the pot.' 
What Makes This Special? The recipe comes from renowned dessert queen Joy the Baker, whose fun blog and cookbooks are drool-worthy, inspirational, and accessible. It takes the classic childhood favorite – Rice Krispie treats – and fancies it up to appeal to adult taste buds. Sea salt – yes!
Serve With: I’m not sure, maybe a cup of coffee, glass of milk? Wet Wipes for your sticky fingers?
Crispy Rice Treats with Brown Butter and Crushed CookiesIndividually wrapped treats for your snacking pleasure
Set the Table: In this case it’s not so much setting the table as preparing the goodies for transport. You can leave the crispy rice treats in the pan, cut into bars, and let folks reach in and help themselves, nothing wrong with that.

​But I decided to wrap the bars individually in plastic wrap (I had colorful wrap in the pantry – who knew?) so they would stay moist and fresh, and the meeting attendees could keep their fingers free from the sweet sticky goodness. 

The Verdict: This modern version of a classic treat is fun and tasty for kids and grown-ups alike. A few tips for success:

1) Work fast-fast-fast once the marshmallows have melted. Stir them into the crispy rice quickly and thoroughly, before the gooey stuff hardens.

2) You need strong forearms and a sturdy wooden spoon to thoroughly mix the mess. I may need to recruit a super-strong helper next time.

​I also wonder if less is more – would this be better with fewer cookie crumbles in it? Something to think about for next time – and I do predict that there will be a next time! Please click on the photos to enlarge them and read the captions.
Print This Recipe- Brown Butter Cookies and Cream Krispie Treats
File Size: 604 kb
File Type: pdf
Download File

Crispy Rice Treats with Browned Butter and Crushed Cookies
Recipe source: Joy the Baker
 
INGREDIENTS:
  • 9-12 ounces rice krispie cold cereal
(Note: The original recipe calls for 12 ounces; I followed a commenter’s advice and reduced it to 10 ounces for better balance with the marshmallows. It was still quite crispy, and if you prefer chewier bars you may reduce the quantity of cereal even further.)
  • 16 ounces large or small marshmallows
  • 8 tablespoons unsalted butter, melted to browned
  • 1 teaspoon coarse sea salt
  • 16 Oreo cookies, chopped and crushed

DIRECTIONS:
  • Place the rice krispies in a very large bowl. Set aside.
  • Butter a 9x13-inch pan. Set aside.
  • In a medium saucepan, melt together the marshmallows and butter. Stir as the mixture melts until thoroughly combined.
  • Pour the melted marshmallow mixture over the rice krispies. Sprinkle in most of the salt. Stir until all of the cereal is coated in marshmallow. Add most of the chopped cookies.
  • To make pressing the mixture into the prepared pan easier, grease your wooden spoon (even if it's covered in sticky rice krispie treats) with butter.
  • Press into the pan. Sprinkle with remaining salt and cookies and use your fingers to press them into the treats.
  • Allow treats to rest in the refrigerator for at least 30 minutes before slicing. This will make the treats easier to slice and handle.
  • Wrap individually, share, and enjoy!
Crispy Rice Treats with Browned Butter and Crushed Cookies
What is your favorite sweet treat from childhood? Do you still indulge in it now? Tell us in the Comments
1 Comment

What’s for Dinner?  Grilled Pork Chops with Mango Salsa

7/11/2017

0 Comments

 
Grilled Pork Chops with Mango Salsa
Juicy Grilled Pork Chops with Mango Salsa - a most satisfying meat-lover's supper!
The Occasion: A hearty summertime meal for when you want to embrace your inner carnivore. I made this recipe after a few days of eating salads, and eggs, and perfectly delicious light bites. (You know how sometimes it’s too darn hot to eat? Like that.) But then I had a desperate need to chew a chop, really tear into a well-prepared cut of meat. Nothing else would do to satisfy my cravings. (Apologies to my vegetarian readers, I know this must sound horrible and now you think much less of me. I will just have to bear that shame.) 
What Makes This Special? Two things: brining the pork chops for maximum juiciness, and the sweet, summery taste of mangoes. Yes!
Serve With: A grain and a veggie side dish. Couscous and green beans? Rice and sliced tomatoes? You choose. Pinot noir goes really well with pork. Maybe treat yourself to a nice glass with this meal. 

Click on the photos to enlarge them and read the captions.
The Verdict: This dish is exactly what your carnivorous self desires. Succulent pork, tender but with a satisfying bite to it. Moist and flavorful meat. Juicy ripe mangoes providing color, sweetness, and a nice neutral foil for the zesty jalapeño and red onion. There’s not much better than that!
Print This Recipe- Grilled Pork Chops with Mango Salsa
File Size: 595 kb
File Type: pdf
Download File

Juicy Grilled Pork Chops with Mango Salsa
Recipe source: Simply Recipes for the mango salsa
 
INGREDIENTS:
  • 4 bone-in center cut pork chops, ideally about an inch thick
  • ¼ cup kosher salt
  • ¼ cup brown sugar
  • 5 cups cold water
  • Optional: Taijin, a citrus spice blend commonly found in Latin markets
For the salsa:
  • 2 ripe mangoes, peeled, pitted, and finely diced
  • 2 tablespoons red onion, finely chopped
  • 1/2 jalapeño, minced – taste the chili and adjust the quantity to suit your taste
  • 3 tablespoons fresh cilantro, chopped (Note: If you have a cilantro-hater in the family like me, feel free to substitute chopped parsley or chopped Mexican oregano)
  • 3 tablespoons freshly squeezed lime juice

DIRECTIONS:
  • Brine the pork chops: This is a key step for keeping meat moist and juicy through the cooking process. Essentially you are giving the chops a nice long soak in salty water. How long? Some recipes say between 30 minutes and 6 hours. I recommend a brine soak for about 3 hours. Much more than that will result in super-salty meat.
  • Combine the salt and brown sugar in the water, stirring vigorously with a whisk to dissolve them. You may add optional spices to the brine water, such as Taijin, black peppercorns, bay leaves, garlic cloves, or other seasonings.
  • Put the chops in a baking dish with high sides or in a sealable plastic storage bag. Pour the brine into the dish or bag, covering the chops. Cover and chill for approximately 3 hours.
  • When it’s time to grill the chops remove them from the brine, rinse in cold water, and pat dry.
  • Meanwhile, make the salsa: Combine all salsa ingredients in a medium bowl and stir to combine. Chill until ready to serve.
  • Grill the pork chops: Prepare the grill by establishing a medium-high flame and oiling the grates.
  • Cook the chops about 4 minutes on each side, or until the temperature reaches about 140 degrees on an instant-read thermometer.
  • Remove from the heat and let the chops rest for about 10 minutes before serving. 
0 Comments

Sweet Bites: Cantaloupe-White Balsamic Sorbet

7/6/2017

0 Comments

 
Cantaloupe Sorbet
Cantaloupe-White Balsamic Vinegar Sorbet - refreshing as a dessert or a palate cleanser
The Occasion: When the ladies who lunch are coming to your place.

I recently hosted a friend for lunch on a weekday. Quite a change from my usual refrigerator grab-n-go. We had a lovely salad plate, bread from Evanston’s amazing Hewn bakery, raspberry iced tea, and topped it all off with this cold, refreshing, sweet but light treat. How elegant!
What Makes This Special? Aside from the wonder that is homemade fruit sorbet, this particular recipe is special due to a splash of white balsamic vinegar and a pinch of sea salt. Just enough savory goodness to turn this frozen concoction into an adult-oriented delight. 
Serve With: Anything, really. It’s a nice light finish to lunch or dinner. I dressed it up with a few fresh blackberries – I like the color contrast as well as the flavor. You could make a slightly more elaborate dessert by adding a plate of cookies or fancy chocolates. 
PictureElegant crystal goblets for an elegant dessert!

​Set The Table:
With such a simple dessert, I like to glam it up by serving the sorbet in fancy crystal goblets.

Also nice would be vintage cocktail glasses or colorful depression glass berry bowls, or mid-century modern coffee cups – or anything interesting and/or quirky that you might find in the back of your cupboard. 

Click on the photo to take a closer look at the Mikasa crystal goblets at Entertaining Vintage.

The Verdict: This cantaloupe sorbet is extremely flavorful and very easy to make. I can’t say I tasted the white balsamic vinegar specifically but there was an unexpected and much appreciated depth of flavor. My guest and I did taste the sea salt and liked it very much. My grandpa used to put salt and pepper on his cantaloupe, so maybe I’ll add a touch of white pepper next time. Oh yes, there will be a next time!  Click on the photos to enlarge them and read the captions.
Print The Recipe- Cantaloupe-White Balsamic Sorbet
File Size: 538 kb
File Type: pdf
Download File

Cantaloupe-White Balsamic Sorbet
Recipe source: Cooking Light
 
INGREDIENTS:
  • 1 pound chopped peeled ripe cantaloupe (about 2 1/2 cups)
  • 3 tablespoons white balsamic vinegar
  • 1/8 teaspoon kosher salt
  • 3/4 cup water, divided
  • 3 tablespoons sugar
  • 3 tablespoons honey

DIRECTIONS:
  • Process cantaloupe, vinegar, salt, and 1/2 cup water in a blender until smooth.
  • Combine sugar, honey, and remaining 1/4 cup water in a saucepan over medium; cook, stirring constantly, until sugar is dissolved, 2 to 4 minutes. Remove from heat, and cool 10 minutes.
  • Stir together cantaloupe mixture and honey mixture in a medium bowl until combined. Cover and chill until cold, about 30 minutes or overnight.
  • Pour mixture into freezer bowl of a 1-quart electric ice-cream maker, and proceed according to manufacturer's instructions. (Instructions and times will vary.) Transfer to a freezer-safe container, and freeze until easily scooped, at least 4 hours.
  • Note: The sorbet is best on the day it is made, but fine for a day or two afterwards.
Cantaloupe-White Balsamic Sorbet
What's your favorite flavor of sorbet? Or do you say sherbet, or sherbert, or granita, or ice?
0 Comments
    When home cooking becomes a special occasion - Recipes, playlists, table tips and more
    Picture

    ​
    Entertaining Vintage

    Vintage treasures for the kitchen, home, collectibles, and gifts

    Categories

    All
    Afternoon Dance Break
    Birthday Greetings
    Cookbook Road Test
    Cool Tunes
    Drinks
    Entertaining Vintage
    Fish
    Kitchen Reno
    Kitchen Tips
    National Days
    Party Planning
    Pop Culture
    Recipe
    Savory Bites
    Supper Club
    Sweet Bites
    The Arts
    Travel
    TV
    Video

    Archives

    October 2017
    September 2017
    August 2017
    July 2017
    June 2017
    May 2017
    April 2017
    March 2017
    February 2017
    January 2017
    December 2016
    November 2016
    October 2016
    September 2016
    August 2016
    July 2016
    June 2016
    May 2016
    April 2016
    March 2016
    February 2016
    January 2016
    December 2015
    November 2015
    October 2015
    September 2015
    August 2015
    July 2015
    June 2015
    May 2015
    April 2015

    RSS Feed

    Subscribe to our mailing list

    * indicates required
Proudly powered by Weebly