Entertain the Possibilities - Home cooking becomes a special occasion; Get recipes, photos, tips and playlists
  • Blog
  • About

Fish for Dinner: Mahi-Mahi with Smashed White Beans and Sage

10/30/2017

1 Comment

 
Mahi-Mahi with Smashed White Beans and Sage
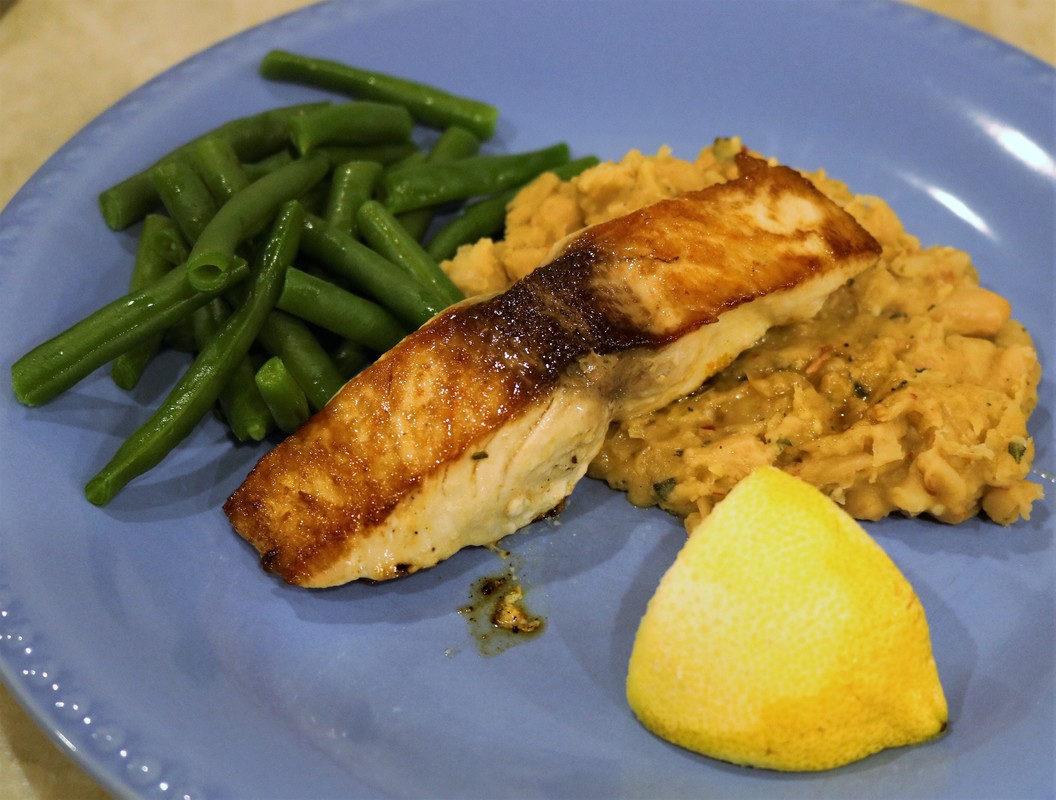
Mahi-Mahi with Smashed White Beans and Sage. Easy and delicious: my two favorite things!
The Fish for Dinner feature chronicles my education in the ways of fish-cookery. I grew up avoiding fish other than sticks and was well into adulthood before adding the real deal into my diet, usually at a restaurant. The impetus to cook more fish at home comes from joining a sustainable fish program through Hooked on Fish. I’ll tell you what we made and how we liked it, plus occasionally a few tips and tunes too.

​The Occasion: Nice enough to serve for dinner with company, but easy enough to assemble quickly for a weeknight supper with the family.

The Recipe: This tasty recipe for Mahi-Mahi with Smashed White Beans and Sage comes from Bon Appetit, a mainstay for home cooks and avid eaters everywhere. I never worry about the accuracy or quality of the recipes I find on their site. Recommended!
The Playlist: OMG the sexist statements from The Man in Black in this song are almost too much for me, but I confess to having a soft spot in my cold dark heart when it comes to Johnny Cash. Plus … beans! It’s thematically correct for pairing with this recipe. 
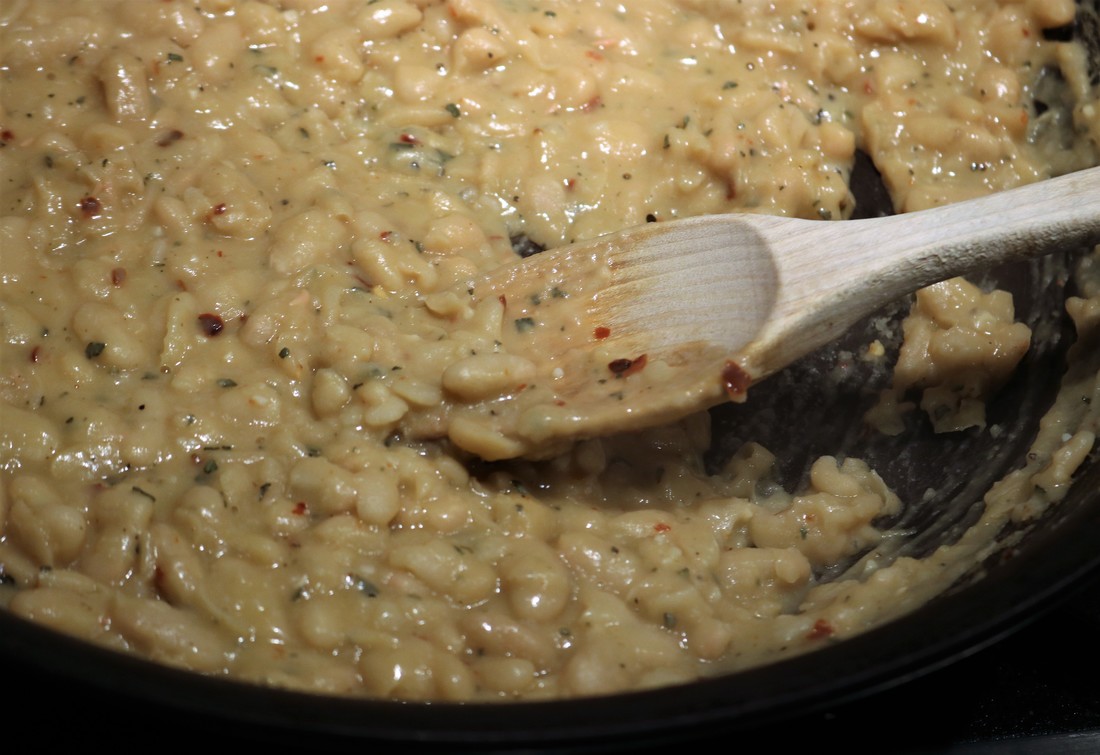
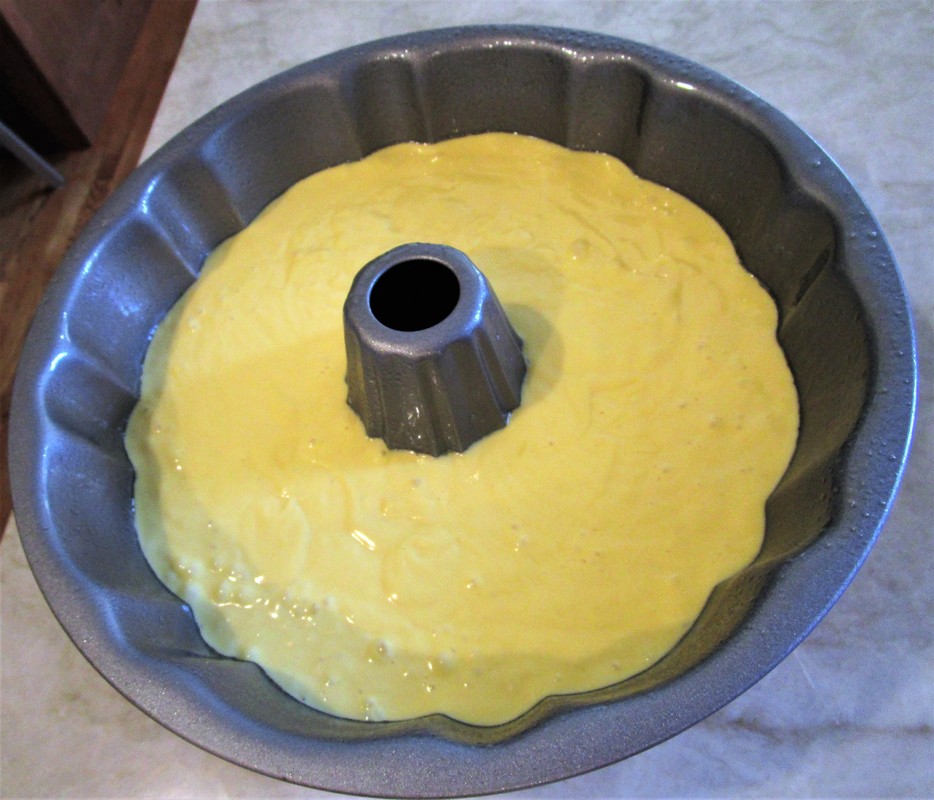
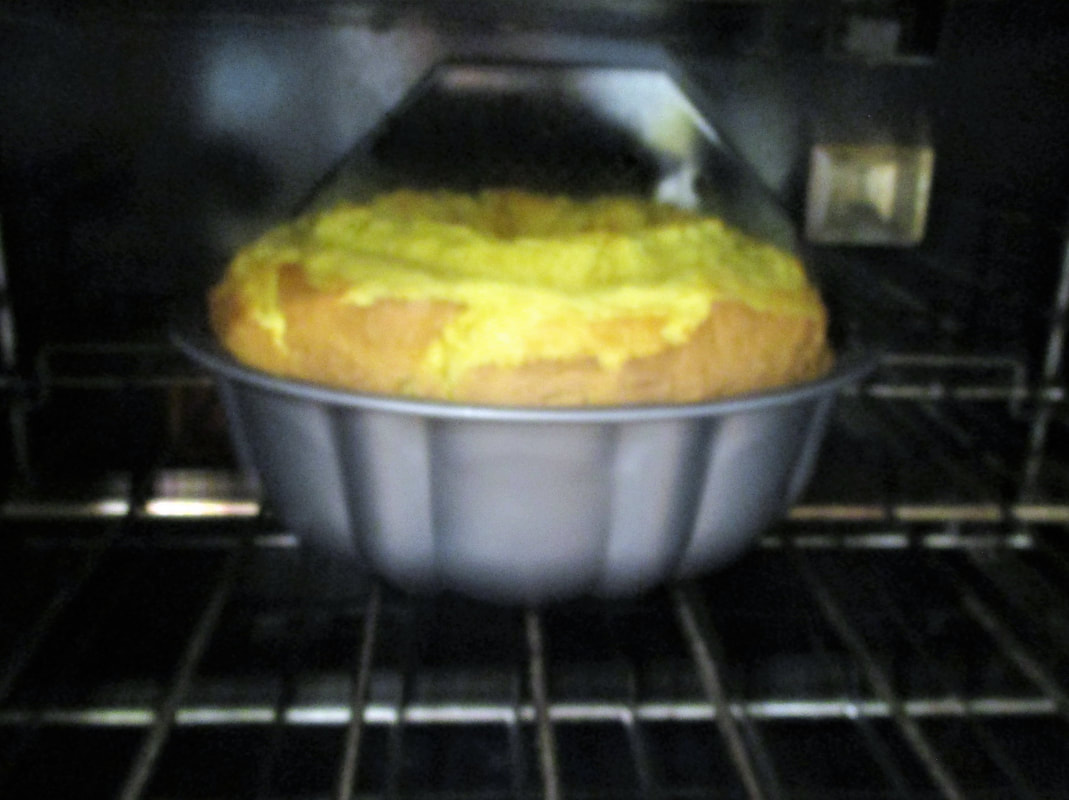
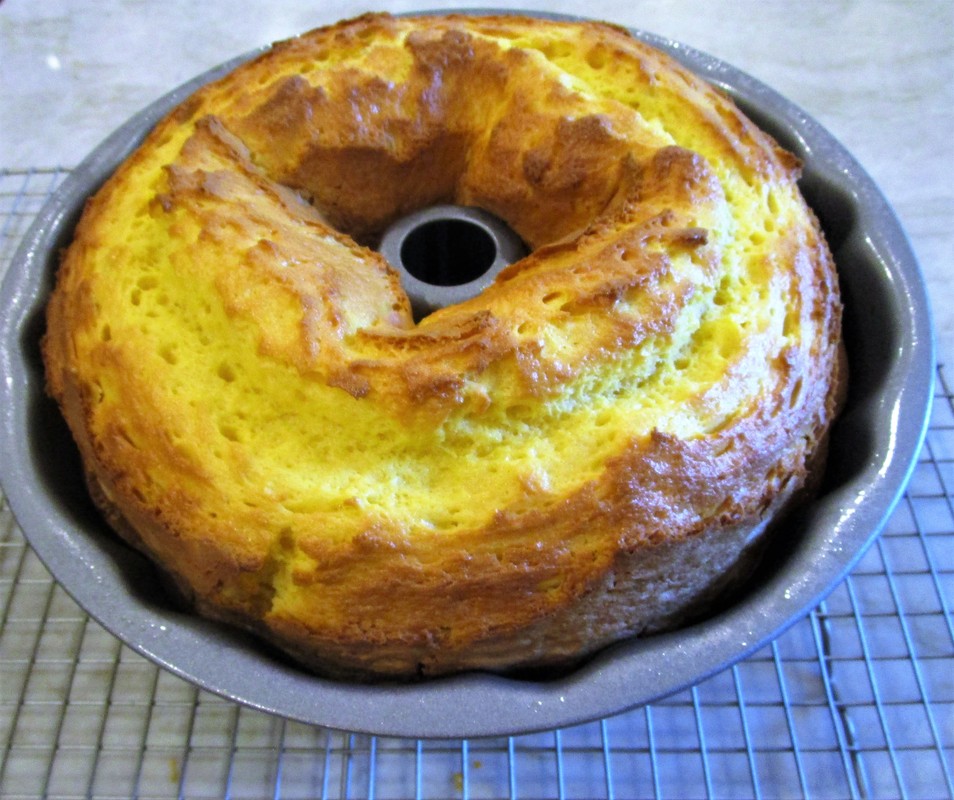
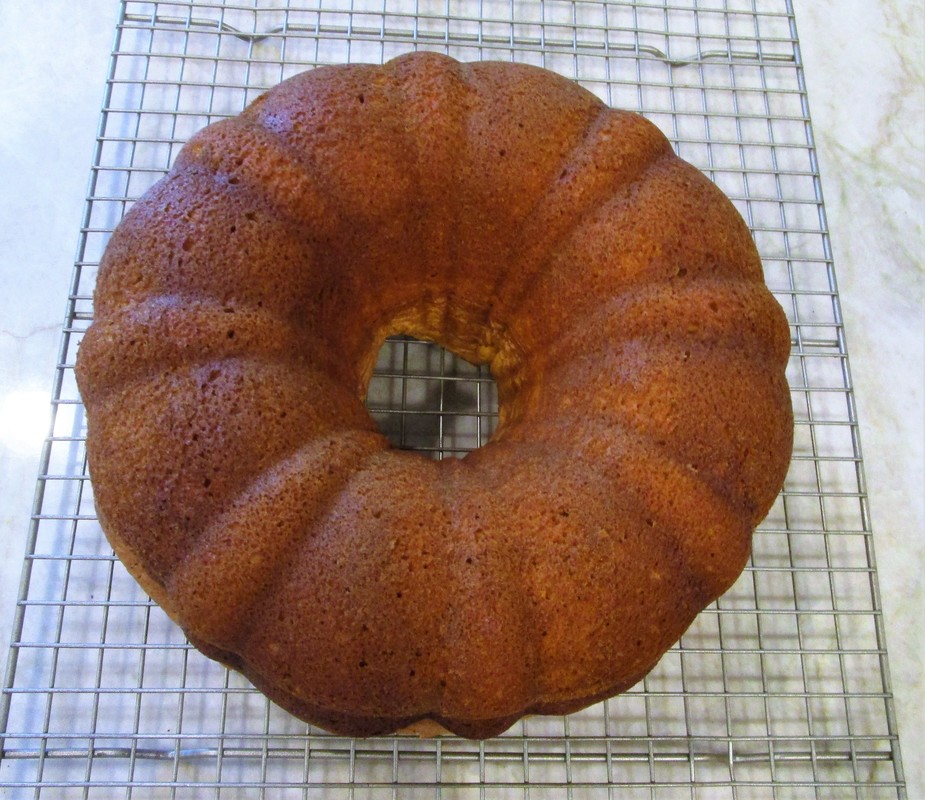
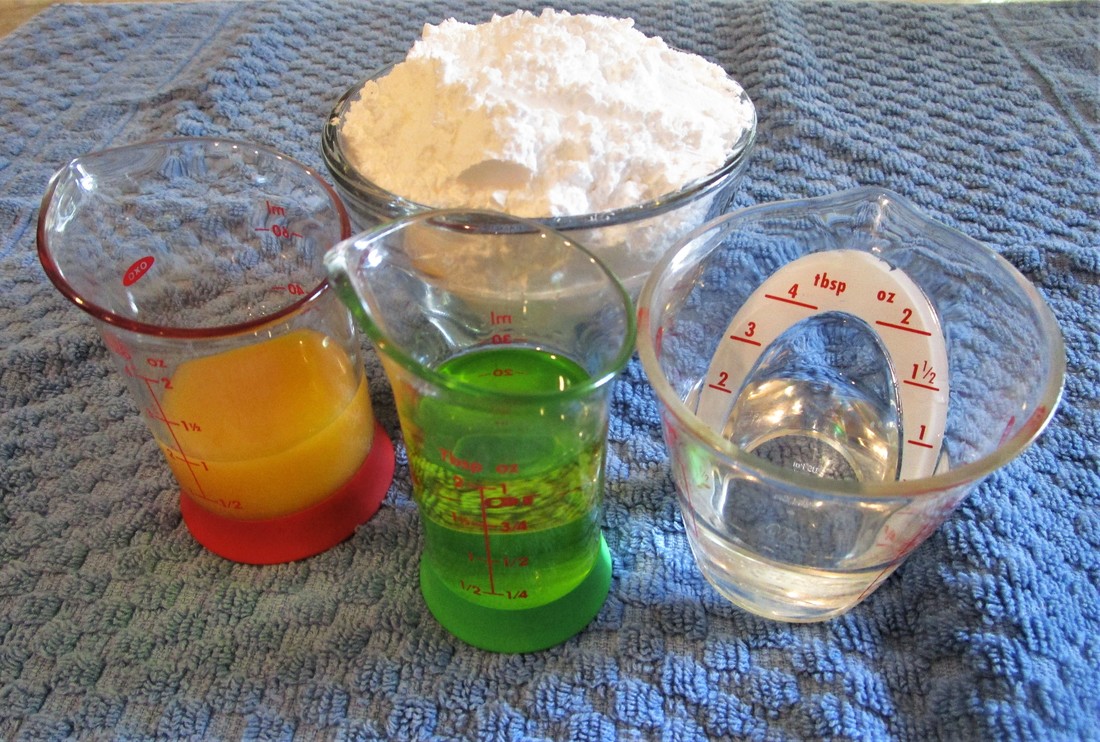
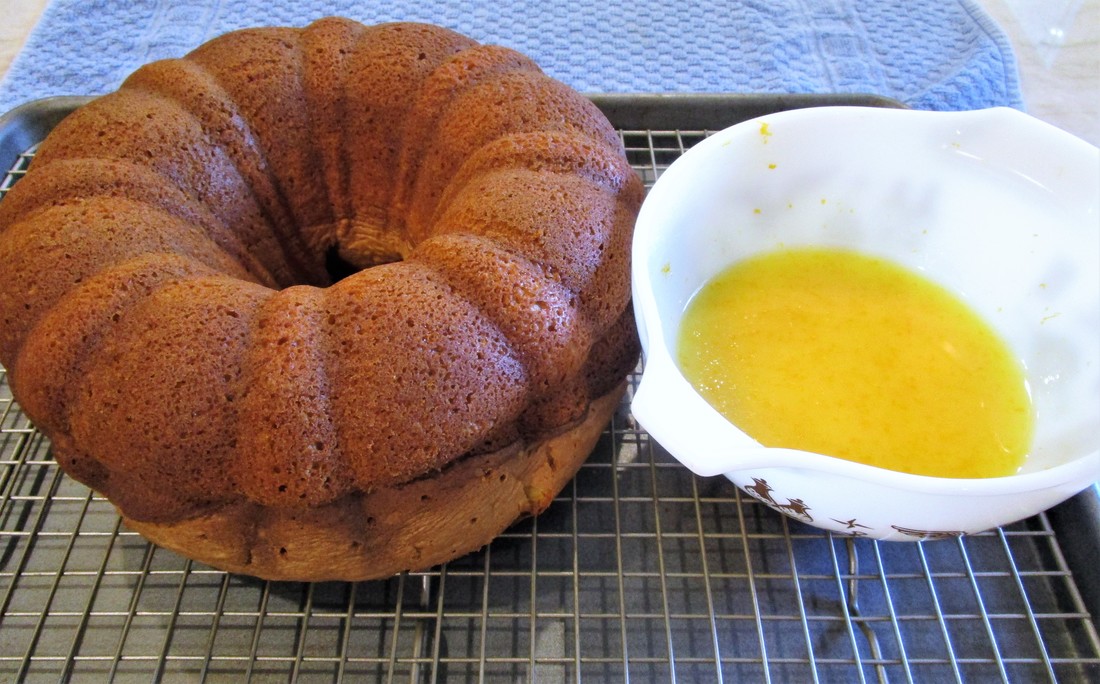
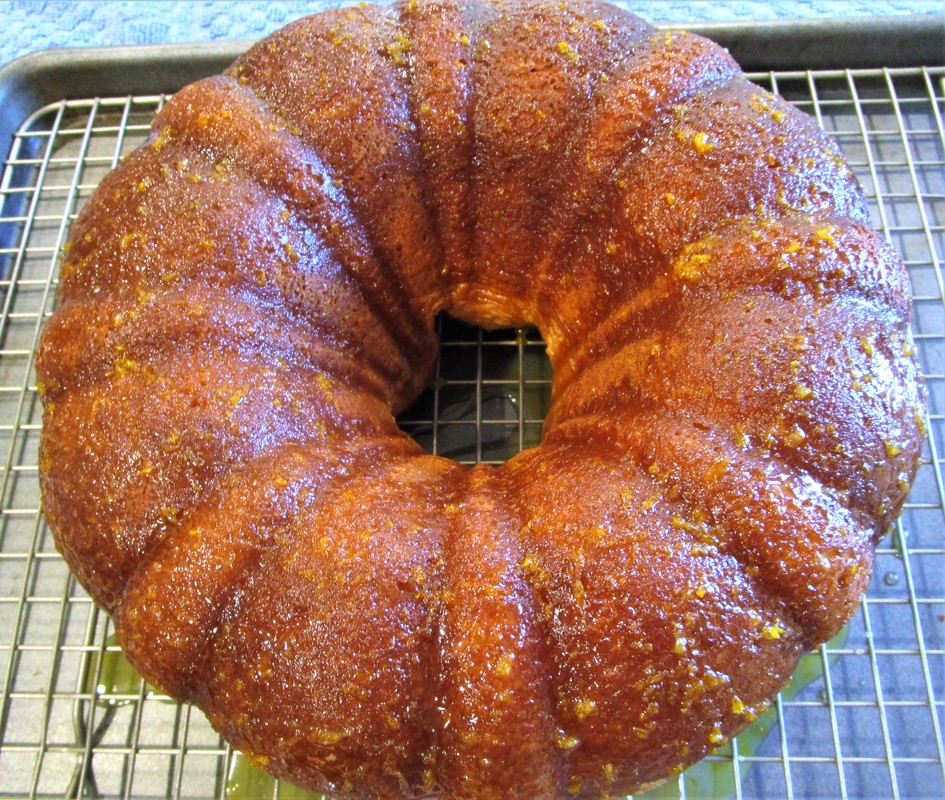
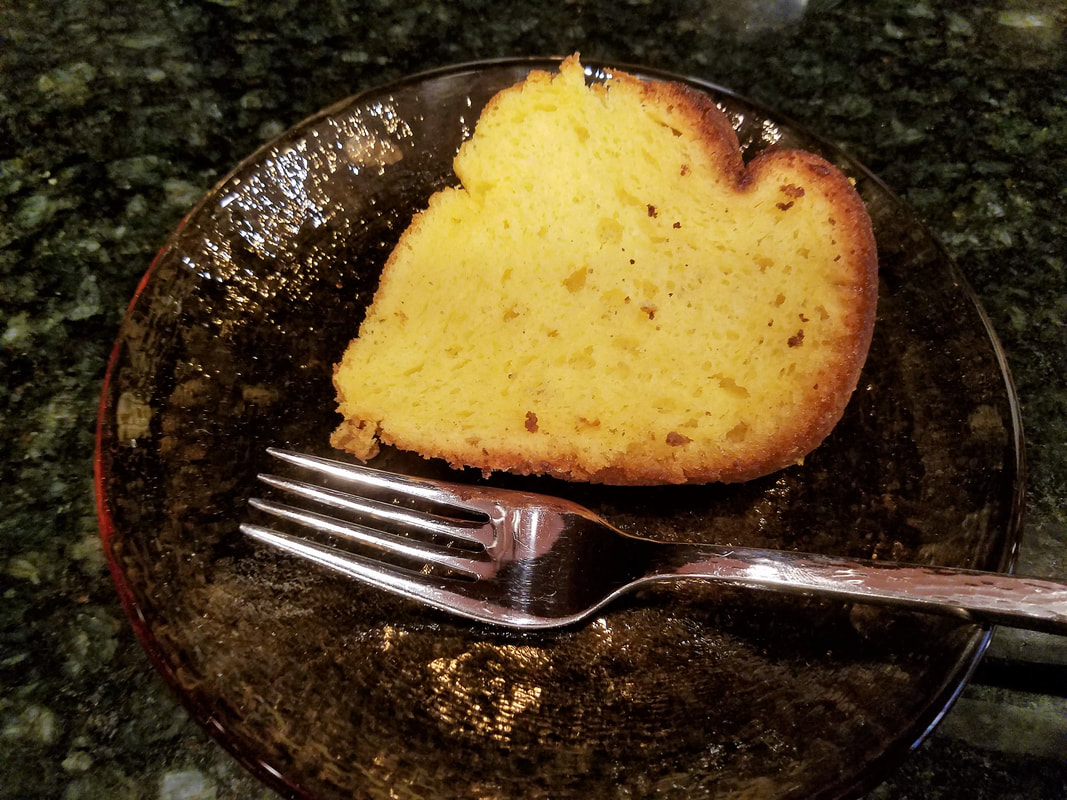
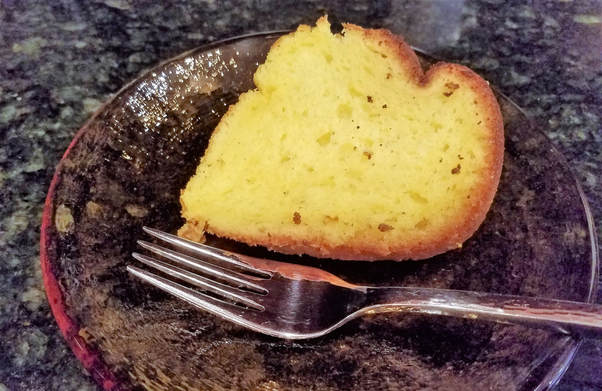
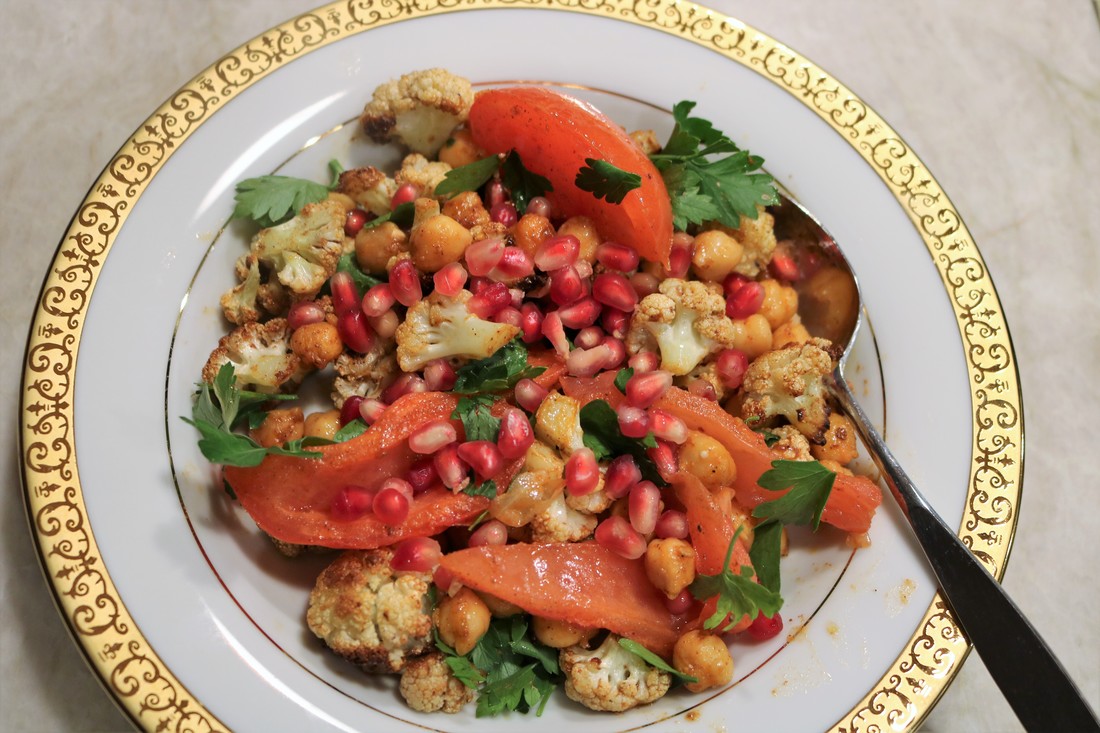
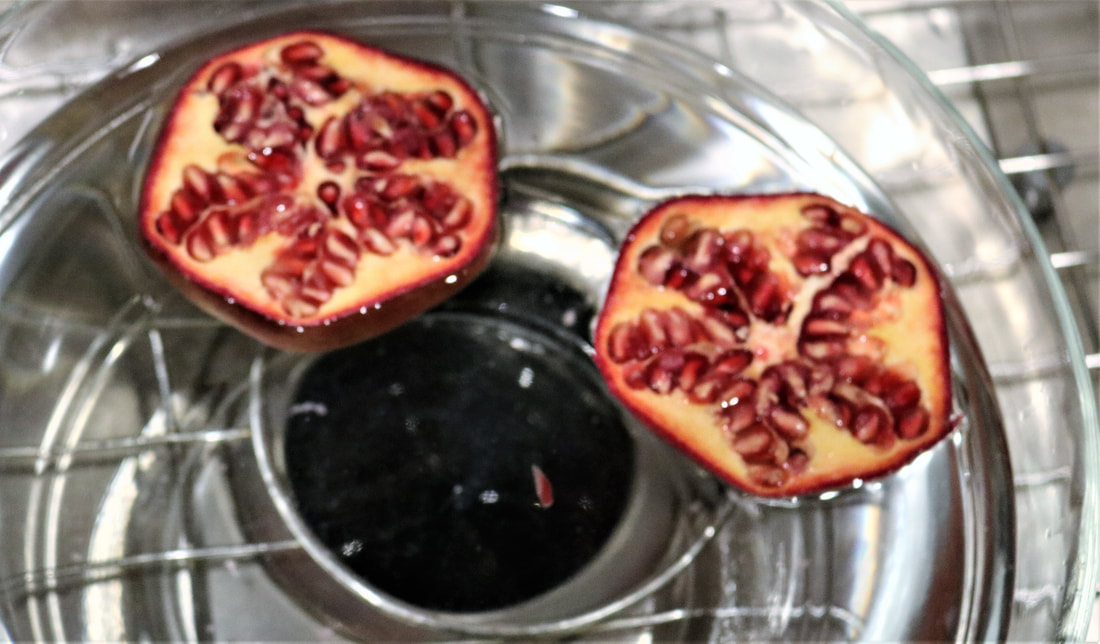
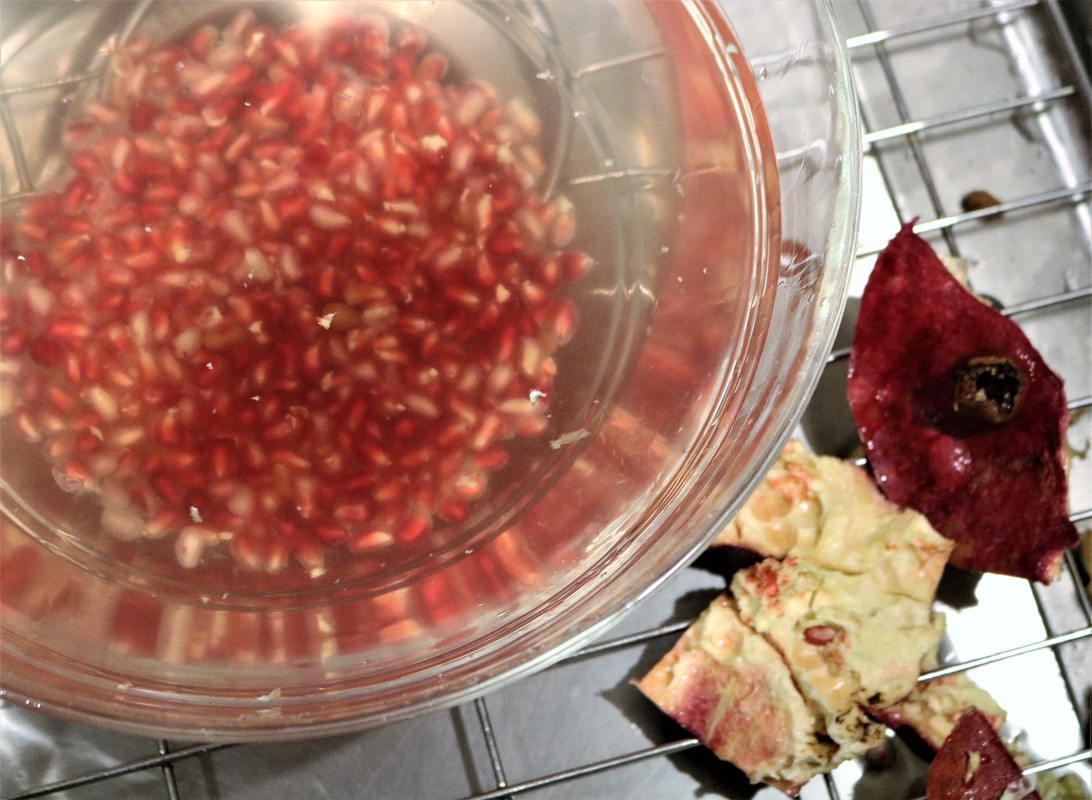
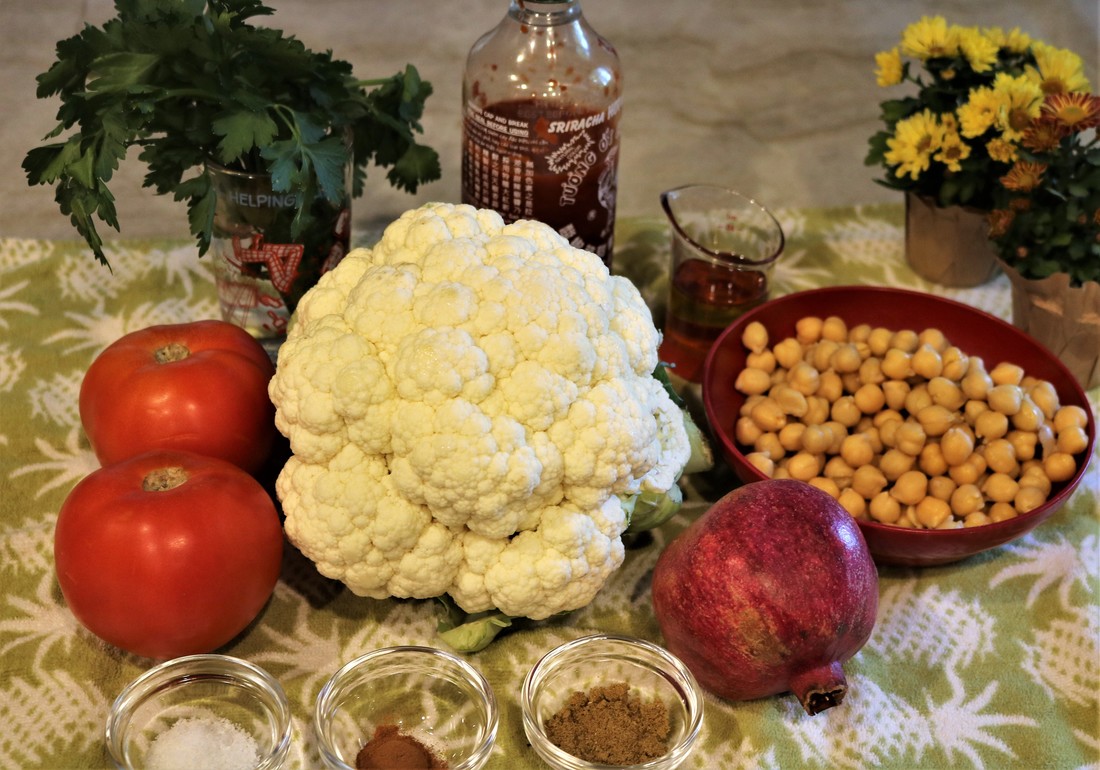
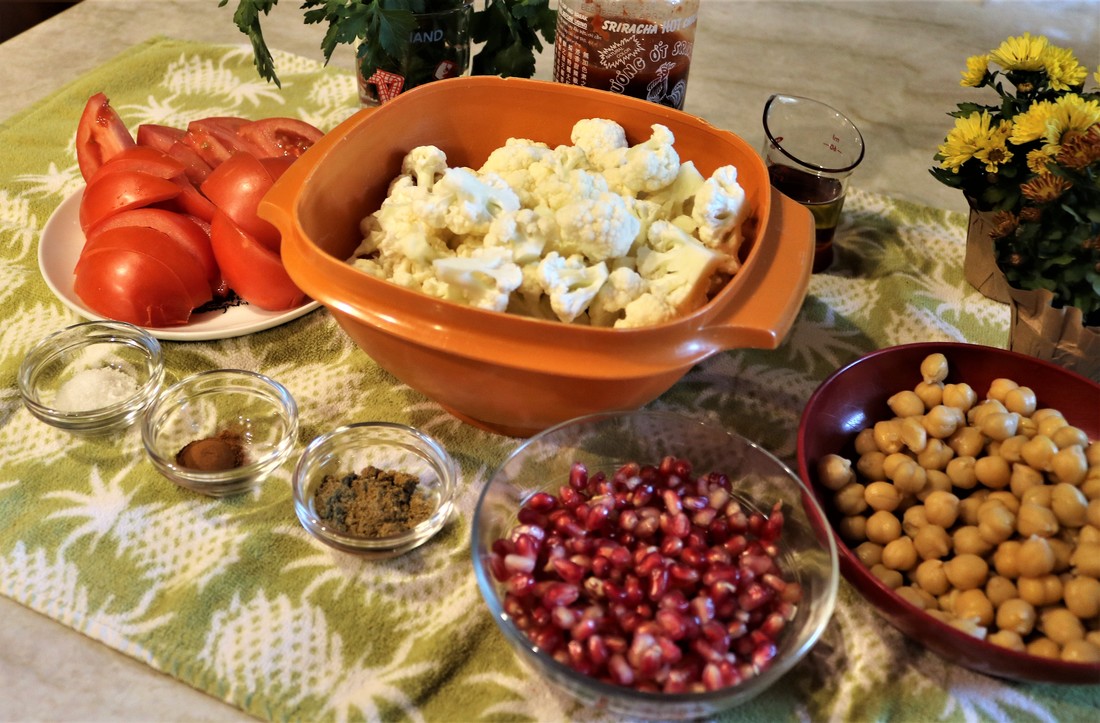
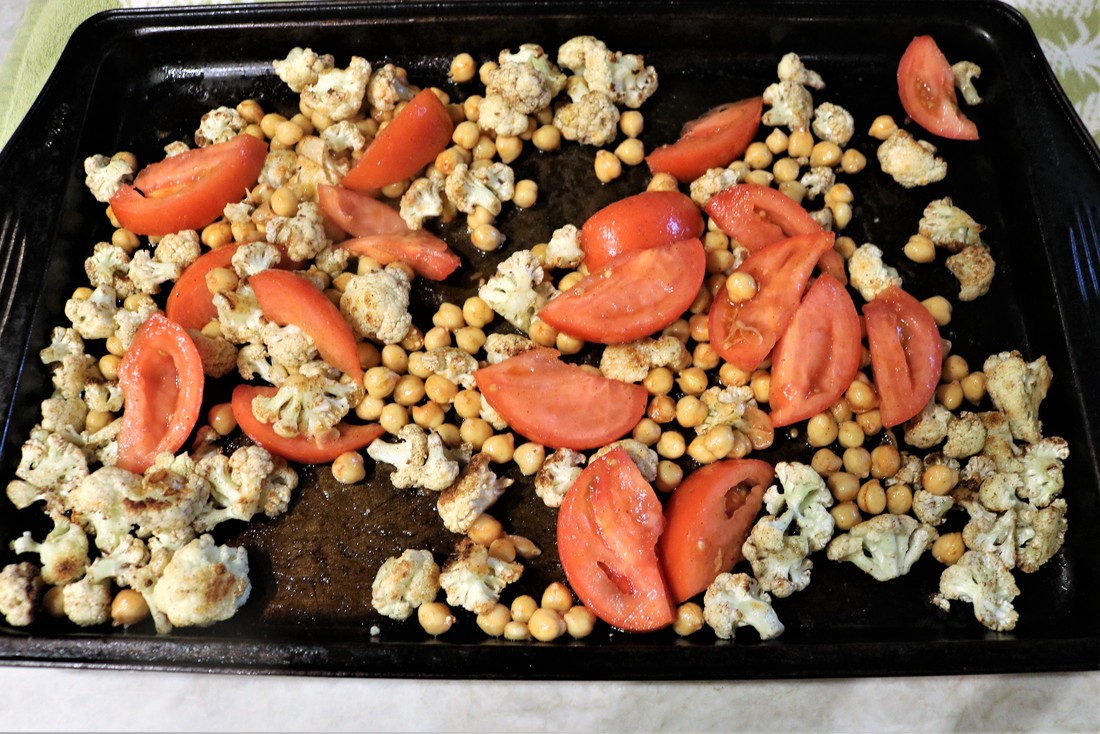
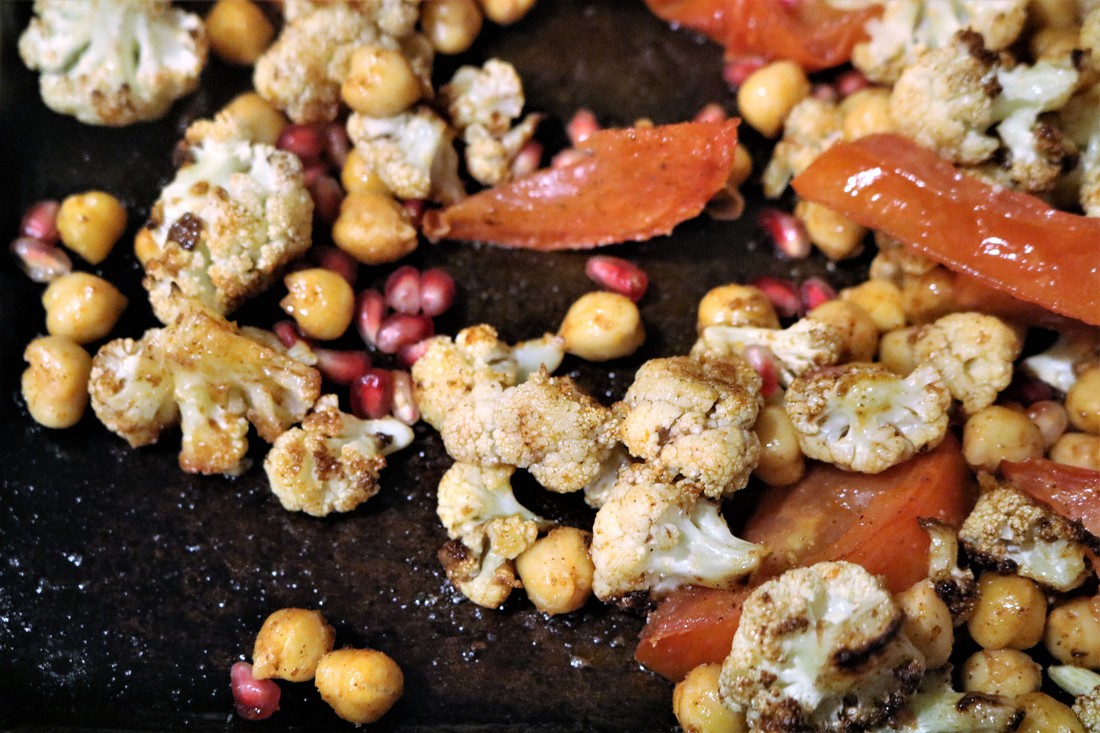
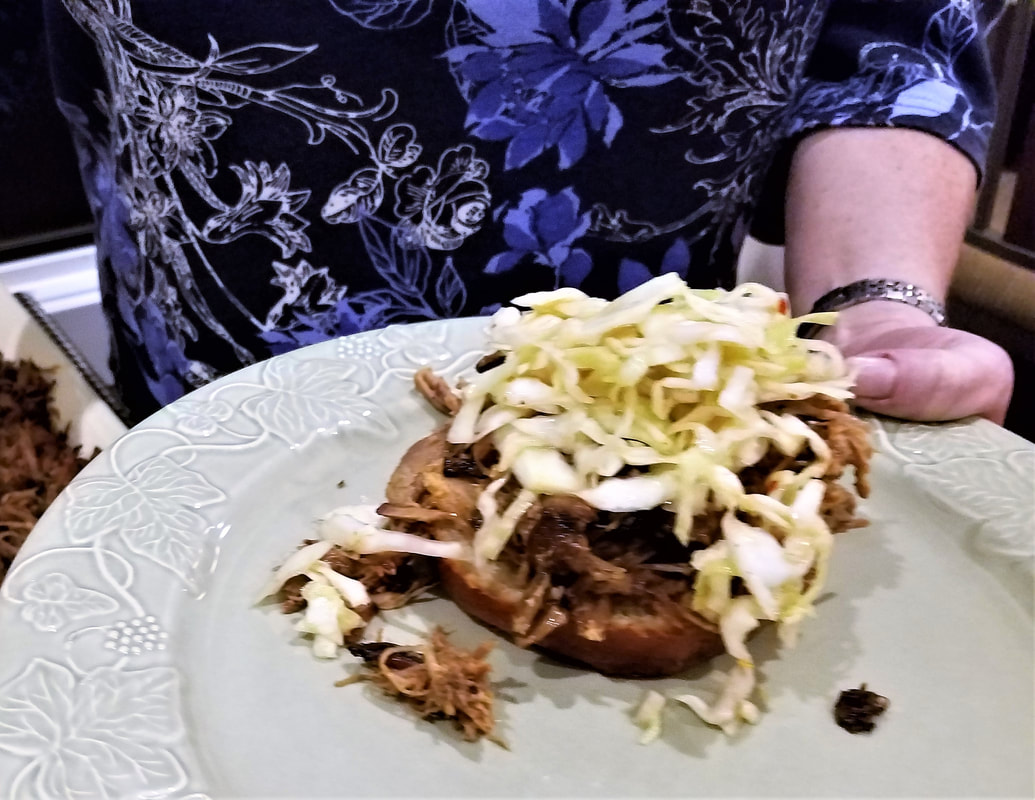
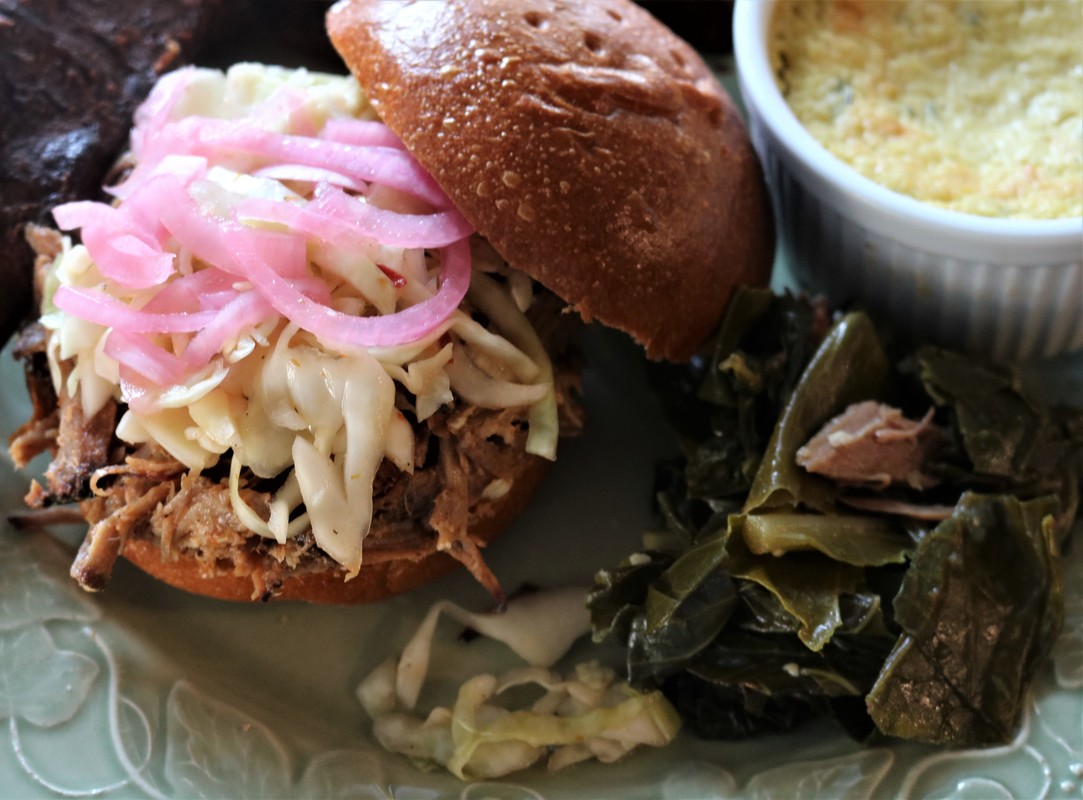
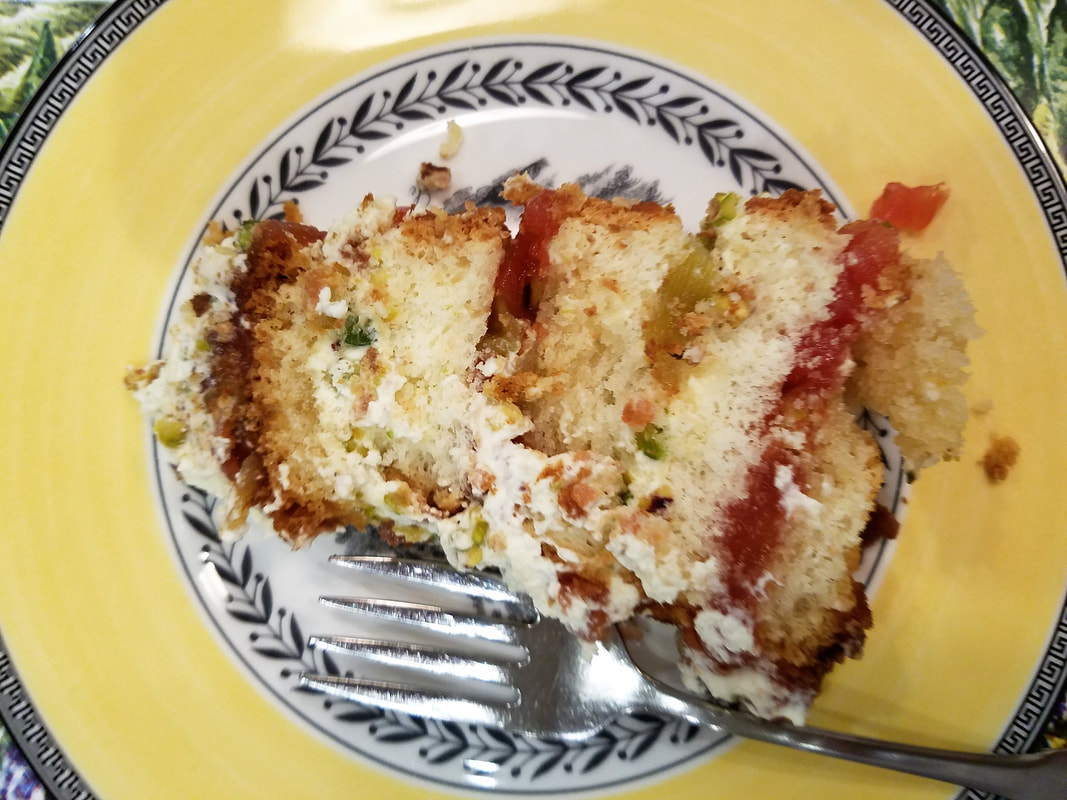
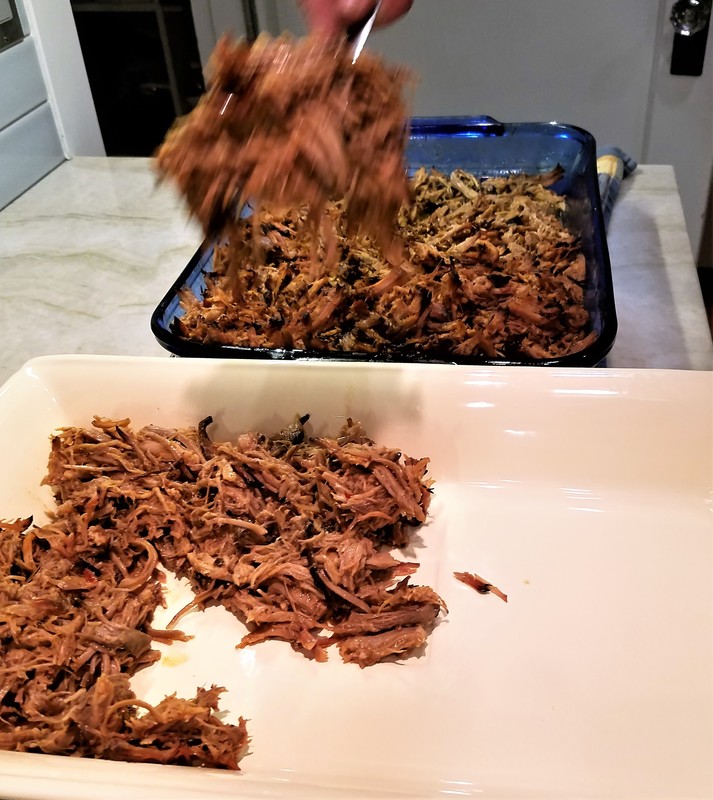
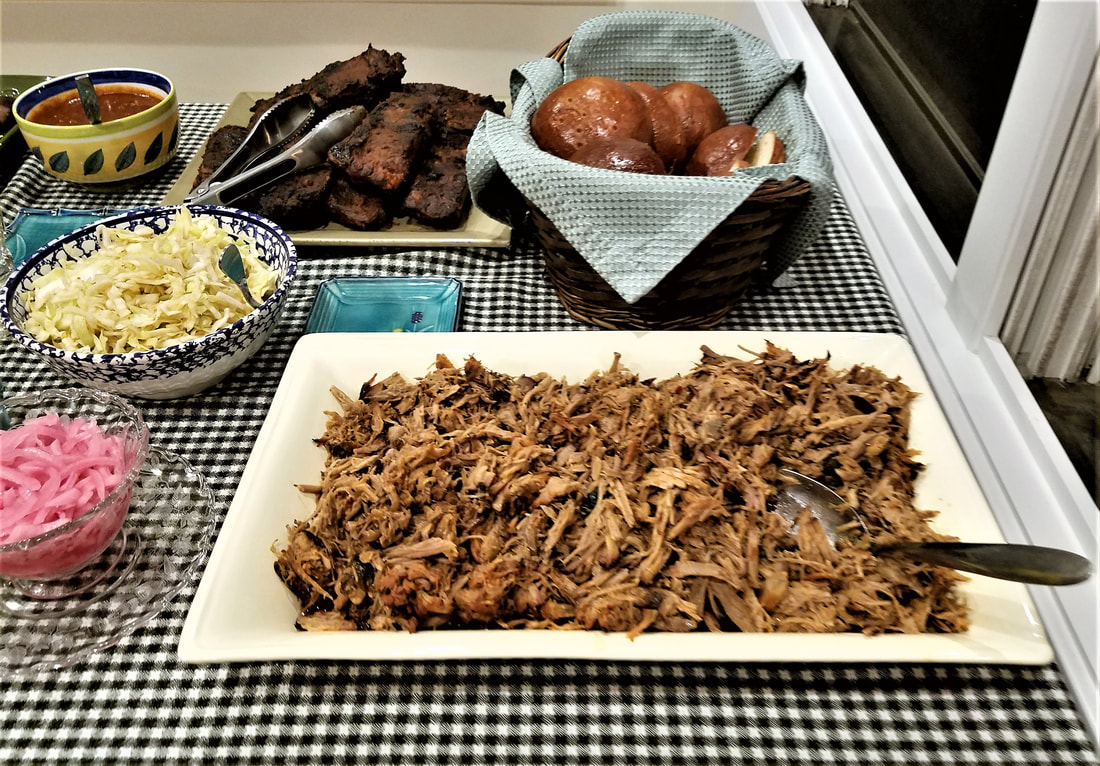
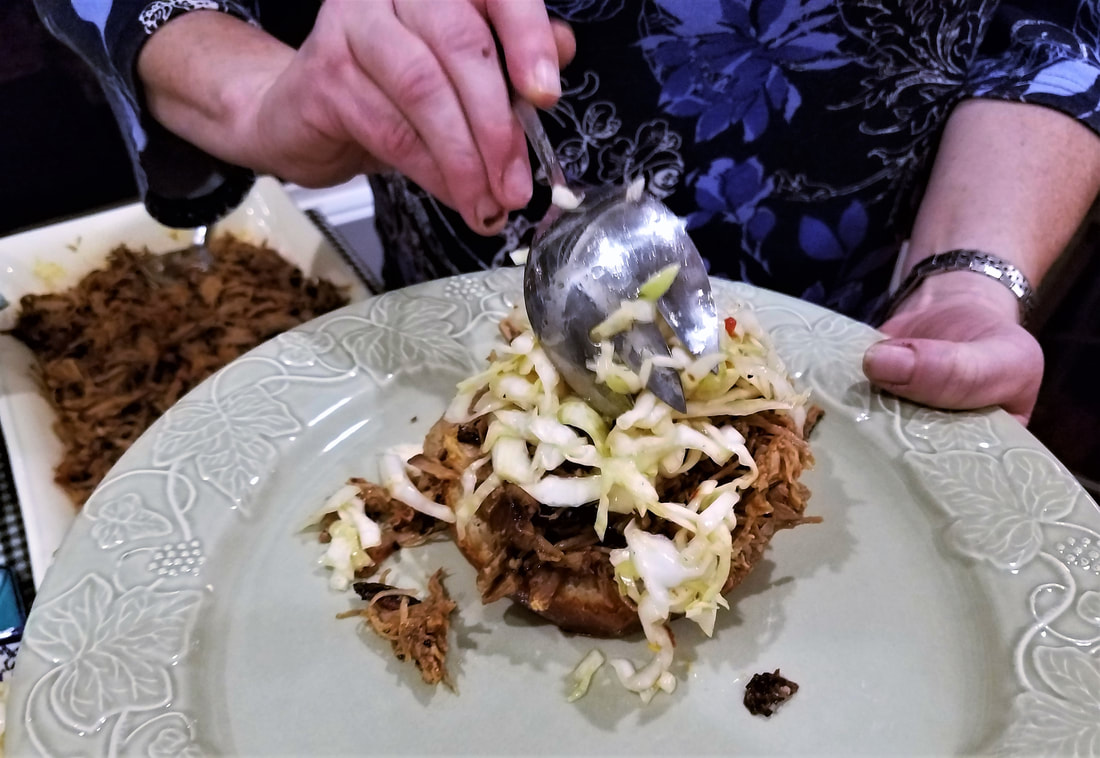
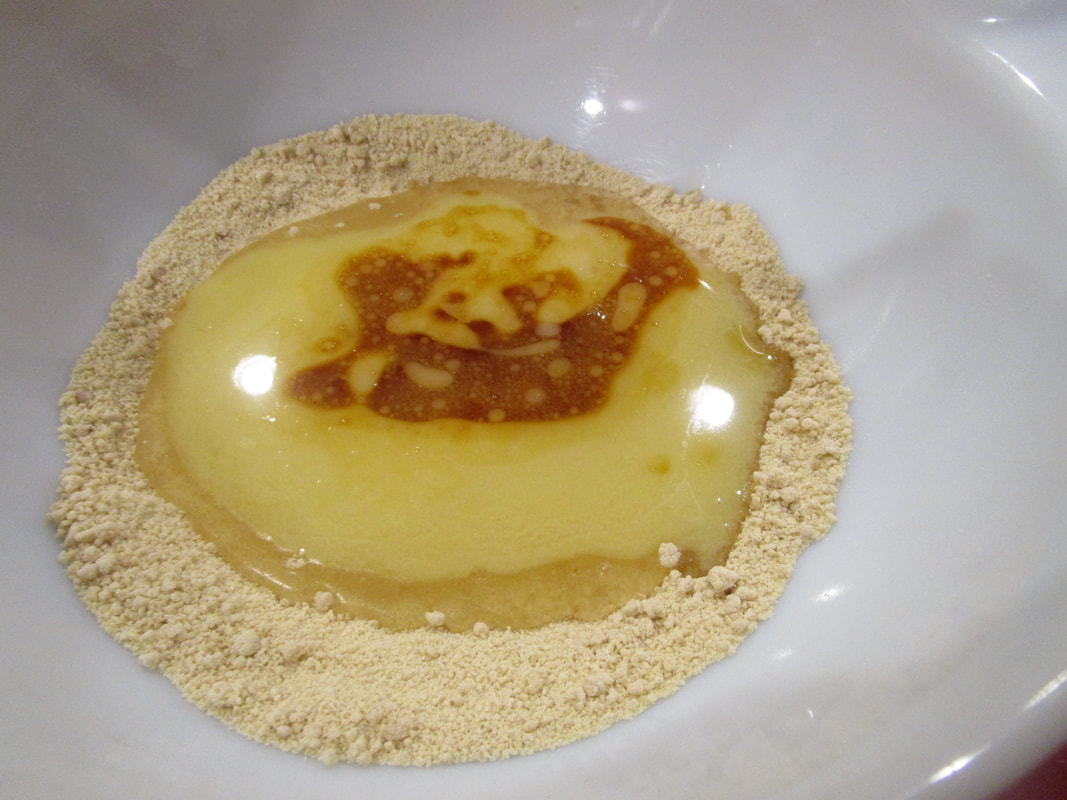
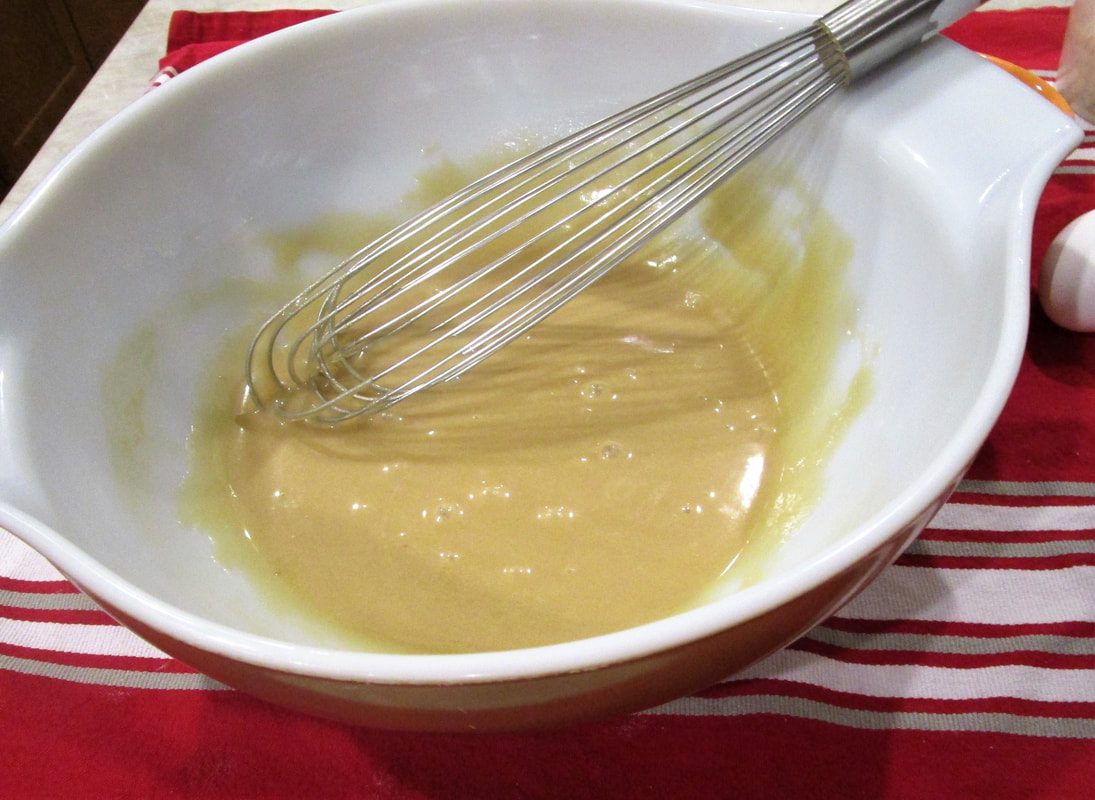
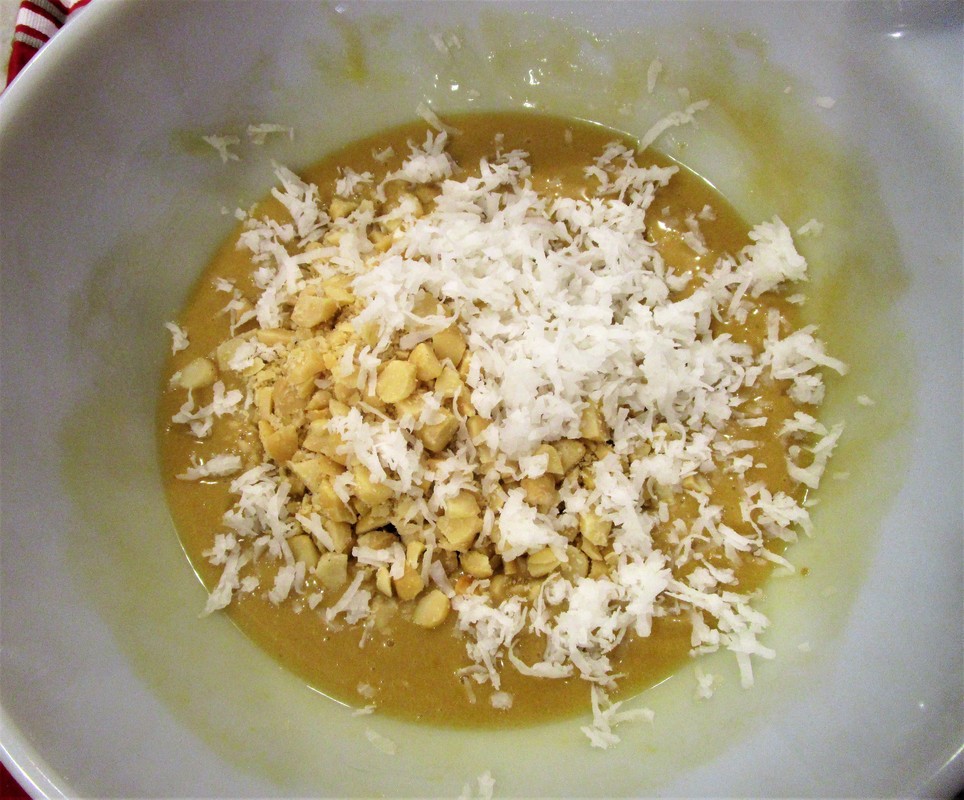
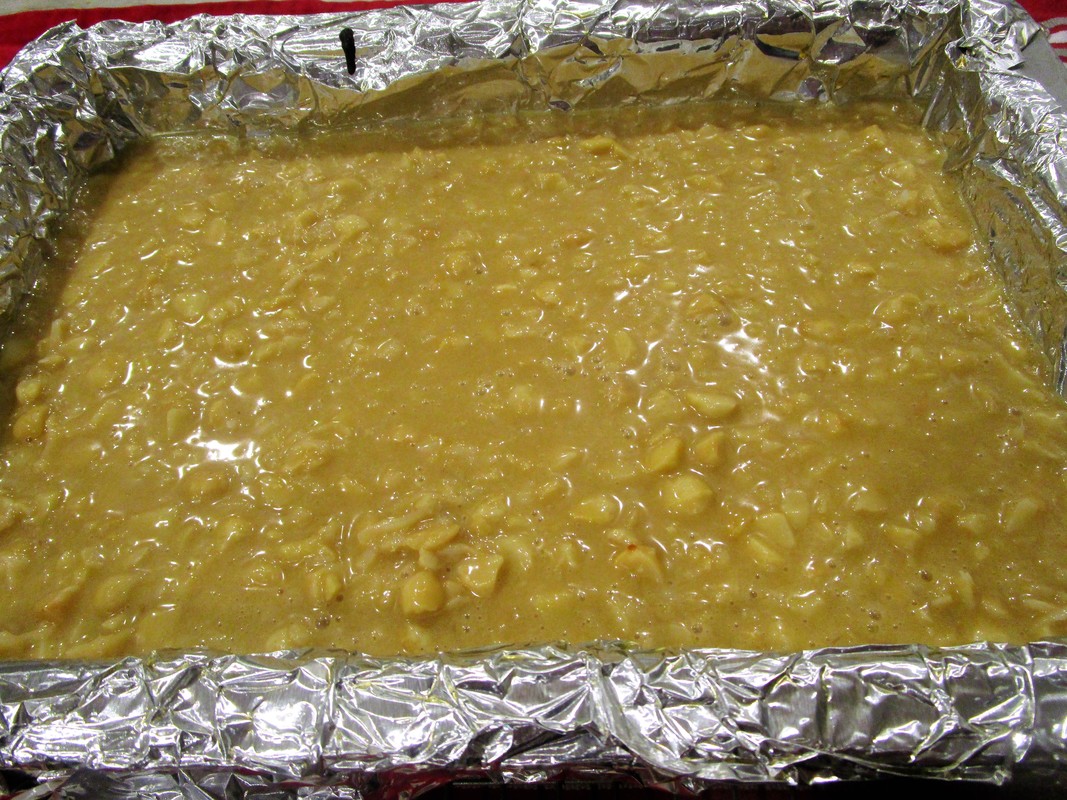
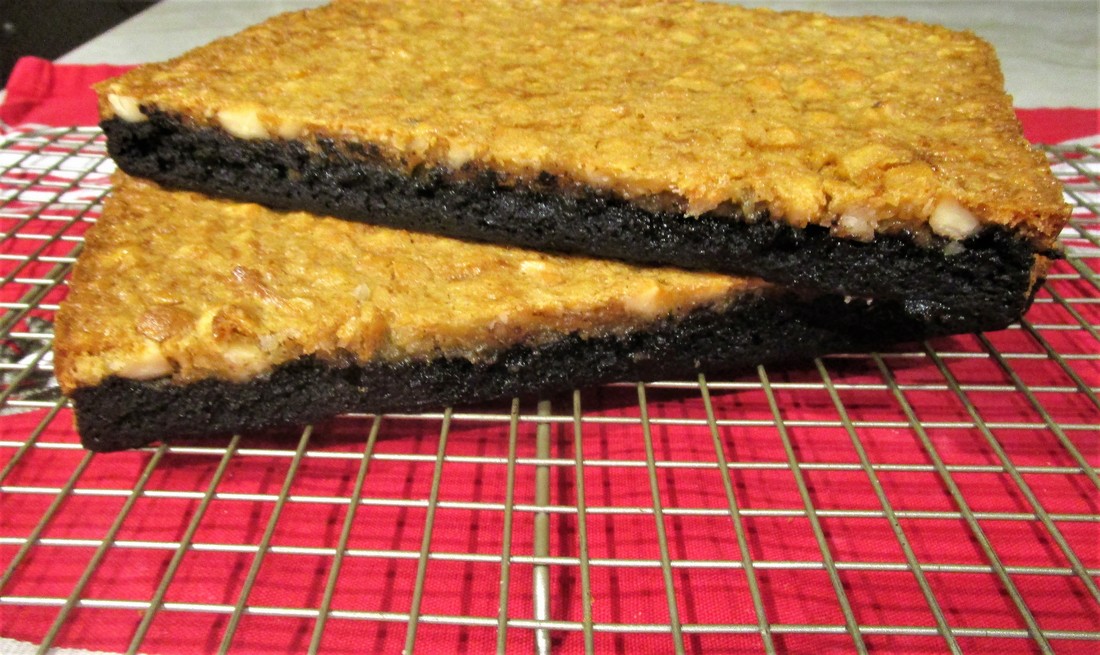
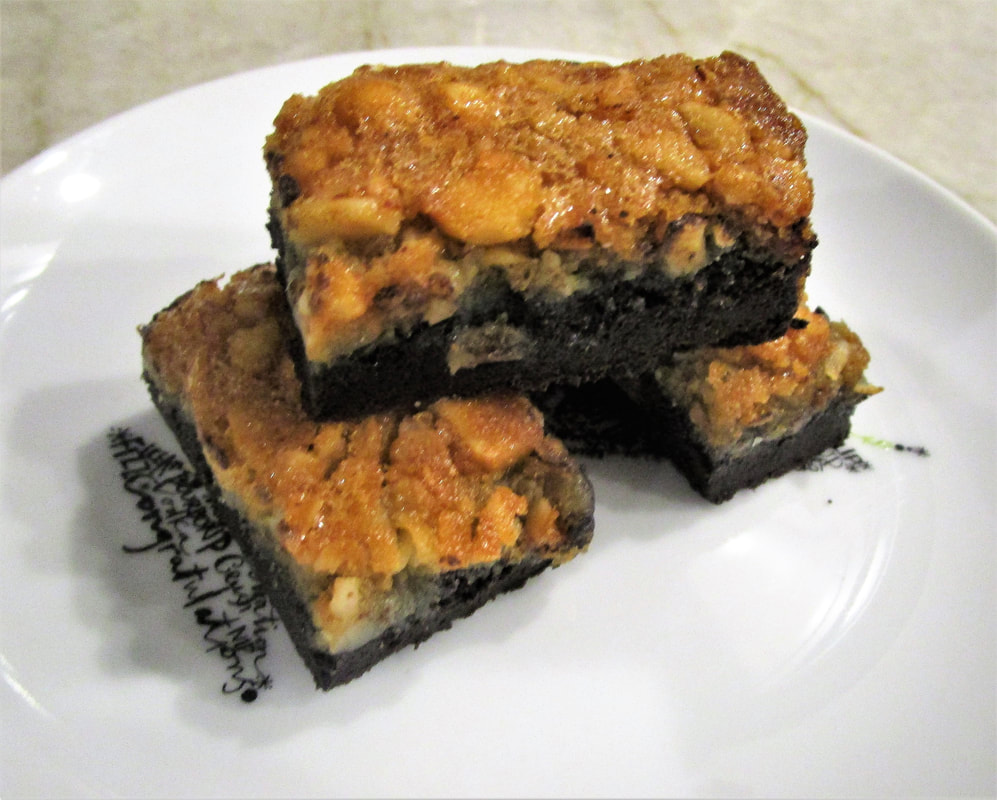
What Makes This Dish Special: For me, it’s all about the white bean mash. It had never occurred to me to substitute beans for mashed potatoes or a cooked grain as the go-with for fresh fish. What a revelation! Plus there’s a little heat in the beans, a welcome spark to snare your full attention. Click on the photos to enlarge them and read the captions.
Mahi-Mahi with Smashed White Beans and Sage Ingredients
Mahi-Mahi with Smashed White Beans and Sage - Citrus Herb Zest
Mahi-Mahi with Smashed White Beans and Sage - Sear the fish
Mahi-Mahi with Smashed White Beans and Sage - Cook the beans
Mahi-Mahi with Smashed White Beans and Sage - Smash some (not all) of the beans
Mahi-Mahi with Smashed White Beans and Sage - Serve them up
Mahi-Mahi with Smashed White Beans and Sage - Enjoy!
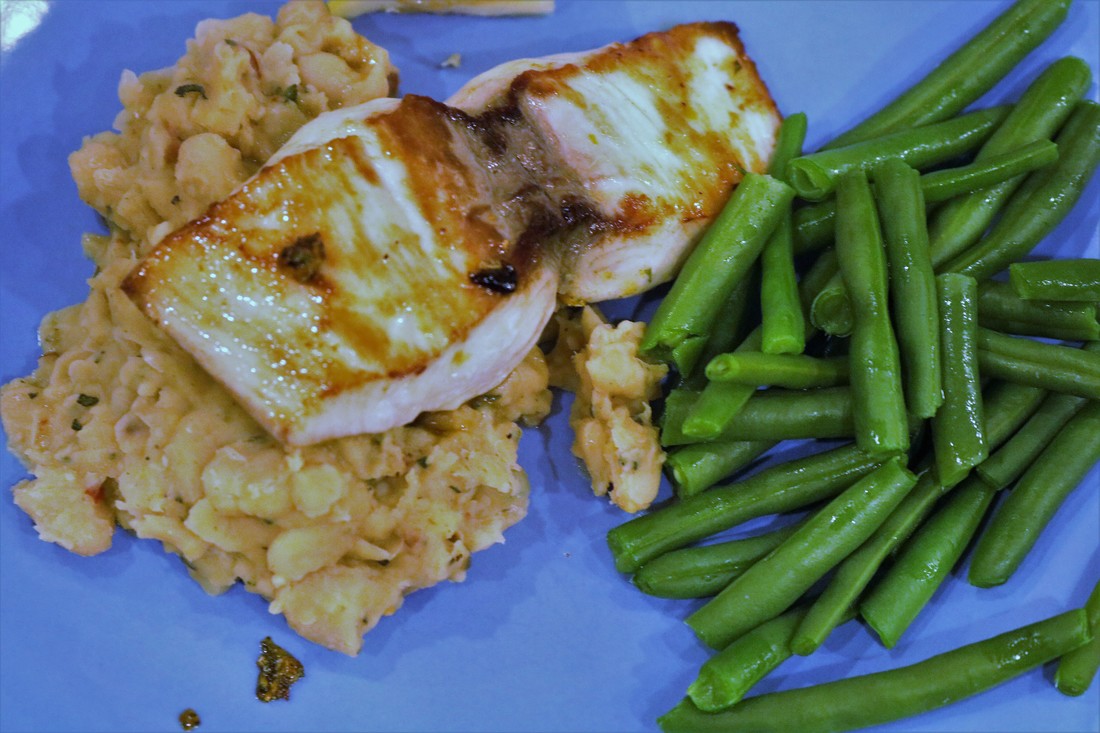
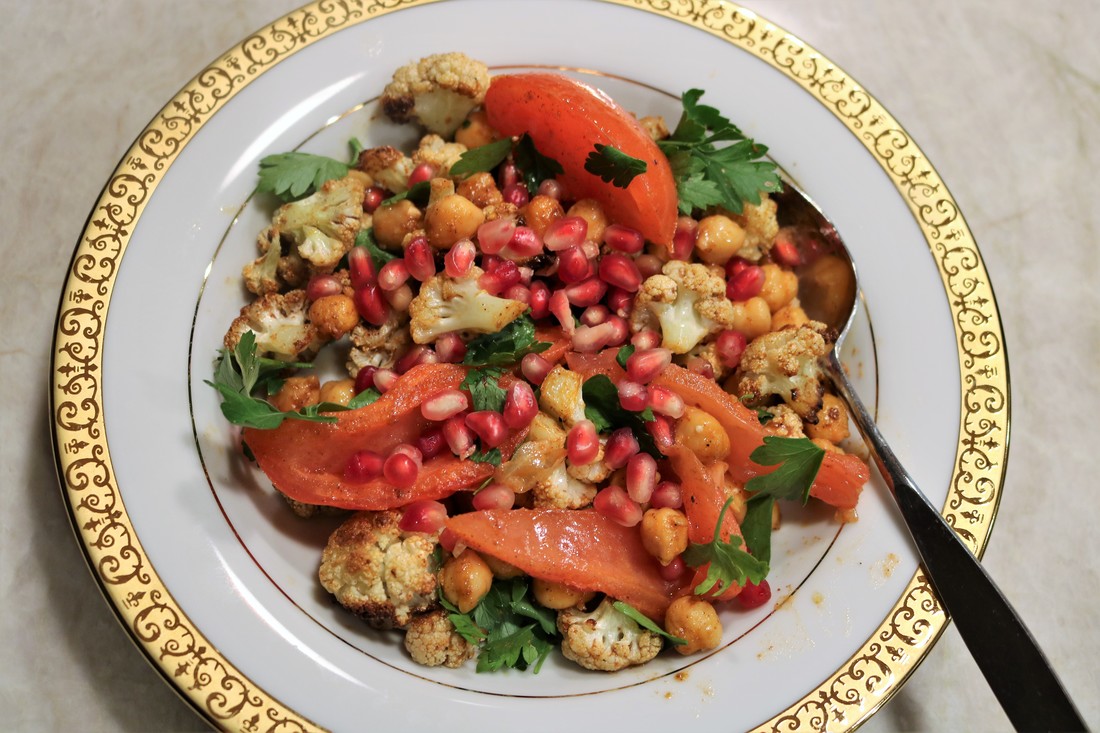
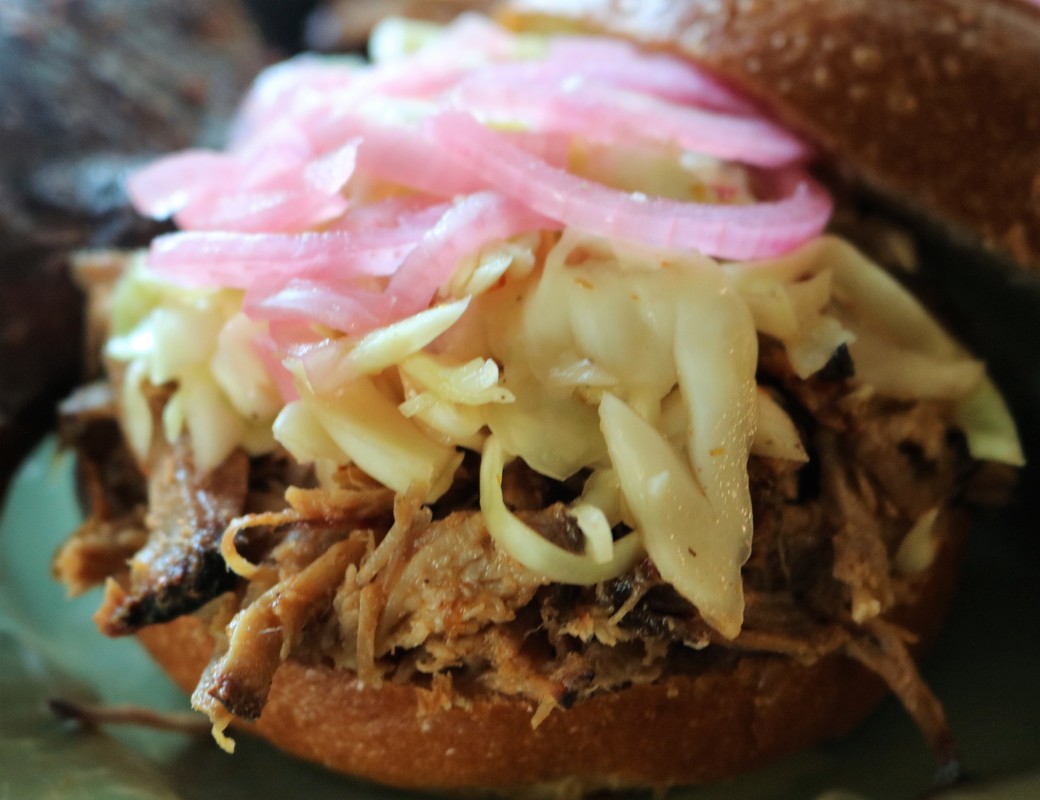
The Verdict: I love the citrus-herb topping for the fish, it makes a nice crust when the fish is pan-seared. You can swap other types of firm, meaty fish if preferred: swordfish, ono, bluefish, or salmon. This recipe has already been requested to make a repeat appearance on the dinner table sometime soon. Give it a try and see for yourself how you like Mahi-Mahi with Smashed White Beans and Sage. 
Print The Recipe- Mahi-Mahi with Smashed White Beans and Sage
File Size: 599 kb
File Type: pdf
Download File

Mahi-Mahi with Smashed White Beans and Sage
Recipe source: Bon Appetit
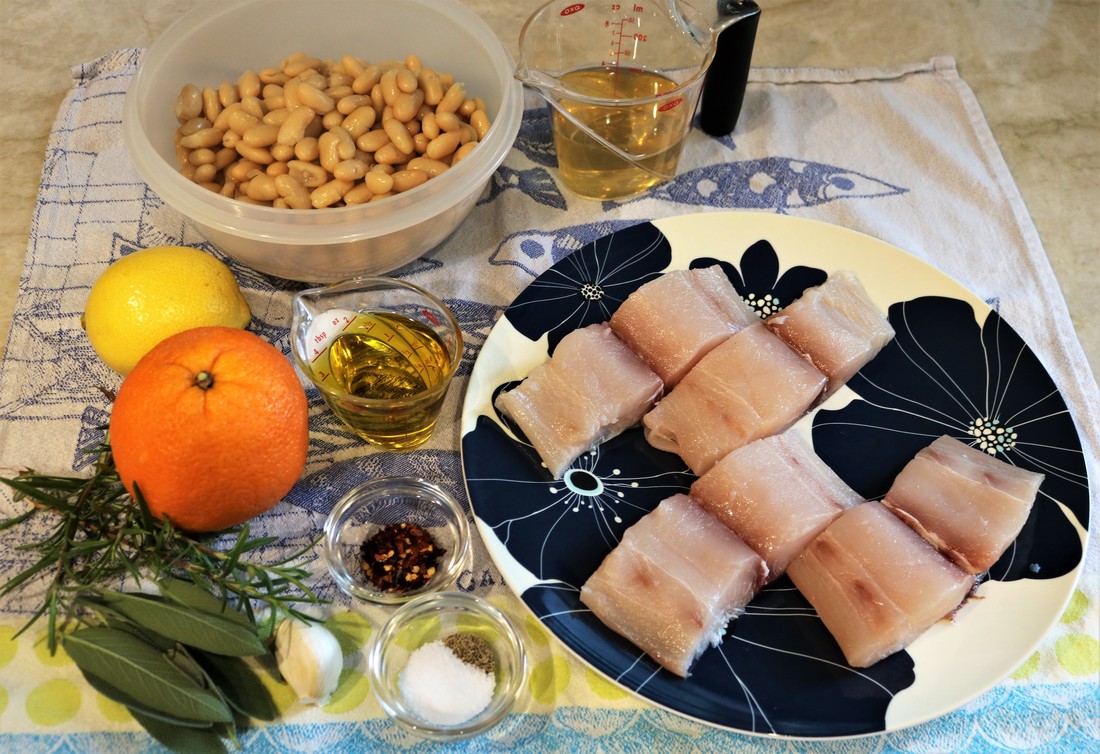
 
INGREDIENTS:
  • ½ teaspoon finely chopped rosemary
  • Kosher salt and freshly ground pepper
  • ½ teaspoon finely grated orange zest
  • 1¼ pounds skinless mahi-mahi fillets, divided into five portions (ono, albacore, and swordfish are all good substitutes)
  • 4 tablespoons olive oil, divided
  • 1 garlic clove, finely chopped
  • 1½ teaspoons finely chopped sage leaves
  • 1 small chile de árbol or ½ teaspoon crushed red pepper flakes
  • 2 15-ounce cans cannellini beans, rinsed
  • ½ cup homemade chicken stock or low-sodium chicken broth
  • 1 tablespoon fresh lemon juice, plus 1 teaspoon finely grated lemon zest
  • Lemon wedges (for serving)

DIRECTIONS:
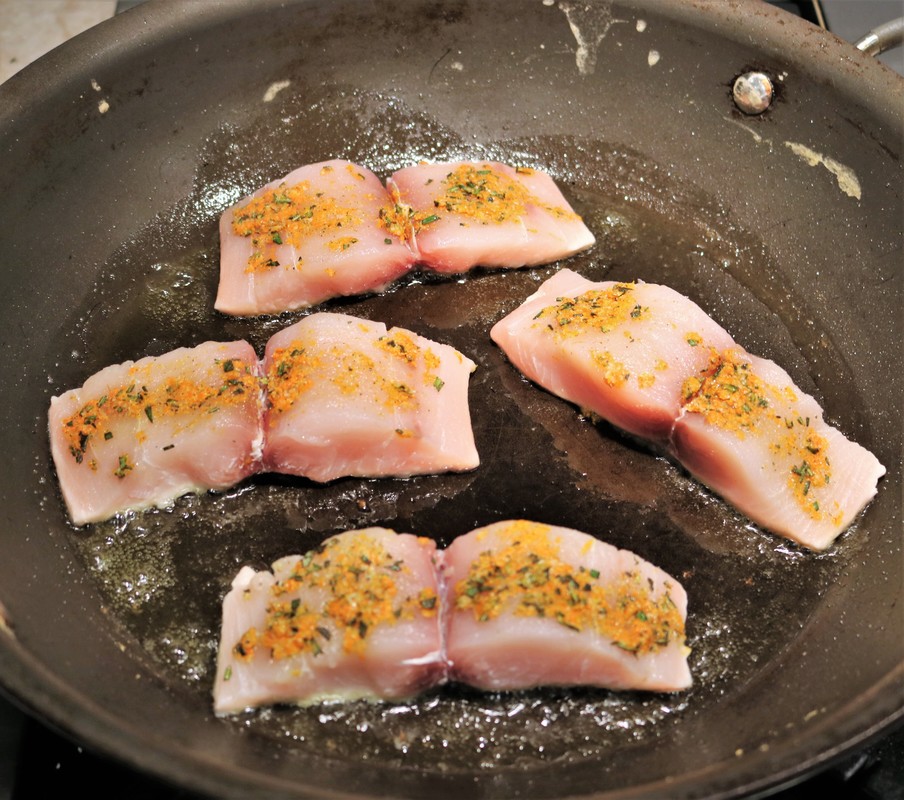
  • Mix together rosemary, 1 teaspoon salt, 1/8 teaspoon black pepper, and orange zest. Sprinkle onto mahi-mahi and let stand at least 10 minutes and up to 30 minutes before cooking.
  • In a large skillet, heat 2 tablespoons oil over medium heat. Add garlic, sage, and chile and cook until fragrant, about 1 minute.
  • Add beans and season with salt and pepper. Cook, stirring and smashing some of the beans with a spoon or spatula as they cook until slightly thickened, about 4 minutes.
  • Add stock and continue to mash to a thick purée (beans should retain some shape and texture).
  • Turn off heat and stir in lemon juice and zest and 1 tablespoon oil; season with salt and pepper. Transfer beans to a bowl and cover to keep warm.
  • Wipe out skillet and heat remaining 1 tablespoon oil over medium-high heat. Blot fish dry with paper towels and add to skillet.
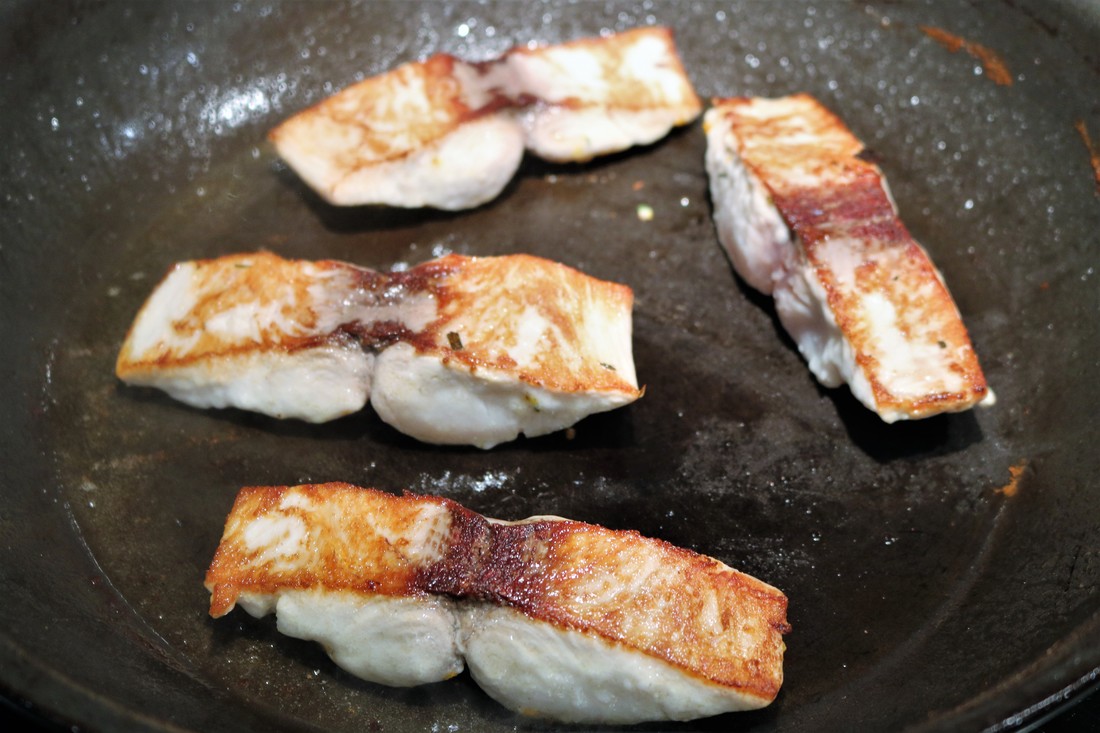
  • Cook until fish is browned on both sides and just opaque at the center, 5–8 minutes.
  • Serve fish with beans and lemon wedges.
1 Comment

Sweet Bites: Harvey Wallbanger Bundt Cake

10/26/2017

1 Comment

 
Harvey Wallbanger Bundt Cake
Harvey Wallbanger Bundt Cake - yes, it's got Galliano liqueur and vodka in it, but mostly it's filled with Delicious!
Have you noticed that we really enjoy cooking with booze? I’m sure that reveals something nefarious about our moral characters, but oh well. When the foodstuff in question is as tender and tasty as this orange-flavored, Galliano- and vodka-spiked Bundt cake I’m prepared to stand by our choices.

This is a family recipe, recovered from a crumbling cardboard box filled with handwritten paper scraps recounting familiar dishes from way back when. Not all the old recipes are winners worth repeating, but this Harvey Wallbanger Cake most definitely is, despite an Ingredients List containing boxed mixes. We don’t usually do that, but I’m glad we made an exception for Great-Aunt Sylvia’s delicious dessert.
Picture
Sadly, Sylvia is no longer with us, and she had retired from cake baking by the time I met her twenty-some-odd years ago.

But I have a vivid picture in my mind of Sylvia in a glamorous hostess caftan, hair perfectly coiffed, with a big welcoming smile, serving up slices of this deceptively simple cake. 
​

That's Sylvia in the middle, along with some of our family's other leading ladies, Sarah and Dorothy.

What Makes It Special: In addition to the fond memories inspired by this cake, it’s also powerfully delicious with citrus flavors and orange zest. The cake is also quite light, not dense at all. 
Kitchen Tips: As you can see in the photos, our regular Bundt pan was too small for this cake. The batter rose way above the top, resulting in an oddly-shaped cake. It still tasted great, don’t get me wrong, but would be better baked in an extra-large Bundt pan. My rule of thumb is to fill a cake pan about three-quarters full (unless the recipe calls for something else); extra batter can be poured into another pan or cupcake tin. Click on the photos to enlarge them and read the captions.
Harvey Wallbanger Bundt Cake - Ingredients
Harvey Wallbanger Bundt Cake - Mix the batter
Harvey Wallbanger Bundt Cake - In the pan
Harvey Wallbanger Bundt Cake - In the oven, rising out of pan
Harvey Wallbanger Bundt Cake - Risen out of pan
Harvey Wallbanger Bundt Cake - on cooling rack
Harvey Wallbanger Bundt Cake - Glaze Ingredients
Harvey Wallbanger Bundt Cake - Poke holes in cake for glaze
Harvey Wallbanger Bundt Cake - Cake with Glaze
Harvey Wallbanger Bundt Cake - A slice to eat
The Verdict: I love it when a cake (or any food item, really) looks deceptively ‘average’ and then turns out to be magnificent. This is that. Strong citrus flavors, light crumb, happy campers. Next time we will add even more orange zest into the batter as well as within the glaze. 
Print This Recipe- Harvey Wallbanger Bundt Cake
File Size: 621 kb
File Type: pdf
Download File

Harvey Wallbanger Cake
Recipe source: Sylvia Berry
 
INGREDIENTS:

For the Cake:
  • 1 Package Yellow Cake Mix (such as Duncan Hines)
  • 1 Package Instant Vanilla Pudding
  • 1/2 Cup Vegetable or Canola Oil
  • 4 Eggs
  • 3/4 Cup Orange Juice
  • 1/4 Cup Vodka
  • 1/4 Cup Galliano liqueur
  • Zest from 1 1/2 oranges

For the Glaze:
  • 1 ounce Galliano
  • 1 ounce vodka
  • 1 ounce orange juice
  • Zest from 1 ½ oranges
  • 1 cup confectioner's sugar

DIRECTIONS:
  • Preheat oven to 350.  Grease a Bundt pan or spray with non-stick spray and set aside.
  • In large bowl, combine cake mix, pudding mix, oil, eggs, vodka, Galliano, zest from 1 ½ oranges and water.  Mix at low speed for 1 minute and then beat 4 minutes more at medium speed. 
  • Pour batter into a well-greased Bundt pan and bake for 40-45 minutes (until toothpick inserted in center comes out clean). 
  • Let cake cool in pan for 10 minutes then remove from pan.

Make the Glaze:
  • Combine the Galliano, vodka, orange juice, zest from 1 ½ oranges, and 1 cup confectioner's sugar. Blend until smooth.
  • Poke holes in the top of the cake with a skewer or toothpick and pour glaze over the still warm cake. 
Harvey Wallbanger Bundt Cake
What's your favorite family recipe for dessert? Tell us in the Comments
1 Comment

Super Sides: Warm Spiced Cauliflower with Chickpeas and Pomegranate Seeds

10/24/2017

0 Comments

 
Warm Spiced Cauliflower with Chickpeas and Pomegranate Seeds
Warm Spiced Cauliflower with Chickpeas and Pomegranate Seeds -- now that's a bowlful of YUM!
The Occasion: Interesting side dish for a casual dinner party with friends. Or a brown bag light lunch the next day.

The Recipe: The recipe for Roasted Warm Spiced Cauliflower with Chickpeas and Pomegranate Seeds comes from the original yummy mummy, Nigella Lawson. I admire Nigella’s low-key, stress-free approach to home cooking, the easy-going tone she takes in her writing, and the shortcuts she is willing to take. Check out the original recipe here. 
What Makes This Special: The unexpected pairing, the cauliflower and pomegranates, works extremely well. It’s a meatless protein-packed meal, plus it makes a lovely dish – so colorful! Click on the photos to enlarge them and read the captions.
Kitchen Tip: Pomegranate seeds -- delicious morsels or messy red devils? Both are true. For me, the best way to peel a pomegranate without leaving bright red stains all over your kitchen is underwater. Cut the pomegranate in half and place in a bowl of water. Then use your hands to gently release the seeds from the tough membrane. Drain the water, pick out any stray bits of debris, and you'll be good to go!
The Verdict: Sometimes I think that cooks employ unusual pairings just for the sake of being wacky. I was worried this might be the case with our odd lot of cauliflower, chickpeas, and pomegranate. Happily I can report … nope, this is A-#1 delicious and well worth your time to give it a try. Wacky, yes, and wonderful too! Click on the photos to enlarge them and read the captions.
Warm Spiced Cauliflower with Chickpeas and Pomegranate Seeds - Ingredients
Warm Spiced Cauliflower with Chickpeas and Pomegranate Seeds - prepped ingredients
Warm Spiced Cauliflower with Chickpeas and Pomegranate Seeds - spices and oil
Warm Spiced Cauliflower with Chickpeas and Pomegranate Seeds - toss cauliflower in spices and oil
Warm Spiced Cauliflower with Chickpeas and Pomegranate Seeds - mix tomatoes and chickpeas
Warm Spiced Cauliflower with Chickpeas and Pomegranate Seeds - Roast all together
Warm Spiced Cauliflower with Chickpeas and Pomegranate Seeds - add pomegranate seeds after roasting
Warm Spiced Cauliflower with Chickpeas and Pomegranate Seeds
Print This Recipe- Warm Spiced Cauliflower with Chickpeas and Pomegranate Seeds
File Size: 680 kb
File Type: pdf
Download File

Warm Spiced Cauliflower with Chickpeas and Pomegranate Seeds
Recipe source: Nigella Lawson featured in Simply Nigella
 
INGREDIENTS:
  • 1 small head cauliflower
  • 3 tablespoons regular olive oil
  • ½ teaspoon ground cinnamon
  • 2 teaspoons cumin seeds
  • 1 can (14 ounces) chickpeas, drained and rinsed
  • 2 tablespoons harissa paste (use more or less according to taste; if you can’t find harissa, substitute another chili paste or sauce such as sriracha)
  • 4 smallish ripe tomatoes
  • 1 teaspoon sea salt flakes (or to taste)
  • 4 tablespoons pomegranate seeds
  • Large bunch fresh flat leaf parsley

DIRECTIONS:
  • Preheat the oven to 425˚F.
  • Trim the cauliflower and divide into small florets.
  • Pour the oil into a large bowl, add the cinnamon and cumin seeds, and stir or whisk to help the spices disperse. Tip in the prepared cauliflower and toss to coat.
  • Pour the contents of the bowl into a sheet pan or medium size baking dish. Place in the oven to roast for 15 minutes.
  • Add the chickpeas to the same bowl used earlier. Taste the harissa to determine exactly how much to add, then add it and toss to coat.
  • Cut the tomatoes into quarters (or smaller chunks if the tomatoes are large) and add them to the bowl. Mix.
  • When the cauliflower has finished cooking for 15 minutes, remove the tray, and quickly add the chickpeas and tomatoes over the cauliflower. Stir or toss to combine before returning to the oven for another 15 minutes until the cauliflower is tender.
  • When it’s ready, remove the pan from the oven and sprinkle the salt over the vegetables. Move the vegetables to a serving bowl, then add half of the pomegranate seeds and toss to combine.
  • Garnish each serving with torn or roughly chopped parsley leaves and a few of the remaining pomegranate seeds. 
Warm Spiced Cauliflower with Chickpeas and Pomegranate Seeds
What is your favorite dish with an unusual ingredient pairing? Tell us in the Comments
0 Comments

The Foodies Want More

10/19/2017

0 Comments

 
The Foodies Want Second HelpingsLate evening, time for dessert from Greg and Dan - Trionfo Della Gola
The Foodies (formerly known as the Supper Club) are a group of friends who love to cook, eat, drink, and laugh together at themed dinner parties. Our friends and family tell us they enjoy living vicariously through tales of our feasts so we’ll share the stories, pictures, and recipes here on the blog from time to time. Click here for previous Foodie Group posts, and here for the group’s origin story.

Oh, that feeling when a musical performance engages your emotions so completely that you surge to a standing ovation, calling Encore, Bravo! Or, in the rowdier joints I’ve been known to frequent, you wave your cell phone in the air (or lighter, in the old days) and yell Wooooooooooooooooooo!  Hungry for just one more song, a final powerful experience to send you out the door, ears ringing, soul soaring, and walking on air.
​
Well, that was the inspiration for this go-round with our group of foodies, substituting dinner for music as the medium. The theme is Encore!
With more than 12 years under our belts our Foodie Group has enjoyed a lot of meals together. (Read the origin story here.) That’s 67 dinners, give or take. An abundance of themes thoughtfully explored, multitudes of recipes gleefully devoured, waterfalls of wine and cocktails imbibed, and occasional outbursts of performance art, both planned and impromptu.
​
Such a wealth of material in our repertoire! The time was right to revisit our past for inspiration. Ilise is our archivist, tracking the details of each meal since 2006 on a master spreadsheet from which we each selected a classic theme to reinvent for an encore performance. 
​​We expected that the Encore ‘hook’ would inspire our fellow Foodies to get creative and have fun with some of the past themes. 

There are some real goodies on that spreadsheet:
Duck and Cover; Red Square; Chocolate; and Booze on the Barbie, to name just a few. 
​

​Before serving up the tantalizing details of this dinner, let’s set the mood with an Encore Playlist. Hit the Play arrow and settle in with a beverage of your choice.

Then get ready for More.
Drinks: Ellyn chose to revisit the Caramelized theme from 2013, preparing a Caramelized Pineapple-Jalapeno Cocktail. Turns out this is the same cocktail she made the first time around, and I’m here to tell you it was just as delicious for the Encore.

​Char-grilled pineapple is the key to this tasty tipple, and the mezcal brings a whole new level of smoky goodness. We all toasted with Cheers! and Bravo! in anticipation of another wonderful dinner party. Click on the photos to enlarge them and read the captions.
Caramelized Pineapple-Jalapeno Mezcal Cocktail, Muddle the fruit
Caramelized Pineapple-Jalapeno Cocktail, Add the mezcal
Caramelized Pineapple-Jalapeno Mezcal Cocktail
Enjoying Caramelized Pineapple-Jalapeno Mezcal Cocktails
Caramelized Pineapple-Jalapeno Mezcal Cocktail
Enjoying Caramelized Pineapple-Jalapeno Mezcal Cocktails
If you’re curious, here’s the menu from April 2013 when Caramelized was our theme:
  • Drinks: Mezcal cocktail w/ caramelized pineapple and jalapeno; Assorted wines; and a Nightcap: Chocolate Covered Caramel (made with chocolate liqueur, butterscotch schnapps, and vodka served w/ a caramel straw in a chocolate cup)
  • Appetizer: Caramelized onion and three cheese tart; Caramelized bacon
  • Main course: Pork Bi Bim Bop; Pickled quail eggs; Korean cucumber salad; Shishito peppers; Seasoned perilla leaves; and two types of Kimchee
  • Dessert: Croquembouche with rum and Kahlua custard

Appetizers: Karen and Kathleen offered a fresh take on the Favorite Restaurant Recipes theme (2007). They made Neapolitan style pizza on the grill, inspired by Spacca Napoli here in Chicago. Kathleen and Karen have made a point to source the same ingredients used by the restaurant and feel they are thisclose to a match.

Arriving at the party with a giant pizza oven attachment for the kettle grill in tow, the Ks proceeded to make two flavors of pizza: Margherita, with tomatoes, fresh mozzarella, and basil; and Prosciutto with mozzarella and baby spinach. Fresh, light, chewy, and utterly delicious! ​Click on the photos to enlarge them and read the captions.
Neapolitan style pizza on the grill, Making dough
Neapolitan style pizza on the grill, Add sauce and cheese
Neapolitan style pizza on the grill, Place pizza on stone on grill
Neapolitan style pizza on the grill
Neapolitan style pizza on the grill, Margherita pizza with tomatoes, fresh mozzarella, and basil
Neapolitan style pizza on the grill, Prep the pizza
Neapolitan style pizza on the grill, Prosciutto pizza
Neapolitan style pizza on the grill, Prosciutto pizza with baby spinach
Neapolitan style pizza on the grill
Here’s what was served in January 2007 when Favorite Restaurant Recipes was the theme:
  • Drinks: Concord Grape Cobbler inspired by No. 9 Park; selected bottles of Witness Tree Pinot Noir, which we first enjoyed (very much!) at Blue Hill
  • Appetizer: Lentils with Warm Spinach and Goat Cheese inspired by Mia Francesca
  • Main course: Duck and venison (sorry, the details are absent)
  • Dessert: Crème brulee (short on details here too)

Main Course: Ilise and I went hog-wild with the Pig Out theme, originally presented in 2012. We hauled out the smoker and barbecued up some sweet meat treats fit to eat. North Carolina style pulled pork sandwiches with coleslaw and pickled onions, Kansas City style baby back ribs, and beef ribs were on the menu – hey, it says to Pig Out, so we did! We rounded out the meat with classic soul food sides including collard greens and corn pudding. (Click on the names of each of the dishes to be linked to the recipes, pictures, and more.)  ​​Click on the photos to enlarge them and read the captions.
Pork shoulders in the smoker, hours away from becoming pulled pork sandwiches
Kansas City style baby back ribs in the smoker
KC style BBQ sauce
Vinegar sauce for the pulled pork and the coleslaw
North Carolina style pulled pork
Buffet table - Encore dinner party
Pig Out menu from August 2012:
  • Drinks: Canadian Bacon Cocktail served with maple glazed bacon; Spicy Pineapple Pepperitas made with pepperoni and jalapeno pepper-infused tequila; and assorted wine
  • Appetizer: Sausages and pickled veggies; Flatbread with apples, caramelized onions, Asiago and maple-candied turkey bacon
  • Main course: "Polenta Portobello Pig Out Platter" with three stews:  the Tuscan Wild Boar stew (made with regular pork instead of boar), a classic Ragù Bolognese; and Parsley-Pipián pulled chicken
  • Dessert: Chocolate and vanilla ice cream served with warm chocolate ganache and ganache-covered strawberries and dried pineapple

Dessert: Always the overachievers (and we love them for it!) Greg and Dan married two themes in one magnificent dessert – the Trionfo Della Gola. This unusual and wonderfully addictive sponge cake is layered with a watermelon pudding, squash preserves, and chopped pistachios.

This dessert fits perfectly for the Regional Italian Cuisine theme we enjoyed in 2011 – this recipe represents Sicily – and it also ticks the box for our 2007 theme, Cookbook from the Year You Were Born – sorta. Although this particular cookbook – Mimmetta LoMonte’s Classic Sicilian Cooking – was published more than a few years after Dan and Greg were born, Greg did receive the book as a birthday gift from his mother, so we’re going to say he gets style points for this one. Click on the photos to enlarge them and read the captions. 
Trionfo della Gola
Trionfo della Gola
Trionfo della Gola
Trionfo della Gola
Here’s the menu from the January 2011 when Regional Italian was our theme:
  • Drinks: Gin martini, Negroni, Bellini, Italian beer, Italian red wines & homemade Limoncello
  • Appetizer: Lazio Region - Ceci alla Romana, Peperonata alla Romana & Gaeta olives; Roman Legionnaires Farro soup and Gnocchi alla Romana
  • Main course: Emilia-Romagna Region - Pasta Bolognese, Chicken wrapped in Prosciutto di Parma, Risotto with Parmigiano Reggiano and aged balsamic vinegar & Broccoli rabe
  • Dessert: Trentino Alto Adige & Veneto Regions - Semifreddo al miele and Apfelnusstorte (or Torta di Mele)
​And here are the details from our Cookbook from the Year You Were Born dinner in December 2007:
  • Drinks: Tangatini (a martini made with Tang, but not from a cookbook), Gin Gimlets and French wine
  • Appetizer: Salmon mousse, and Vichyssoise
  • Main course: Coq au vin
  • Dessert: White layer cake with Maraschino cherries, and Brandy Balls

So there you have it – an Encore performance of the foodie group’s favorite themes. I was intrigued to see what everyone picked. As usual, the dinner party was a huge success – mouthwatering food, delicious drinks and wine, and best of all, sparkling conversation with an amazing group of dear pals. Bravo to you all, my Foodie friends!
0 Comments

Sweets for the Sweet – October 21 is Sweetest Day

10/10/2017

0 Comments

 
Picture
What the heck is Sweetest Day anyway? According to Wikipedia (insert grain of salt here) it’s a holiday for showing love and affection, celebrated in the Midwest and parts of the Northeastern U.S.

I used to roll my eyes vigorously at made-up holidays such as this. But then I opened an online vintage shop – Entertaining Vintage, come visit! – and now I’m a major fan of all gift-giving occasions such as this.
​
Entertaining Vintage offers housewares, items for dining, kitchen and entertaining plus art glass, figurines, dolls, and collectibles both ridiculous and sublime.

Our Sweetest Day Sale features 15% off selected items to treat your sweetie – thru 10/21/17. 
Heart Shaped Trinket Box
Hand Painted Fenton Basket
Teddy Bear Salt and Pepper Shakers
Pink Limoges Small Tea Cup and Saucer
Girl with Basket Figurine
Royal Stuart Demitasse Cup and Saucer
Child Playing Music Figurine
Wedgwood Crystal Heart
Just here for the food? Well, here you go – enjoy some links to our favorite Sweet Bites. Any of these tasty treats would make a delicious homemade gift for someone you love. They do say – Food is Love!
  • German Chocolate Cake Cookies
  • Bourbon Caramels
  • Salted Caramel Pretzel Cookies
  • Port Ganache-Glazed Brownies with Dried Cherries​

Click on the photos to enlarge them and read the captions
German Chocolate Cake Cookies
Bourbon Caramels
Salted Caramel Pretzel Cookies
Port Ganache-Glazed Brownies with Dried Cherries

​Want a song? This one’s sweet.
0 Comments

What’s for Dinner? North Carolina-Style Pulled Pork Sandwiches with Coleslaw and Pickled Onions

10/5/2017

1 Comment

 
North Carolina Style Pulled Pork Sandwiches with Coleslaw and Pickled Onions
Pulled Pork Sandwich with Coleslaw and Pickled Onions - Now that's good eatin'!
The Occasion: Oh yes indeed, it’s always a special occasion when it comes to making pulled pork. This is a ritual, not a casual endeavor, requiring one to haul out the smoker, stock up on charcoal and wood chips, and babysit the meat cooking low and slow for nearly 12 hours.

Worth it? Mmmm yup.
This time the special occasion was another of our (in)famous themed dinner parties with The Foodies. The full story about that meal is coming in a few days, but I’ll tell you that the motto of our main course was Pig Out. We made pulled pork sandwiches with all the fixings plus babyback pork ribs – and beef ribs too because why not.

The Recipe: I did a lot of online research in preparation for this meal, comparing recipes and techniques. Good news – there’s a lot of awesome Q to be had out there! We wound up using recipes from the Barbecue King himself, Steven Raichlen. The man knows what he’s doing and, thanks to his easy to follow instructions, now so do I. Thanks, Steve!
Fire up the smoker, it's time for pulled pork!This baby will be smoking up the yard (and neighborhood) for nearly 12 hours!
What Makes It Special: Hello! Low and slow. 12 hours in the smoker. I’m not sure what else needs saying. I guess ‘authenticity’ is a big part of what makes this special. As you know, there are many styles of barbecue from around the country. This recipe follows the North Carolina tradition of vinegar-forward ‘cue and slaw. I was worried it might be too vinegar-y, but nope, just right. 

(In case you’re interested, we did a Kansas City BBQ treatment for the ribs – sweeter and more tomato flavor. We’ve posted about our smoked ribs before. Find the story and recipe here.) 

Serve With: Any of the traditional soul food or barbecue sides will be perfect with this sandwich. Baked beans, corn on the cob or tasty corn pudding, mac and cheese, collard greens. And of course the mandatory vinegar-based coleslaw sits right on top of the sandwich, where it belongs. 
Pork shoulders early in the smoking processThese pork shoulders have just started smoking. See you in 12 hours, Porky!
Kitchen Tips: Smoking the pork shoulder will take a loooooong time. The guideline is 1 ½ hours per pound of meat, and it’s common to hit a sticking point where the internal temperature just refuses to rise. You either wait it out – continuing to keep the smoker fire going for as long as it takes – or you wrap the meat in foil and finish roasting it on the gas grill. After about 10 hours in the smoker, we opted to use the grill for the final 90 minutes. Turned out perfectly.  

There’s no harm in cooking the meat a day or two prior to mealtime, and in fact you almost have to, given the lengthy prep time. After the meat reached the optimal internal temperature (195˚F.) we let it cool a bit, then broke it into large chunks to store overnight in the fridge. On party day we shredded the pork using two forks. Heads up: this will take a looooooong time too. Do it anyway. (Some rebels prefer to chop the meat, but BBQ purists know that hand-shredding is the way to go.)
​
The pickled onions can be made days in advance and will keep for 1-2 weeks. I shredded the cabbage for coleslaw and made the sauce the day before, stored them separately, and combined them several hours before dinnertime so the ingredients could get acquainted and cozy up to each other. 

The Verdict: Making pulled pork was a BIG production with many steps (rub, smoke, mop, sauce, and toppings) but - hallelujah! - it was most definitely worth the effort. Our guests were thrilled and satisfied in equal measures, and the leftovers left smiles behind when they were enjoyed the next day. I don’t have the stamina to do this more than once a year, but I’m already looking forward to next year’s porkapalooza. Click on the photos to enlarge them and read the captions.

Print The Recipe- North Carolina Style Pulled Pork
File Size: 577 kb
File Type: pdf
Download File

North Carolina Style Pulled Pork Sandwiches
Recipe source: Steven Raichlen, The Barbecue! Bible 10th Anniversary Edition via Epicurious
 
Grilling Method
  • Indirect grilling
Advance preparation
  • 3 to 8 hours for marinating the meat (optional); also, allow yourself 4 to 6 hours cooking time
Special equipment
  • 6 cups hickory chips or chunks, soaked for 1 hour in cold water to cover and drained
INGREDIENTS:

For the rub (optional but recommended)
  • 1 tablespoon mild paprika
  • 2 teaspoons light brown sugar
  • 1 1/2 teaspoons hot paprika
  • 1/2 teaspoon celery salt
  • 1/2 teaspoon garlic salt
  • 1/2 teaspoon dry mustard
  • 1/2 teaspoon freshly ground black pepper
  • 1/2 teaspoon onion powder
  • 1/4 teaspoon salt
For the barbecue
  • 1 Boston butt (bone-in pork shoulder roast; 5 to 6 pounds), covered with a thick (1/2 inch) layer of fat
  • Cider Squirt Mop Sauce – recipe below
  • Vinegar Sauce – recipe below
  • 10 to 12 hamburger buns
  • North Carolina–Style Coleslaw – recipe below
  • Quick Pickled Red Onions – recipe below

DIRECTIONS:

 
  • If using the rub, combine the mild paprika, brown sugar, hot paprika, celery salt, garlic salt, dry mustard, pepper, onion powder, and salt in a bowl and toss with your fingers to mix. Wearing rubber or plastic gloves if desired, rub the spice mixture onto the pork shoulder on all sides, then cover it with plastic wrap and refrigerate it for at least 3 hours, preferably 8.
  • If not using the rub, generously season the pork all over with coarse (kosher or sea) salt and freshly ground black pepper; you can start cooking immediately.
  • Set up the grill for indirect grilling and place a drip pan in the center. If using a gas grill, place all of the wood chips in the smoker box and preheat the grill to high; when smoke appears, reduce the heat to medium. If using a charcoal grill, preheat the grill to medium-low and adjust the vents to obtain a temperature of 300°F.
  • When ready to cook, if using charcoal, toss 1 cup of the wood chips on the coals. Place the pork shoulder, fat side up, on the hot grate over the drip pan. Cover the grill and smoke cook the pork shoulder until fall-off-the-bone tender and the internal temperature on an instant-read meat thermometer reaches 195°F, 4 to 6 hours (the cooking time will depend on the size of the pork roast and the heat of the grill). If using charcoal, you'll need to add 10 to 12 fresh coals to each side every hour and toss more wood chips on the fresh coals; add about 1/2 cup per side every time you replenish the coals. With gas, all you need to do is be sure that you start with a full tank of gas. If the pork begins to brown too much, drape a piece of aluminum foil loosely over it or lower the heat.
  • Periodically, baste the meat with the cider mop sauce to keep the meat moist and tender - about once per hour. We like to use a spray bottle, but you can use a cloth or silicon brush to “mop” the meat if preferred.
  • Transfer the pork roast to a cutting board, loosely tent it with aluminum foil, and let rest for 15 minutes.
  • Wearing heavy-duty rubber gloves if desired, pull off and discard any skin from the meat, then pull the pork into pieces, discarding any bones or fat. Using your fingertips or a fork, pull each piece of pork into shreds 1 to 2 inches long and 1/8 to 1/4 inch wide. This requires time and patience, but a human touch is needed to achieve the perfect texture. If patience isn't one of your virtues, you can finely chop the pork with a cleaver (many respected North Carolina barbecue joints serve chopped 'cue). Transfer the shredded pork to a nonreactive roasting pan. Stir in 1 to 1 1/2 cups of the vinegar sauce, enough to keep the pork moist, then cover the pan with aluminum foil and place it on the grill for up to 30 minutes to keep warm.
  • To serve, mound the pulled pork on the hamburger buns and top with coleslaw and pickled onions. Let each person add more vinegar sauce to taste.

Excerpted from The Barbecue! Bible 10th Anniversary Edition. © 1998, 2008 by Steven Raichlen. Workman
----------------------------
Cider Squirt Mop Sauce
Recipe source: Steve Raichlen’s Barbecue! Bible
 
INGREDIENTS:
  • 2 cups apple cider
  • 3/4 cup cider vinegar
  • 1/2 cup bourbon
  • 1/2 cup water
  • 1/4 cup Worcestershire sauce
  • 1/4 cup lemon juice
  • 1/2 teaspoon salt

DIRECTIONS:
  • Combine all the ingredients in a heavy saucepan and bring to a boil. Reduce the heat and simmer the sauce for 5 minutes.
  • Let cool to room temperature.
  • Transfer the squirt to a spray bottle and use right away or refrigerate.
  • Use within 1 or 2 days of making.
  • Tips: You wouldn’t want to eat this stuff straight, but spray it on roasting or smoking meat and it adds a world of flavor. I put the “squirt” in a spray bottle and spray it right on the meat. Alternatively, brush it on with a mop or basting brush. When cooking chicken or ribs, apply every 30 minutes. When cooking a large cut of meat (like a brisket or pork shoulder), apply every hour.
 ----------------------------
Vinegar Sauce
Recipe source: Steve Raichlen’s Barbecue! Bible
 
INGREDIENTS:
  • 2 cups cider vinegar
  • 1/2 cup plus 2 tablespoons ketchup
  • 1/4 cup firmly packed brown sugar, or more to taste
  • 5 teaspoons salt, or more to taste
  • 4 teaspoons hot red pepper flakes
  • 1 teaspoon freshly ground black pepper
  • 1 teaspoon freshly ground white pepper

DIRECTIONS:
  • Combine the vinegar, ketchup, brown sugar, salt, red pepper flakes, black pepper, and white pepper with 1 1/3 cups of water in a nonreactive medium-size bowl and whisk until the sugar and salt dissolve.
  • Taste for seasoning, adding more brown sugar and/or salt as necessary; the sauce should be piquant but not quite sour.
 ----------------------------
North Carolina Style Coleslaw
Recipe source: Steve Raichlen’s Barbecue! Bible
 
INGREDIENTS:
  • 1 small or 1/2 large head green cabbage (about 2 pounds), cored
  • 1 cup Vinegar Sauce or more to taste – see recipe above
  • Salt (optional)

DIRECTIONS:
  • Finely chop the cabbage by hand or shred it on a mandoline or using the shredding disk of a food processor.
  • Place the cabbage in a large bowl and stir in the Vinegar Sauce.
  • Let stand for 10 minutes, then taste for seasoning, adding salt and/or more sauce as needed.
 ----------------------------
Quick Pickled Red Onions
Recipe source: Steve Raichlen’s Barbecue! Bible
 
INGREDIENTS:
  • 3/4 cup distilled white vinegar or apple cider vinegar
  • 3/4 cup water
  • 1 tablespoon sugar
  • 1 tablespoon coarse salt (sea or kosher)
  • 1 large red onion, peeled and very thinly sliced crosswise

DIRECTIONS:
  • In a medium saucepan over medium-high heat, bring the vinegar, water, sugar, and salt to a boil.
  • Add the onion and remove from the heat.
  • Make sure the onion is submerged in the liquid. Let the onion sit for 1 hour before serving.
  • Store any leftover onion in its brine in a jar in the refrigerator for up to 3 days.
North Carolina Style Pulled Pork Sandwiches with Coleslaw and Pickled Onions
What's your favorite labor-intensive, once-a-year dish to make? Tell us in the Comments
1 Comment

Sweet Bites: Macadamia Double-Decker Brownies

10/3/2017

1 Comment

 
Macadamia Double-Decker Brownies
Nom nom nom, these Macadamia Double-Decker Brownies are definitely worth the calories!
Brownies are awesome, right? Are we in agreement on that basic fact? Good, I thought so. Well, these chocolatey nuggets – Macadamia Double-Decker Brownies – elevate the game to a whole new level.

The Occasion: This is all the dessert you will ever need. You know how sometimes a cookie or brownie is just a snack? This one counts as a legit, capital ‘D’ dessert that’ll inspire you to take your time.

The Recipe: The recipe comes from Fine Cooking, an excellent magazine and website for the serious foodie. Expert recipes, helpful how-to guides, and awesome food photography are the hallmarks of this operation. Check it out. 
What Makes It Special: You’ve got two distinct layers of goodness: sweet, gooey caramelized coconut with chopped macadamias crowning a rich, dark, moist chocolate brownie base. Wow.
The Verdict: Super-duper yummy! If I were a puppy I’d be wagging my tail real hard and conspiring to grab the whole plate off the counter. Even without the tail, I still might conspire. These brownies might just change your life. Click on the photos to enlarge them and read the captions.
Ingredients for the brownie layer
Mixing the brownie batter - step 1
Brownie batter is ready for baking
Brownie layer is ready to bake in a foil-lined pan
Brownie layer is baked
Topping ingredients for Macadamia Double-Decker Brownies
Begin mixing the topping layer
Topping layer in process
Coconut and chopped macadamias added to the topping mix
Topping layer added to baked brownie - then bake again
Cross-section of Macadamia Double-Decker Brownies
Macadamia Double-Decker Brownies
Print The Recipe- Macadamia Double-Decker Brownies
File Size: 663 kb
File Type: pdf
Download File

Macadamia Double-Decker Brownie Bars
Recipe source: Fine Cooking
 
INGREDIENTS:
For the brownie layer:
  • Cooking spray
  • 6 ounces (12 tablespoons) unsalted butter, cut into large chunks
  • 1 ½ cups granulated sugar
  • 2 ¼ ounces (3/4 cup) unsweetened cocoa powder (natural or Dutch processed)
  • 1/4 teaspoon table salt
  • 2 large eggs
  • 1 teaspoon pure vanilla extract
  • 3 ½ ounces (3/4 cup) unbleached all-purpose flour
For the macadamia layer:
  • 1/2 cup firmly packed light brown sugar
  • 1 ½ ounces (1/3 cup) unbleached all-purpose flour
  • 2/3 cup light corn syrup
  • 1 ½ ounces (3 tablespoons) unsalted butter, melted
  • 1 ½ teaspoons pure vanilla extract
  • 2 large eggs
  • 1 ½ cups roughly chopped salted macadamia nuts
  • 1/3 cup sweetened coconut flakes

DIRECTIONS:
  • Position a rack in the center of the oven and heat the oven to 325 degrees F. Line the bottom and sides of a 9×13-inch baking pan with foil, leaving some overhang on the sides, and spray with cooking spray.
  • For the brownie layer: In a medium saucepan over medium heat, whisk the butter until it is melted.
  • Remove the pan from the heat and add the sugar, cocoa powder, and salt. Whisk until well blended, about 1 minute.
  • Add the eggs and vanilla and whisk until smooth.
  • Add the flour and stir with a rubber spatula until blended.
  • Scrape into the prepared pan and spread evenly.
  • Bake until the top is shiny and dry-looking and the brownie springs back very slightly when pressed with a fingertip, about 20 minutes. (The brownie should not be completely baked.) Remove from the oven and put on a rack.
  • For the macadamia topping (Make while the brownie layer is baking): In a large mixing bowl, combine the brown sugar and flour. Whisk until well blended, breaking up any large clumps.
  • Add the corn syrup, melted butter, and vanilla. Whisk until blended, about 1 minute.
  • Add the eggs and whisk just until combined, about 30 seconds. (Don’t overmix or the batter will be foamy.)
  • Add the nuts and coconut and stir with a rubber spatula until evenly blended.
  • Bring the elements together: Pour the macadamia topping over the warm, partially baked brownie layer. Using a spatula, carefully spread the mixture into an even layer.
  • Return the pan to the oven and bake until the top is golden brown, 37 to 40 minutes.
  • Transfer the pan to a rack to cool completely.
  • Using the foil as handles, lift the rectangle from the pan and invert onto a work surface. Carefully peel away the foil. Flip right side up. Using a sharp knife, cut into 2×2-inch squares and then cut each square into triangles.
  • Make ahead: After the brownie and macadamia layers have been baked and cooled, the entire pan can be wrapped in plastic wrap, then foil, and frozen for up to 1 month.
1 Comment
    When home cooking becomes a special occasion - Recipes, playlists, table tips and more
    Picture

    ​
    Entertaining Vintage

    Vintage treasures for the kitchen, home, collectibles, and gifts

    Categories

    All
    Afternoon Dance Break
    Birthday Greetings
    Cookbook Road Test
    Cool Tunes
    Drinks
    Entertaining Vintage
    Fish
    Kitchen Reno
    Kitchen Tips
    National Days
    Party Planning
    Pop Culture
    Recipe
    Savory Bites
    Supper Club
    Sweet Bites
    The Arts
    Travel
    TV
    Video

    Archives

    May 2020
    April 2020
    March 2020
    August 2019
    June 2019
    May 2019
    April 2019
    March 2019
    February 2019
    January 2019
    December 2018
    November 2018
    October 2018
    September 2018
    August 2018
    July 2018
    June 2018
    May 2018
    April 2018
    March 2018
    February 2018
    January 2018
    December 2017
    November 2017
    October 2017
    September 2017
    August 2017
    July 2017
    June 2017
    May 2017
    April 2017
    March 2017
    February 2017
    January 2017
    December 2016
    November 2016
    October 2016
    September 2016
    August 2016
    July 2016
    June 2016
    May 2016
    April 2016
    March 2016
    February 2016
    January 2016
    December 2015
    November 2015
    October 2015
    September 2015
    August 2015
    July 2015
    June 2015
    May 2015
    April 2015

    RSS Feed

    Subscribe to our mailing list

    * indicates required
Proudly powered by Weebly