Entertain the Possibilities - Home cooking becomes a special occasion; Get recipes, photos, tips and playlists
  • Blog
  • About

Drinkies: The Pink Hound

3/31/2017

0 Comments

 
The Pink Hound
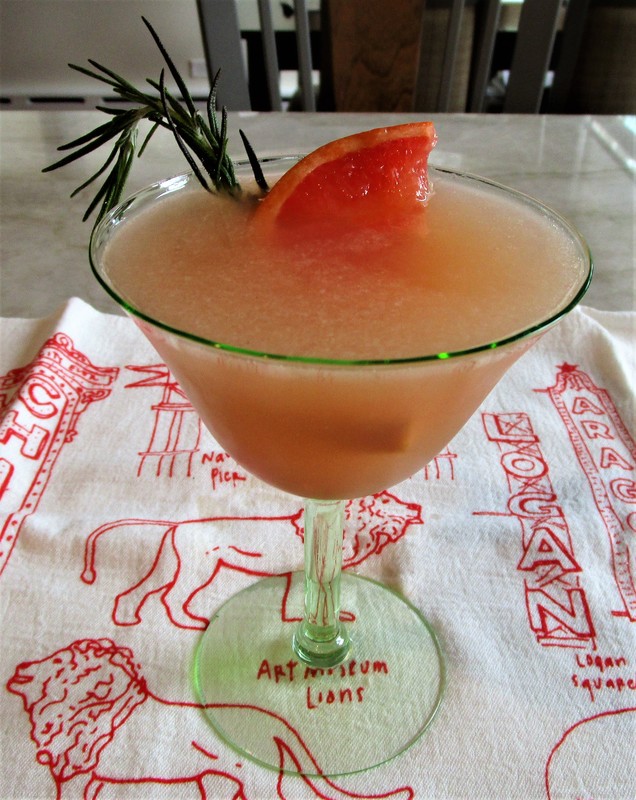
The Pink Hound - a tasty riff on the classic Greyhound
The Occasion: We have FINALLY made it to the weekend. Time for drinks on the deck. Or perhaps a brunch cocktail? The grapefruit juice says YES!

Why This Works: The classic cocktail - greyhound – features gin and grapefruit juice. Yum. This recipe kicks it up a few notches with freshly squeezed pink grapefruit and lemon juices AND an herbal garnish. 
The Playlist: Tunes relating to Pink, to Greyhounds (but not the bus), and to Happy Hour. Enjoy!

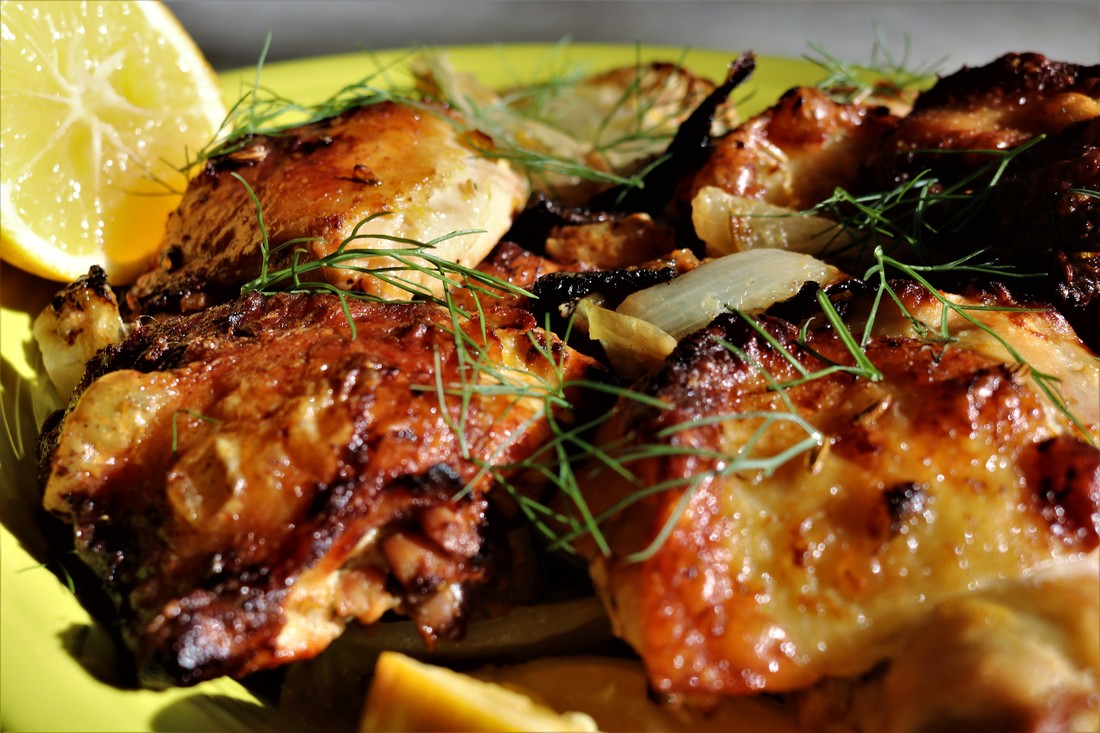
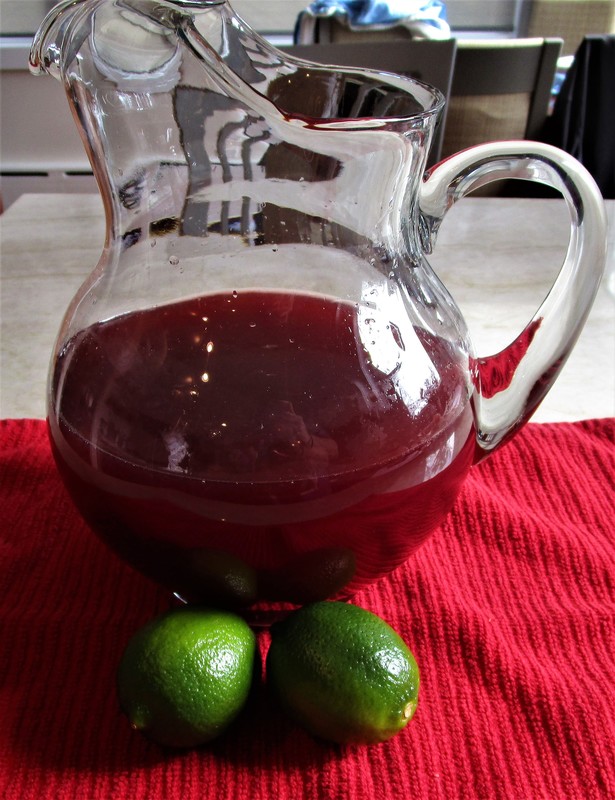
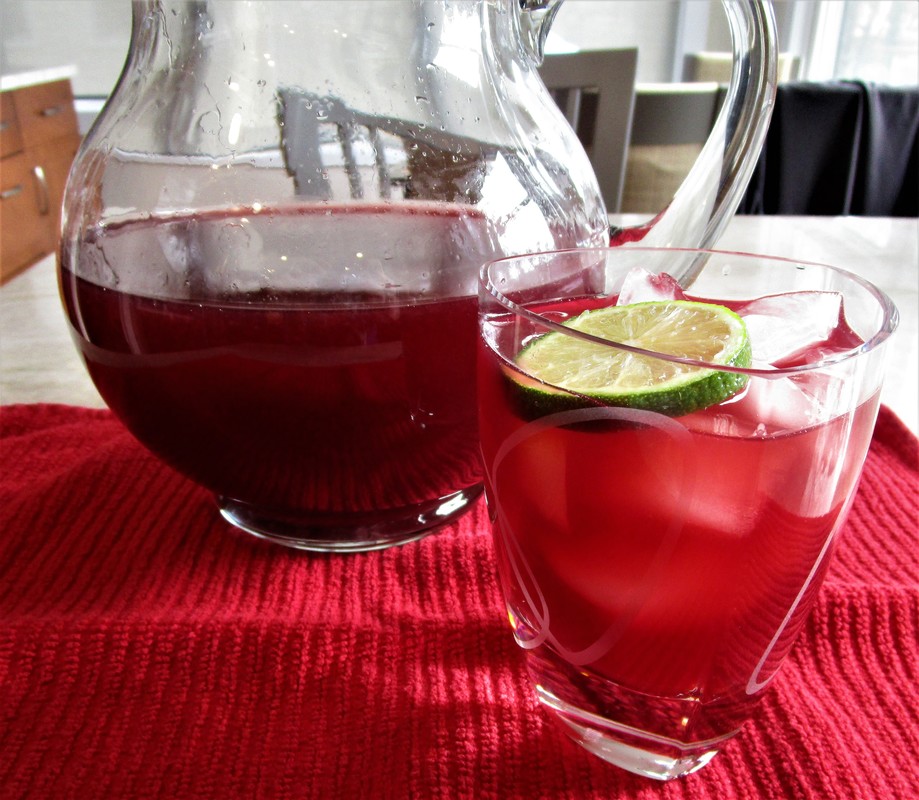
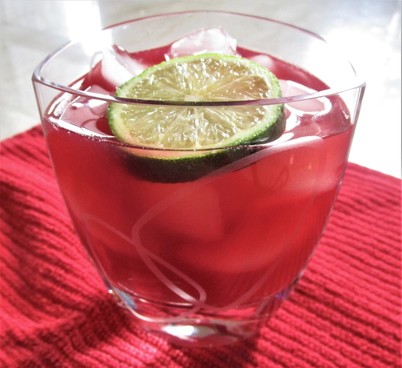
​The Verdict: Really good. This is not a wacky ‘look at me’ drink, just a classic cocktail elevated by a few upgrades – freshly squeezed juices, herbal notes. 

It goes down very easily so be careful – and be happy!

Click on the photos to enlarge them and read the captions.
Printable Recipe- The Pink Hound
File Size: 526 kb
File Type: pdf
Download File

The Pink Hound
Recipe by Ilise Goldberg, riffing off the classic Greyhound cocktail

Makes one cocktail

INGREDIENTS:
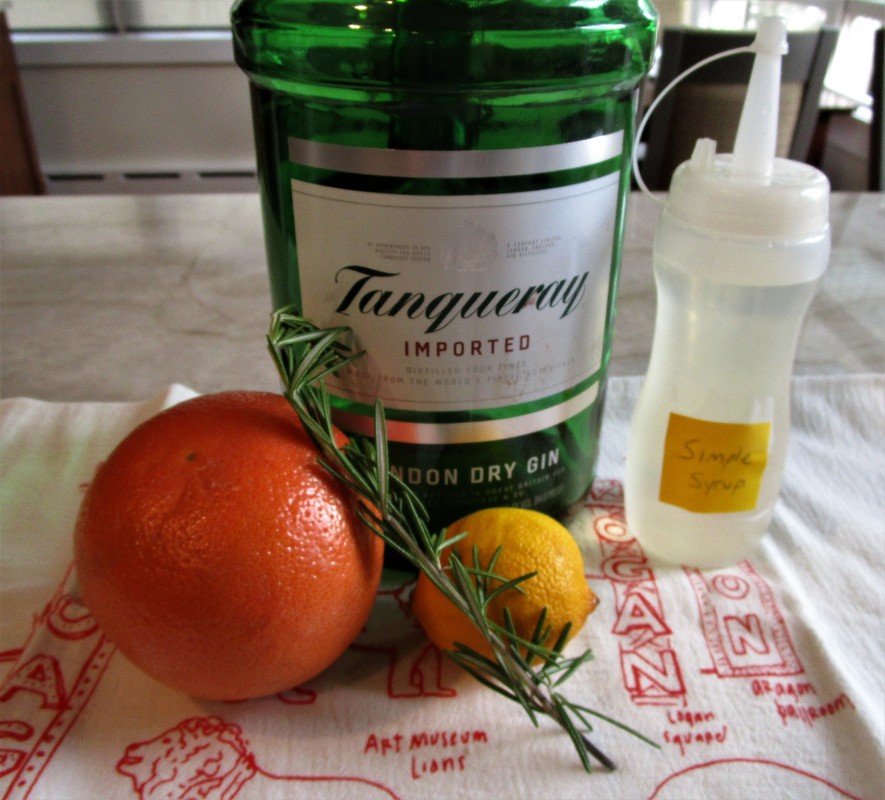
  • 2 ounces gin (such as Tanqueray)
  • 2 ½ ounces freshly squeezed pink grapefruit juice
  • ¾ ounce freshly squeezed lemon juice – ideally Meyer lemons but regular lemons are fine
  • ¼ ounce simple syrup – See note below
  • Sprig of rosemary for garnish (optional)
  • Slice of grapefruit for garnish (optional)

DIRECTIONS:
  • Put ice in a shaker. Add all liquid ingredients and shake well. 
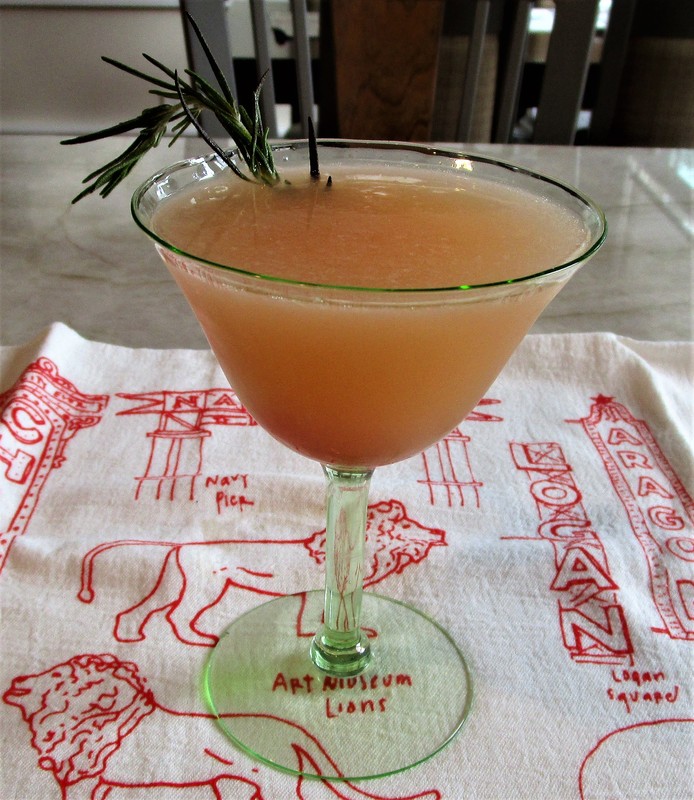
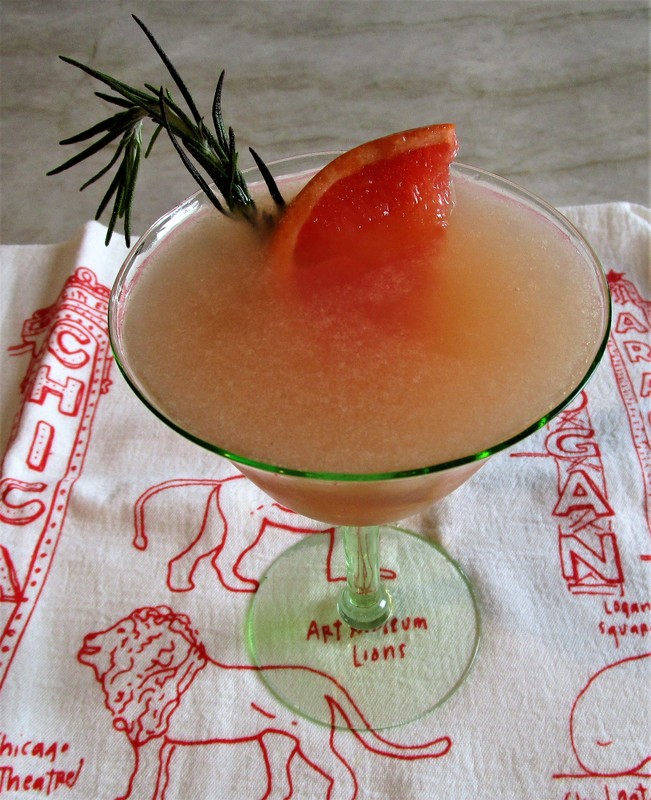
  • Pour strained drink into a chilled coupe glass. Garnish with a sprig of rosemary and/or a slice of grapefruit. 
  • If you prefer, the cocktail may be served on the rocks.

​Simple Syrup:
To make simple syrup, combine equal parts sugar and water in a pan over medium heat until the sugar has dissolved and the liquid looks clear. Cool before using. 
0 Comments

Afternoon Dance Break – Strike a Pose

3/30/2017

0 Comments

 
Picture
This photograph depicts Betty Bloomer (center), the future Mrs. Gerald R. Ford, Jr. The photo was possibly taken at Bennington College Summer School of Dance. Image courtesy of The U.S. National Archives
Afternoon Dance Break is a recurring feature that invites you to get up from the desk, crank up the tunes, and dance your fool head off for a few minutes before resuming the daily grind. Want more dancing? Find past ADBs here.
 
How cool is it that former First Lady Betty Ford is exceeding her youthful squad goals in the photo above?  
You can exceed your own goals for mid-afternoon stress relief with a shake-it, groove-it, move-it, jiggle-it, wiggle-it Afternoon Dance Break featuring artists Spencer Ludwig + a new one from Blondie.
​
0 Comments

Super Sides: Sweet Potato Fries

3/27/2017

0 Comments

 
Sweet Potato Fries
Sweet Potato Fries -- great for snacks or a side dish
The Occasion: Kids at the table – or kids at heart who've never outgrown the joy of French fries. Also good for game day snacks, in case there are any March Madness maniacs out there.

Why This Works: Baked, not fried. Orange, not white. (More nutrients that way, right?) Fan favorites. 
Why I Almost Didn’t Include This: Because you’re probably already making sweet potato fries three times a week and I’m the very last person to jump on the bandwagon. Better late than never? 
The Process and The Verdict: I started with a Mark Bittman/New York Times recipe and modified it based on suggestions in the comments and my own common sense. It’s now a slightly longer process with more potschke-ing (comes from the Yiddish for ‘fussing with it’) but results in a supremely delicious batch of crisp-tender French fries. Worth it! These fries will be the first thing to disappear from everyone’s plate. Make lots.

​Click on the photos to enlarge them and read the captions.
Printable Recipe- Sweet Potato Fries
File Size: 562 kb
File Type: pdf
Download File

Sweet Potato Fries
Recipe source: Mark Bittman for New York Times Cooking – with slight adaptations
 
INGREDIENTS:
  • 2 pounds sweet potatoes, peeled or unpeeled, your choice
  • 2 tablespoons olive oil
  • 1 teaspoon garlic powder
  • 1 teaspoon paprika
  • 1 teaspoon salt
  • ½ teaspoon black pepper
 
DIRECTIONS:
  • Heat the oven to 400. Prepare 2 rimmed baking sheets with parchment paper to fit inside.
  • Cut the sweet potatoes into thin sticks about 1/4-inch wide and 3 inches long.
Optional step for extra crispiness: Rinse the potato strips in a bowl of cold water to reduce starchiness. Then dry the potatoes thoroughly on paper towels before proceeding to the next step.
  • Toss potato strips with the oil in a bowl. Mix the spices, salt and pepper in a small bowl and mix them with the sweet potatoes.
  • Spread the sweet potato fries out in a single layer on 2 rimmed baking sheets.
  • Place the baking sheets into the oven, using the top and middle racks. Get your timer handy, you’re going to need it. Total oven time is about 25 minutes give or take, and you’ll be flipping fries and rearranging baking sheets throughout the whole time.
  • After 8 minutes, take out the pans and flip the fries with a spatula. Don’t worry, they’re not supposed to look done or crispy yet.
  • When you return the pans to the oven, be sure to switch their locations – top/middle and also front/back of the pan.
  • Bake for about 10 minutes, until the bottoms are brown and crisp. Flip the fries back to the first side and return the pans to the oven, doing the top/middle, front/back switcheroo once again.
  • Bake for a final 8 minutes or so until the fries are brown and crispy all over, to suit your taste.
  • Serve hot.
Sweet Potato Fries
If you had to pick one for the rest of your life, would it be regular French fries, sweet potato fries, or onion rings? Tell me in the Comments
0 Comments

Friday is National Chocolate Covered Raisins Day

3/24/2017

0 Comments

 
I Like Chocolate Covered Raisins by Don DeBold
Cheers and many happy returns to our little chocolatey friends on their special day! I admit it has only just occurred to me that one can home-make chocolate covered raisins, but of course you can. Let’s get on that right away!

Follow the link to The Nibble’s great how-to with recipe, photos, and historical info about Raisinets. 
We can’t let a Raisin Appreciation opportunity go by without a musical tribute from the California Raisins singing their cover of the Motown classic I Heard It Through the Grapevine. Yes, you should absolutely sing along and do the choreography too.
​And then we invite you to enjoy one of the early California Raisin commercials – way back from ye olde mid-80s. Oh yeah, these raisin fellas were big stars back in the day – yuuuuuge.
​
0 Comments

Fish for Dinner: Pan Fried Rainbow Trout with Pineapple Salsa

3/22/2017

0 Comments

 
Pan Fried Rainbow Trout with Pineapple Salsa
The Fish for Dinner feature chronicles my education in the ways of fish-cookery. I grew up avoiding fish other than sticks and was well into adulthood before adding the real deal into my diet, usually at a restaurant. The impetus to cook more fish at home comes from joining a sustainable fish program through Hooked on Fish, like a CSA that delivers boxes of farm-fresh produce but with seafood instead. I’ll tell you what we made and how we liked it, plus occasionally a few tips and fishin’ tunes too.
The Occasion: A cold but sunny day provokes wishful thinking about summer cookouts. Fruit salsas are awesome alongside most grilled meats and fishes and this was no exception, even though the fish was cooked indoors and we had to wear sweaters.
​
This is quick enough to pull together after work for a weeknight dinner and tasty enough to inspire requests for a repeat appearance.
The Playlist: This is a weird one from Brakes (aka brakesbrakesbrakes), asking the age-old question: Porcupine or Pineapple? (Spiky, spiky!) It cracks me up. Hopefully you too. 
The Verdict: Fresh, light, and juicy! The pineapple is an unexpected yet welcome surprise. I purposely made my salsa un-spicy this time, taking into consideration the tender palates of my dinner companions, but you can dial that up or down based on your own preferences by adjusting the quantity of jalapeño. We are a cilantro-free household so used chopped fresh parsley instead. Suit yourself!

Click on the photos to enlarge them and read the captions.
Printable Recipe- Pan Fried Rainbow Trout with Pineapple Salsa
File Size: 570 kb
File Type: pdf
Download File

Pan Fried Rainbow Trout with Pineapple Salsa
Recipe source: Sweet and Savoury Pursuits, inspired by Two Peas and Their Pod
Servings: 4 

INGREDIENTS:

For the Pineapple Salsa:
  • 1 cup diced fresh pineapple
  • 1/2 cup diced red pepper
  • 1/4 cup chopped cilantro
  • 1/8 cup finely chopped red onion
  • 1 tablespoon finely chopped jalapeño pepper, seeded
  • 1 clove small garlic minced
  • Juice of 1 small lime
  • 1 teaspoon extra-virgin olive oil
  • Salt to taste

​For the Trout:
  • 4 portions of rainbow trout or salmon fillets
  • Salt and pepper to taste
  • 2 teaspoons vegetable oil

​DIRECTIONS:
  • In a medium bowl, combine all of the salsa ingredients. Season with salt and stir well. Cover the salsa and let sit at room temperature or chill in the refrigerator until serving.
  • Heat oil in a non-stick skillet over medium-high heat.
  • Season fish with salt and pepper. Add the fish fillets to the fry pan, skin side down.
  • Fry for 2 to 3 minutes, then carefully flip over and fry for another 2 minutes. For thicker fillets fry for 1 minute longer or until fish is cooked.
  • Transfer the trout to plates and serve with pineapple salsa.
0 Comments

What’s for Dinner? Lemon Fennel Chicken Traybake

3/20/2017

0 Comments

 
Meyer Lemon Fennel Chicken Traybake
The Occasion: Super-simple one-pan meal. Perfect for a quick weeknight supper.

Easy, yes, but you do need a little advance work: Marinate the chicken a day ahead or in the morning before you leave for work.

Why This Works: There’s something appealing about this no-fuss approach, one of the signature characteristics of a Nigella Lawson recipe, of which this is one. After marinating for hours, throw everything onto one sheet pan and bake until it’s done. Boom.

Also, versatility. We used some nice-looking Meyer lemons that were on sale at the grocery, but almost any citrus will work. Nigella’s original recipe calls for Seville oranges, which I could not find for love or money. Regular oranges or lemons will do just fine, if they are thin-skinned.
The Playlist: It’s a bit of a reach, but please go with me. Today’s recipe comes from Nigella Lawson, the (self-proclaimed with tongue planted firmly in cheek) British domestic goddess, cookbook author, and television personality. Pleasure, ease, and decadence are her culinary calling cards. 

​I don’t think she has a hit record out but I did reacquaint myself with former bad boy/wunderkind violinist Nigel Kennedy. Aside from having similar first names, they seem to share an irreverence towards the expected. Here are two of Kennedy’s tracks from the jazz/pop world instead of his usual classical milieu.
The Verdict: For me, this was a 95% win. Roasting the fennel, onion, and citrus together makes a heavenly taste treat, and chicken thighs complement the mix. Per Nigella’s recipe, you’re supposed to make a sauce with the pan drippings, but I had none to speak of, just burnt bits of onion and smoky, charred oil. There was nothing usable to make a sauce with, and this is a dish that really needed a little something on top to add back some moisture. A few squeezes of lemon was a fine solution, but next time I will plan to make a separate pan sauce with orange juice, chicken broth, and a little butter.

​Click on the photos to enlarge them and read the captions.
Printable Recipe- Chicken Traybake with Bitter Orange or Lemon and Fennel
File Size: 627 kb
File Type: pdf
Download File

Chicken Traybake with Bitter Orange and Fennel
Recipe source: Nigella Lawson, featured in SIMPLY NIGELLA
 
INGREDIENTS:
  • 2 large bulbs fennel (approx. 2 pounds give or take)
  • 3 ounces extra-virgin olive oil, plus more for drizzling on the chicken when cooking
  • 2 Seville oranges (zested and juiced, or zest and juice of 1 eating orange and juice of 1 lemon, about scant half cup of juice)
NOTE: Feel free to substitute citrus here. I used Meyer lemons, and I think regular thin-skinned lemons and/or oranges would be just fine in this recipe.
  • 2 teaspoons sea salt flakes
  • 4 teaspoons fennel seeds
  • 4 teaspoons Dijon mustard
  • 12 chicken thighs with skin and bone still on (preferably organic)

DIRECTIONS:
  • Remove the fronds from the fennel and save them in the fridge for serving. Cut the bulbs of fennel into quarters and then cut each quarter, lengthwise, into 3. Set aside.
  • Place a large freezer bag inside a wide-necked measuring jug or something similar; pour in the oil, add the citrus zest and juice (and lemon juice, if using), and spoon in the salt, fennel seeds and mustard. Stir briefly to mix.
  • Add a quarter of the chicken pieces, followed by a quarter of the fennel pieces, and so on until all chicken parts and vegetables have been added.
  • Seal the bag tightly at the top, then lay the bag flat in a baking dish or on a plate so that the marinade covers as much chicken as possible. Marinate in the fridge overnight or up to 1 day.
  • When ready to cook, pour the contents of the bag – marinade and all – into a large shallow roasting pan or sheet pan. Arrange the chicken pieces so that they are sitting, skin-side up, on top of the fennel. Leave it for 30 minutes or so, to come up to room temperature while you preheat the oven to 400ºF.
  • Drizzle 1 tablespoon canola oil onto the chicken, and cook in the oven for 1 hour, by which time the fennel will be soft and the chicken cooked through and bronzed on top.
Note: Start checking for doneness about 15 minutes earlier; use a meat thermometer.
  • Put the chicken and fennel onto a warmed serving plate.  
  • Make a pan sauce: Put the pan over a medium heat or pour the juices into a saucepan. Boil the juices, stirring as you watch it turn syrupy; this should take about 2 – 5 minutes.
  • Or make a separate pan sauce with equal parts orange juice and chicken broth/stock. Bring to a boil, reduce to a simmer, and cook until it thickens a bit, approx.. 5 minutes. Add 1 tablespoon of butter, stir to melt.
  • Pour the reduced sauce over the chicken and fennel, and then tear over the reserved fennel fronds.
Lemon Fennel Chicken Traybake
How do you feel about fennel? Seems like a love-it or hate-it vegetable. No in between.
0 Comments

Afternoon Dance Break – Hit the Floor

3/17/2017

0 Comments

 
Picture
Irish céllí dance by Jesse Millan
Afternoon Dance Break is a recurring feature that invites you to get up from the desk, crank up the tunes, and dance your fool head off for a few minutes before resuming the daily grind. Want more dancing? Find past ADBs here.

Don’t think. Don’t talk. Just dance.

Click on the artists' names to learn more about them. Eva Shaw & Mally Mall + Laura Mvula & NK-OK

0 Comments

Sweet Bites: Port Ganache-Glazed Brownies with Dried Cherries

3/16/2017

0 Comments

 
Port Ganache Glazed Brownies with Dried Cherries
The Occasion: Anytime you want to treat yo self. Or claim your crown as the most awesome treat-baker in the world and bake for others. Mm-hm, they are just that good. We brought them to a Mardi Gras party and yes indeed, the good times did roll!
Why This Recipe Works: Three reasons: 1) Cooking with booze (which we seem to do an awful lot); 2) Treasure-hunting for marinated cherries buried within the dark, luscious brownies; and 3) All that rich, creamy chocolate piled on top. Don’t skimp!
The Verdict: Thin, dense, and sweet. That sounds like a punchline to a “that’s how I like my lovers” joke, but no, we’re still talking about dessert. And these treats cannot be beat! Go on and get you some.

Click on the photos to enlarge them and read the captions.
Printable Recipe- Port Ganache Glazed Brownies with Dried Cherries
File Size: 546 kb
File Type: pdf
Download File

Port Ganache-Glazed Brownies with Dried Cherries
Recipe source: Fine Cooking

INGREDIENTS:

For the port-soaked dried cherries:
  • 1/2 cup dried cherries, very coarsely chopped (or whole dried cranberries)
  • 1/3 cup tawny port

For the brownies:
  • 8 ounces (1 cup) unsalted butter; plus more softened butter for the pan
  • 3 ounces (2/3 cup) unbleached all-purpose flour; plus more for the pan
  • 2 cups granulated sugar
  • 4 large eggs, at room temperature
  • 1/2 teaspoon pure vanilla extract
  • 2-1/2 ounces (3/4 cup) unsweetened natural cocoa powder
  • 1/2 teaspoon baking powder
  • 1/2 teaspoon table salt

For the port-ganache topping:
  • 1/2 cup tawny port
  • 1/2 cup heavy cream
  • 6 ounces semisweet chocolate, finely chopped  (about 1 cup)

DIRECTIONS:

Soak the cherries:

In a small saucepan, bring the cherries and port to a boil over medium heat. Reduce the heat to low and cook for 2 minutes. Take the pan off the heat and let cool to room temperature.

Make the brownies:

Position a rack in the center of the oven and heat the oven to 350° F. Butter and flour a 9-inch-square metal baking pan, tapping out the excess flour. (I cover bottom of pan in aluminum foil first so that it’s easier to remove from the pan once baked.)

Melt the butter in a medium saucepan over medium heat. Remove the pan from the heat. Whisk or stir in the sugar, followed by all four of the eggs and the vanilla.

Stir in the flour, cocoa, baking powder, and salt, starting slowly to keep the ingredients from flying out of the pan and stirring more vigorously as you go. Stir until the batter is smooth and uniform, about 1 minute.

If you're using the port-soaked cherries, stir them in at this time, along with any remaining liquid from the saucepan.

Spread the batter into the prepared baking pan, smoothing it so it fills the pan evenly. Bake until a toothpick or a skewer inserted 3/4 inch into the center of the brownies comes out with just a few moist clumps clinging to it, about 40 minutes. Let the brownies cool completely in the pan on a rack.
​
Make the topping:

In a small saucepan over medium heat, bring the port to a boil. Boil until the port is reduced to 2 tablespoons, 5 to 10 minutes. Pour it into a small cup or bowl. Thoroughly rinse the pan.

​Bring the heavy cream to a boil in the pan over medium-high heat, stirring occasionally. Take the pan off the heat. Stir in the chopped chocolate and reduced port until the mixture is smooth and the chocolate is melted.

Pour the ganache into a bowl and cover the surface with plastic wrap to prevent a skin from forming. Put the bowl in a cool part of the kitchen and let the ganache cool to room temperature, stirring occasionally. When it's cool, spread it evenly over the cooled brownies and give the ganache about an hour to set (it will still be quite soft and gooey). Cut into 16 squares – or smaller sizes as this is quite rich. Keep the brownies at room temperature, well wrapped. You can freeze them, too.
Port Ganache Glazed Brownies with Dried Cherries
Click photo to visit Entertaining Vintage for a closer look at the dessert plates and cordial glasses
0 Comments

Tex-Mex Toppings: Pickled Corn, Salsa Verde, and Chipotle Ranch Dressing

3/14/2017

0 Comments

 
The Occasion: Great Go-Withs for Taco Night

Game Night and Taco Night collided recently at our house for an evening of riotous fun with friends. A mix-and-match buffet of tacos and green salad gave our guests plenty of options to customize their plates: two proteins, multiple cheeses and salsas, various veggies, and a choice of salad dressing. Everyone got exactly what they wanted. (This is a good tactic when cooking for guests with dietary restrictions – it’s all about having options.)  Here’s the spread:
​
  • Chicken Carnitas and Grilled Marinated Flank Steak (this recipe is a perennial favorite in our house – try it!)
  • Green Salad with chopped jicama, sweet peppers, cukes and tomatoes
  • Mix-ins for Tacos and/or Salads: Homemade pickled corn; Seasoned black beans; Toasted pepitas
  • Cheeses: Shredded Chihuahua and Manchego cheeses
  • Veggies: Grilled onions and peppers; shredded lettuce; chopped tomatoes
  • Sauces/Dressings: Homemade salsa verde; Smoky red salsa from a jar; Guacamole; Chipotle ranch salad dressing; Simple vinaigrette
  • Corn and flour tortillas; Tortilla chips 

Click on the photos to enlarge them and read the captions.
Everyone was united with love for the salsa verde, the pickled corn, and the chipotle ranch salad dressing.

​These stellar condiments are so good you’ll be proud to serve them for a family dinner, a fancy dinner, or just you and a bag of tortilla chips in front of the TV. 

Why These Work: All three are quick, easy, and make ahead – souped-up versions of your Tex-Mex favorites improved by home cooking. 

I’ve expressed my love for pickled vegetables before, and likely will again. Love the tart, briny stuff! This recipe is a keeper. It was so good with off-season ears of corn I’m eager to try it again at the height of summer. 

Pickled Corn
Recipe source: Alison Roman for Bon Appétit
 
Combine 2 small dried chiles, 1 seeded thinly sliced jalapeño, 1/4 thinly sliced medium red onion, 2 cups corn kernels (from about 2 ears), 1/4 cup fresh cilantro leaves with tender stems (NOTE: We’re not cilantro fans, so substituted Mexican oregano; parsley would also be fine), 1/4 cup fresh lime juice, and 1/4 teaspoon coarsely ground black pepper in a heatproof 1-quart jar.

Bring 1/2 cup white wine vinegar or apple cider vinegar, 2 teaspoons kosher salt, 1 teaspoon sugar, and 3/4 cup water to a boil; pour over corn. (Add water to cover, if needed.)
​
Seal jar. Let cool; chill. Will keep up to 1 month.  Click on the photos to enlarge them and read the captions.
Printable Recipe- Pickled Corn
File Size: 512 kb
File Type: pdf
Download File


The Salsa Verde is a perfect example of the pure power of fresh ingredients simply prepared. We roasted tomatillos and jalapeno, then whizzed them up in the blender to make a thick puree. Just before serving I added finely chopped white onion, chopped parsley (or cilantro if you prefer), a little water, and stirred it all up. Magnifico!

Salsa Verde (Roasted Tomatillo Salsa)
Recipe source: Rick Bayless, Fiesta at Rick’s cookbook
Yield: 1 cup
 
INGREDIENTS:
  • 8 ounces (3 to 4 medium) tomatillos, husked and rinsed
  • Fresh hot green chiles to taste (1 or 2 serranos or 1 jalapeno), stemmed
  • 2 large garlic cloves, peeled
  • 6 sprigs of fresh cilantro (thick bottom stems cut off), roughly chopped
  • 1 small white onion, finely chopped
  • Salt

DIRECTIONS:
  • Roast the tomatillos, chile(s) and garlic on a rimmed baking sheet 4 inches below a very hot broiler, until blotchy black and softening (they’ll be turning from lime green to olive), about 5 minutes. Flip them over and roast the other side.
  • Cool, then transfer everything to a blender, including all the delicious juice the tomatillos have exuded during roasting. Add the cilantro and 1/4 cup water, then blend to a coarse puree. Scoop into a serving dish.
  • Rinse the onion under cold water, then shake to remove excess moisture. Stir into the salsa and season with salt, usually 1/2 teaspoon.
  • To make ahead: After pureeing the vegetables in the blender, store in refrigerator for up to 5 days. At serving time, add the chopped onion and herbs plus a little water to thin the puree as needed, mix and taste. Add salt as needed, usually ½ teaspoon.
Click on the photos to enlarge them and read the captions.
Printable Recipe- Salsa Verde
File Size: 527 kb
File Type: pdf
Download File


PictureIngredients for Chipotle Ranch Salad Dressing
And finally the salad dressing. Ranch dressing has long been relegated to the kids table or not-so-adventurous eaters. Well, it’s time to take another bite. This is another great example of homemade beating store-bought with handfuls of fresh green herbs and a little zing from one or two canned chipotles in adobo. Really good!
 
Chipotle Ranch Salad Dressing
Recipe source: Ree Drummond (The Pioneer Woman) for Food Network
 
INGREDIENTS:
  • 1 cup mayonnaise
  • 1/2 cup sour cream 
  • 1/4 cup Italian (flat-leaf) parsley leaves, minced 
  • 2 tablespoons fresh dill, minced 
  • 1 tablespoon minced fresh chives 
  • 1 teaspoon Worcestershire sauce 
  • 1/2 teaspoon freshly ground black pepper 
  • 1/2 teaspoon white vinegar 
  • 1/4 teaspoon paprika 
  • 1/4 teaspoon kosher salt 
  • 1/8 teaspoon cayenne pepper 
  • Dash hot sauce 
  • 1 to 2 chipotle peppers 
  • 1 clove garlic, smashed 
  • 1/4 to 1/2 cup buttermilk (as needed for desired consistency) 
 
DIRECTIONS:
  • In a food processor or blender, combine the mayonnaise, sour cream, parsley, dill, chives, Worcestershire sauce, black pepper, vinegar, paprika, salt, cayenne, hot sauce, chipotle peppers and garlic.
  • Add the buttermilk to the desired consistency and blend.
  • Chill for a couple of hours before serving, thinning with more buttermilk if needed.

Printable Recipe- Chipotle Ranch Salad Dressing
File Size: 538 kb
File Type: pdf
Download File


So there you have it, a trio of Tex-Mex toppings to dress up your tacos, salads, barbecue plates, and who knows what – let your imagination and your taste buds run free! The salad dressing makes a good dip for crudité, or spoon a little on top of a baked potato – yum! The salsa verde would be a great side sauce for pork tenderloin or grilled fish. And the pickled corn is great by the spoonful. Enjoy!
0 Comments

Drinkies: Tart Cherry Margarita

3/10/2017

0 Comments

 
Tart Cherry Margarita
The Occasion: Knock knock. It’s the weekend. Let it in. 

The Backstory: Ilise and I hosted a fun and lively Game Night/Taco Night recently which you’ll read more about next week. But the part you need to know right now is this super-tasty cherry margarita. Mm-hm! Tart and refreshing, yes please and thank you. 
Many weeks ago we bought a jug of tart cherry juice, used a few tablespoons, and it’s languished in the fridge ever since, waiting for inspiration to strike and make use of the rest of it. God bless inspiration, because this margarita is The Right Answer. Antioxidant-rich too!
The Verdict: The Taco Night Gamers loved it and there’s a very good chance you will too. Be sure to use tart cherry juice – this is perfect precisely because it’s not too sweet. Cheers, and enjoy the weekend! 

Click on the photos to enlarge them and read the captions.
Printable Recipe- Tart Cherry Margarita
File Size: 538 kb
File Type: pdf
Download File

Tart Cherry Margarita
Recipe source: Ilise Goldberg
Makes one cocktail

INGREDIENTS:
  • 1 ½ ounces Tequila
  • ¾ ounce Cointreau
  • ¾ ounce Lime Juice
  • 2 ¼ - 2 ½ ounces Tart Cherry Juice

DIRECTIONS:
  • Mix ingredients together and pour over ice. Garnish with lime.
  • To make a pitcher, just multiply the ingredients by 8-10. 
Tart Cherry Margarita
Is there a refreshment you're especially looking forward to this weekend? (Liquid or otherwise) Tell us in the Comments
0 Comments

What's to Eat?  Asparagus, Red Pepper, and Spinach Salad with Goat Cheese

3/8/2017

0 Comments

 
Asparagus, Red Pepper, and Spinach Salad with Goat Cheese
Get your springtime produce on with Asparagus, Red Pepper, and Spinach Salad with Goat Cheese
The Occasion: Brown bag lunch. Or a light meatless supper. Also nice as part of a brunch menu. 
Why This Works: Goodies among the greens. Nothing outrageous or exotic, no mysterious superfoods or anything like that – just tasty bites of tender asparagus, pan-seared peppers and tangy goat cheese.  
The Verdict: Easy, in-season, and satisfying. With asparagus and baby spinach making a comeback in the produce aisle, now is the time to get your salad fix. Click on the photos to enlarge them and read the captions.
Printable Recipe- Asparagus, Red Pepper and Spinach Salad with Goat Cheese
File Size: 555 kb
File Type: pdf
Download File

Asparagus, Red Pepper, and Spinach Salad with Goat Cheese
Recipe source: Best American Side Dishes from the Editors of Cook’s Illustrated (cookbook)
Serves 4 to 6

INGREDIENTS:
  • 6 tablespoons extra-virgin olive oil, divided
  • 1 small red bell pepper, cored, seeded, and cut into ¼-inch strips
  • 1 pound asparagus, tough ends snapped off and cut on the diagonal into 1-inch pieces
  • Salt and pepper
  • 1 medium shallot, thinly sliced
  • 1 tablespoon plus 2 teaspoon sherry vinegar
  • 1 teaspoon minced garlic
  • 6 ounces baby spinach
  • 4 ounces goat cheese, cut into small chunks

DIRECTIONS:
  • Heat 2 tablespoons of the oil in a skillet over high heat until it begins to smoke. Add the red pepper and cook until lightly browned, about 2 minutes, stirring only once, after 1 minute.
  • Add the asparagus, ¼ teaspoon salt, and 1/8 teaspoon pepper and cook until the asparagus is browned and almost tender, about 2 minutes, stirring only once after 1 minute.
  • Stir in the shallot and cook until softened about 1 minute, stirring occasionally.
  • Transfer the vegetables to a large plate and cool for 5 minutes.
  • Meanwhile, whisk the remaining 4 tablespoons oil, the vinegar, garlic, ¼ teaspoon salt and 1/8 teaspoon pepper in a medium bowl until combined. (OR shake them all together in a jar with a lid.)
  • In a large bowl, toss the spinach with 2 tablespoons of the dressing and divided among individual plates.
  • Toss the asparagus mixture with the remaining dressing and place a portion over the spinach.
  • Divide the goat cheese among the salads and serve immediately.
 
0 Comments

Sweet Bites: Chocolate Layer Cake with White Chocolate Mousse Filling and Chocolate Fudge Frosting

3/3/2017

1 Comment

 
Chocolate Layer Cake with White Chocolate Mousse Filling and Chocolate Fudge Frosting
Chocolate Layer Cake with White Chocolate Mousse Filling and Chocolate Fudge Frosting (white chocolate trees optional)
The Occasion: This cake is ideal for special occasions like birthdays or celebrations. IMO this is not an everyday dessert. (However if it’s everyday for you, I’ll be right over. With my fork. Every day.)

We made it for the dessert course at our recent Foodies Group dinner; the theme was Rocky Mountain High. Read about it here. We wanted something large and impressive, like the Rockies themselves, and a towering chocolate cake seemed like a good starting point. Adding a mountain of snowy white chocolate mousse in between layers evokes, you know, snow on the mountains – plus it tastes damn delicious. We went a little crazy with add-ons for our Foodies presentation – as one does. More about that below.
Testing, Testing, 1-2-3: We tested the recipe ahead of time with an informal focus group – namely our extended family. While they were complimentary (and ravenous – that cake went fast!) we learned a few things and made some changes for the final version which is presented here. 
Lesson #1: This cake needs plenty of time to chillax in between the different phases. Specifically, it’s important to chill the mousse for a good long time before slathering it on between the cake layers, and it’s even more important to chill the cake + mousse before frosting the cake. Otherwise the mousse will ooze out the sides. Still delicious but messy and hard to work with.
​
Lesson #2: With a bonanza of tasty frostings to choose from it’s hard to go wrong. But we wanted to achieve soul-satisfying perfection, so swapped out the test cake’s cream cheese based chocolate frosting for a rich chocolate fudge. Mmmm. Definitely the right call. 
Chocolate Layer Cake in a Ski-Scape
Gilding the Lily: Honestly, the cake + mousse + frosting combo is impressive enough by itself. There really is no need to make chocolate bears and moose pops and candy evergreens. And the skiers? Way over the top.

​But excess is the name of the game for our Foodie group, and so we did.

We used candy-making molds bought online and cookie cutters to make the shapes. Super easy. Take a look. Click on the photos to enlarge them and read the captions.

The Verdict: This is a truly excellent chocolate cake, rich, moist and decadent. It ain’t easy or quick, but those are not the only success metrics for a worthwhile kitchen experience. Plan ahead. Ilise took 3 days to complete this cake and boy oh boy was it worth the wait! Be generous with the white chocolate mousse filling. When you think you’ve piled on plenty of mousse, go ahead and add another big scoop. An abundance of delectable, creamy filling is a big factor in this cake’s off the charts approval rating. Is there an upcoming special occasion in your life? Mm-hm. You know what to do. 
Printable Recipe- Chocolate Cake with White Chocolate Mousse and Chocolate Fudge Frosting
File Size: 622 kb
File Type: pdf
Download File

Chocolate Layer Cake with White Chocolate Mousse and Chocolate Fudge Frosting
Recipe source: Delicious Wordflux, slightly adapted by Ilise Goldberg 
 
INGREDIENTS:
  • 1 3/4 cups all-purpose flour
  • 1 3/4 cups sugar
  • 3/4 cups cocoa powder
  • 1 1/2 teaspoons baking powder
  • 1 1/2 teaspoons baking soda
  • 1/2 teaspoon salt
  • 2 eggs
  • 1 cup milk
  • 1/2 cup oil
  • 2 teaspoon vanilla extract
  • 1 cup freshly brewed hot coffee
 
DIRECTIONS:
  • Heat oven to 350°F.
  • Grease and flour two 9-inch round baking pans.
  • Stir together sugar, flour, cocoa, baking powder, baking soda and salt in large bowl.
  • Add eggs, milk, olive oil and almond extract; beat with an electric mixer on medium speed for 2 minutes.
  • Stir in hot coffee (batter will be thin).
  • Pour batter into prepared pans.
  • Bake 30 to 35 minutes or until wooden pick inserted in center comes out clean.
  • Cool 10 minutes; remove from pans to wire racks. Cool completely.
 
White Chocolate Mousse Filling
  • 6 ounces white chocolate
  • 1 7/8 cups heavy cream
  • 1 tablespoon powdered sugar

​Directions for Mousse:
  • Place a stand mixer bowl and whisk attachment in the freezer.
  • Heat the cream over medium heat until it is hot. 
  • Place white chocolate chips or chopped white chocolate in a bowl and pour the hot cream over the chocolate.  Let it sit for about two minutes.  Whisk the mixture until well combined.  Put the mixture in the refrigerator for a few hours until the cream is cold. 
  • After about two hours check the mixture to see if a white chocolate layer has started to form on the top, if there is one just whisk it to incorporate it.  
  • Place the heavy cream white chocolate mixture in the well-chilled bowl of an electric mixer fitted with the chilled whisk attachment. Whisk on high-speed and as the cream starts to thicken add the powdered sugar, whip until stiff peaks form. Remove the bowl from the mixer.  Chill the white chocolate mousse in the bowl or another container for at least 4 hours.
  • Spread the mousse over the top of the cake base evenly. Use an offset spatula to smooth the top. Place the other cake round over the mousse. Chill for at least 1 hour – longer is better.
 
Fudgy Chocolate Frosting
Recipe source: An Ilise Goldberg adaptation from two sources – Chocolate Chocolate and More and Add A Pinch

INGREDIENTS:
  • 2 ¼ sticks butter (1 cup plus 2 tablespoons)
  • 1 ½ cups unsweetened cocoa powder
  • 5 1/4 cups powdered sugar
  • 1 cup milk
  • 2 teaspoons vanilla extract
  • ½ teaspoon espresso powder

DIRECTIONS:
  • In a saucepan, over low heat, melt butter. Stir in cocoa powder. Mixture will resemble a paste.
  • Mix he espresso powder into the milk to allow it to dissolve
  • Transfer chocolate mixture to a large mixing bowl. With mixer on low speed, add in powdered sugar and milk, alternating the two. Reserve a few tablespoons of milk. If frosting is thick, add in remaining milk. Add vanilla extract.
  • Turn mixer to medium high speed and beat about 5 minutes, until frosting is smooth and creamy.
  • Frost cake or cupcakes as desired.
Chocolate Layer Cake with White Chocolate Mousse Filling and Chocolate Fudge Frosting
Even without decorations this cake looks AWESOME -- who's hungry? (Me, me, me!)
1 Comment

Fish for Dinner: Cod Stew with Chorizo, Leeks and Potatoes

3/1/2017

1 Comment

 
Cod Stew with Chorizo, Leeks and Potatoes
Today marks the beginning of Lent which means, for those who follow the religious food guidelines, eating no meat on Ash Wednesday, Good Friday, and every Friday until Easter. The fishmongers are no doubt giving extra thanks during this time.
Right off the bat I’m going to lead you into temptation with an amazing recipe that features, yes, fish but also indulges in the zesty flavor of chorizo. The Mexican sausage (available in pork or beef) certainly breaks the abstinence rules, so maybe save this dish for a random Tuesday dinner. Honestly, it’s good enough for Saturday night with company. 
This could be a great ‘training wheels’ dish for someone who’s not quite sure if they like fish. There are so many big and bold flavors in here contrasting with the mild, sweet cod you might even forget you’re eating seafood. Longtime fish-lovers will find a lot to like as well.
​
Click on the photos to enlarge them and read the captions.
Printable Recipe- Cod Stew with Chorizo, Leeks and Potatoes
File Size: 570 kb
File Type: pdf
Download File

Cod Stew with Chorizo, Leeks & Potatoes
Recipe source: Fine Cooking via Hooked on Fish
 
INGREDIENTS:
  • 2 small leeks (or 1 large leek)
  • 6 oz. chorizo
  • 1 lb. red potatoes (4 to 5 medium), scrubbed and cut into 3/4-inch cubes
  • Kosher salt and freshly ground black pepper
  • 1 Tbs. olive oil
  • 3 cloves garlic, minced
  • 28-oz. can diced tomatoes, with their juices
  • ½ cup dry white wine
  • ¼ cup chopped fresh flat-leaf parsley
  • 1 lb. cod fillet, cut into four even portions

DIRECTIONS:
  • Trim off the root, the dark greens, and most of the light green parts of the leeks. Chop the leeks into 1/2-inch pieces and rinse thoroughly to remove all the grit.
  • Cut the chorizo in half lengthwise and slice into half-moons about 1/8 inch thick.
  • Put the potatoes in a large saucepan and cover with cold water by 1 to 2 inches. Salt the water, cover partially, and bring to a boil over high heat. Reduce the heat as needed and boil until the potatoes are tender, 10 to 15 minutes; drain. 
  • While the potatoes cook, heat the oil in a large pot (choose one that’s wide enough to hold the fish in a single layer) over medium heat for 1 minute. Add the chorizo and leeks and cook, stirring occasionally, until the chorizo has browned slightly and the leeks are soft, about 6 minutes.
  • Add the garlic and cook for 1 minute.
  • Stir in the tomatoes and their juices, the wine, 1½ cups water, and ½ tsp. salt. Bring to a boil over high heat. Partially cover the pot, reduce the heat to medium, and simmer for 15 minutes. 
  • Add the potatoes, season with salt and pepper, and stir in half of the parsley.
  • Season the cod with salt and pepper, set the fillets on top of the stew, cover, and simmer until just cooked through, 6 to 8 minutes.
  • Using a wide spatula, carefully transfer the cod to shallow soup bowls (the fillets may break apart). Spoon the stew over the cod and serve immediately, garnished with the remaining parsley.

Serves 4
Cod Stew with Chorizo, Leeks and Potatoes
Good enough to eat! You could substitute almost any mild white fish for the cod, if desired.
1 Comment
    When home cooking becomes a special occasion - Recipes, playlists, table tips and more
    Picture

    ​
    Entertaining Vintage

    Vintage treasures for the kitchen, home, collectibles, and gifts

    Categories

    All
    Afternoon Dance Break
    Birthday Greetings
    Cookbook Road Test
    Cool Tunes
    Drinks
    Entertaining Vintage
    Fish
    Kitchen Reno
    Kitchen Tips
    National Days
    Party Planning
    Pop Culture
    Recipe
    Savory Bites
    Supper Club
    Sweet Bites
    The Arts
    Travel
    TV
    Video

    Archives

    May 2020
    April 2020
    March 2020
    August 2019
    June 2019
    May 2019
    April 2019
    March 2019
    February 2019
    January 2019
    December 2018
    November 2018
    October 2018
    September 2018
    August 2018
    July 2018
    June 2018
    May 2018
    April 2018
    March 2018
    February 2018
    January 2018
    December 2017
    November 2017
    October 2017
    September 2017
    August 2017
    July 2017
    June 2017
    May 2017
    April 2017
    March 2017
    February 2017
    January 2017
    December 2016
    November 2016
    October 2016
    September 2016
    August 2016
    July 2016
    June 2016
    May 2016
    April 2016
    March 2016
    February 2016
    January 2016
    December 2015
    November 2015
    October 2015
    September 2015
    August 2015
    July 2015
    June 2015
    May 2015
    April 2015

    RSS Feed

    Subscribe to our mailing list

    * indicates required
Proudly powered by Weebly