Entertain the Possibilities - Home cooking becomes a special occasion; Get recipes, photos, tips and playlists
  • Blog
  • About

What’s for Dinner? Korean Chap Chae and Scallion Pancakes

2/27/2018

0 Comments

 
Korean Glass Noodles (Chap Chae)
Korean Scallion Pancakes (Pa Jun)
In honor of the recently concluded Winter Olympics in Pyeongchang, we hosted a potluck style dinner party with dear friends. Each couple took charge of a dish or two, and everything we ate was gold medal-worthy. So much winning that evening!
The Occasion: Now that the Olympics are over and regular TV viewing is back to normal, you can still enjoy an easy, tasty and healthy Korean dinner at home. 

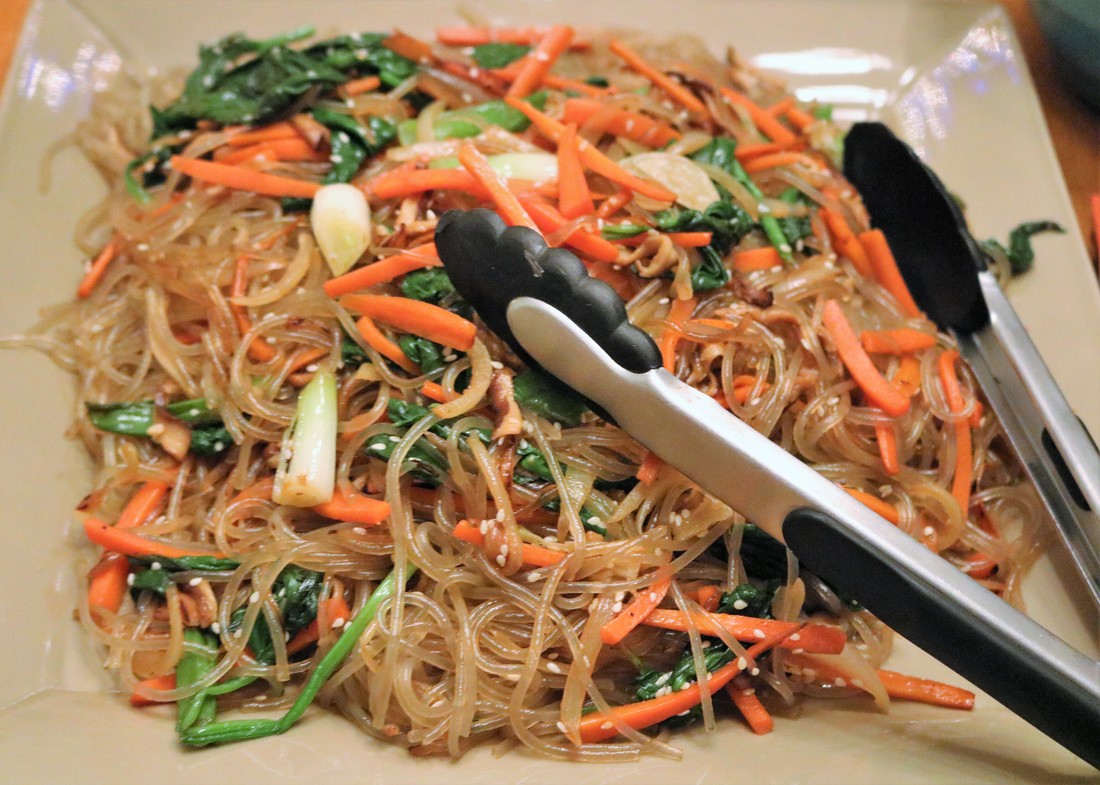
Here’s a high energy K-Pop playlist (stands for Korean pop music) to motivate you while cooking or as you read on.  

Chap chae is an iconic Korean noodle dish often made with beef. I made a meat-free version with lots of veggies that was super-delicious. ​Although it’s easy enough for a weeknight meal, this is just about perfect for the weekend when you can take more time and go to town on the accompaniments. ​
The Recipe: This recipe for Korean Glass Noodles (aka chap chae aka jap chae) comes from recipe developer, cookbook author, and television chef, Jaden Hair at the Steamy Kitchen food blog. Many recipes here boast an Asian flair, and the site also features cooking shortcuts and giveaways. Check it out!
Cheers with Soju-Apple cocktails
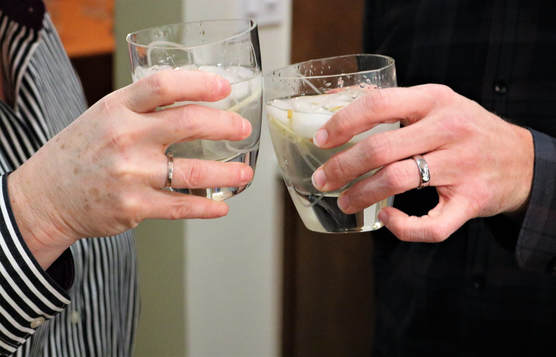
Cheers to a great night, with Soju-Apple cocktails
Picture
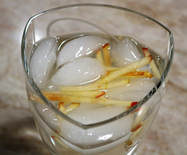
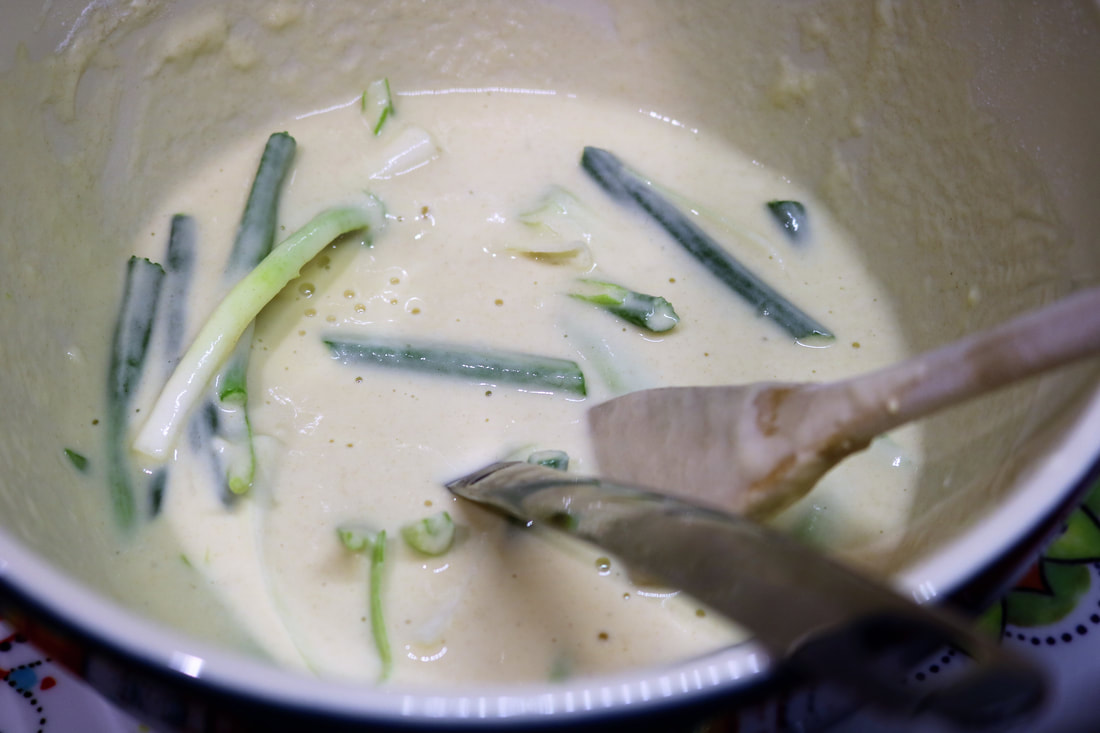
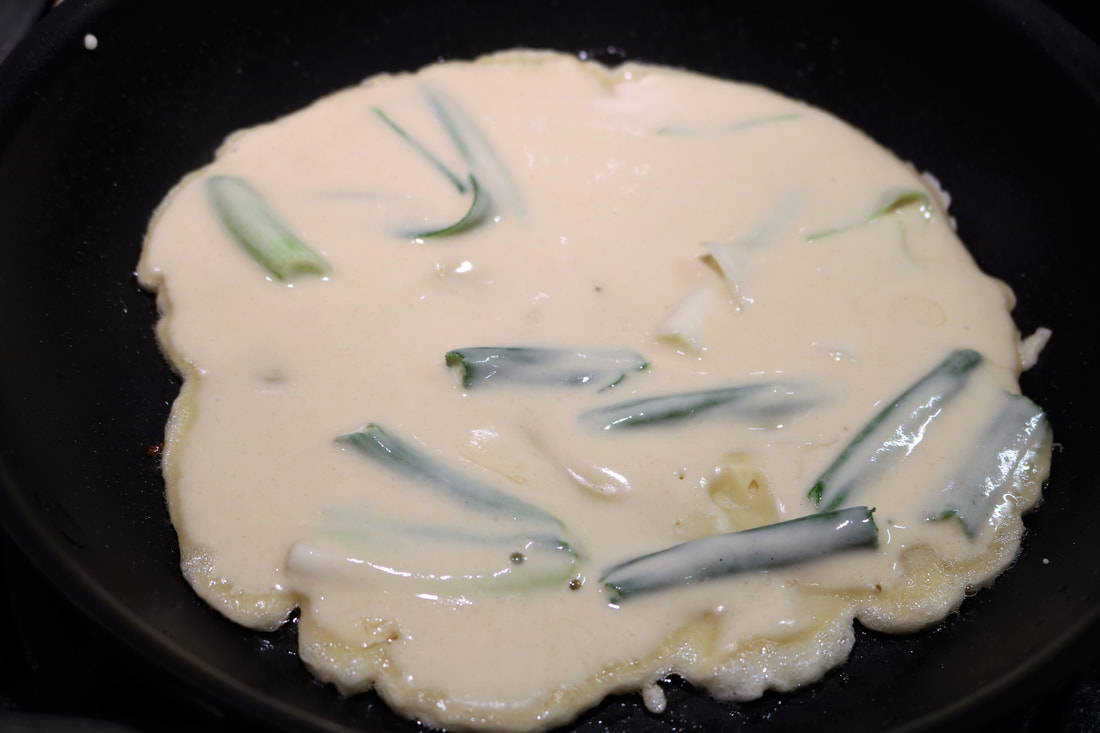
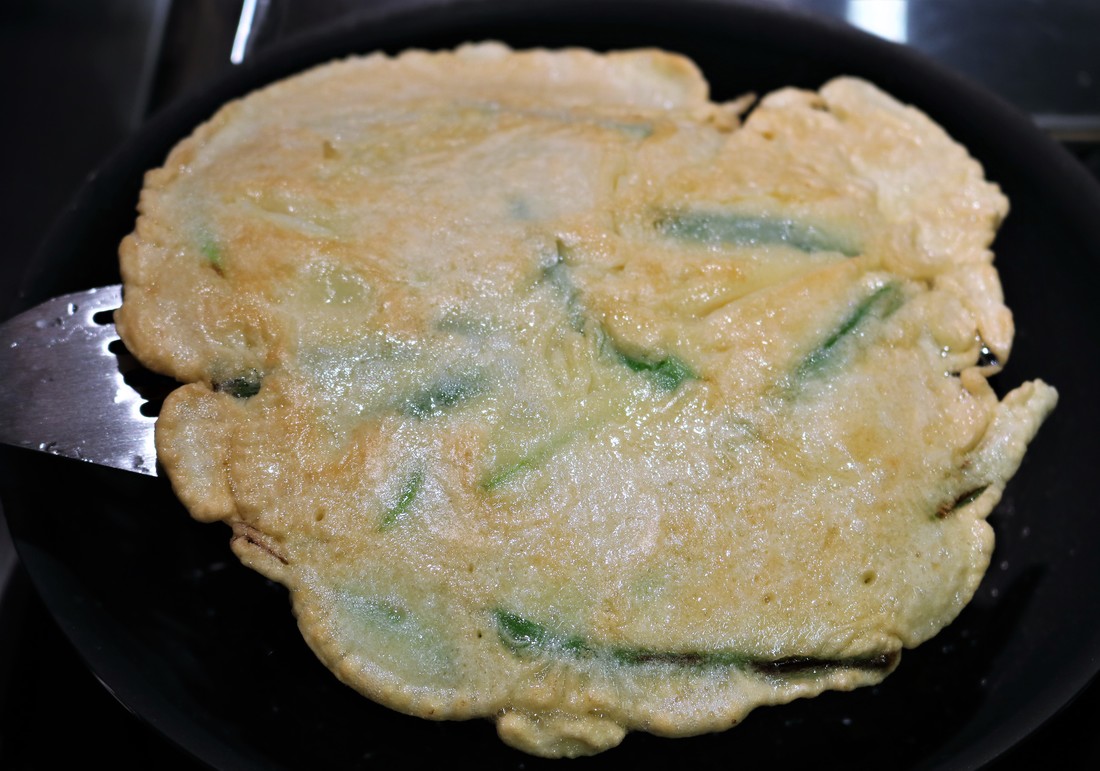
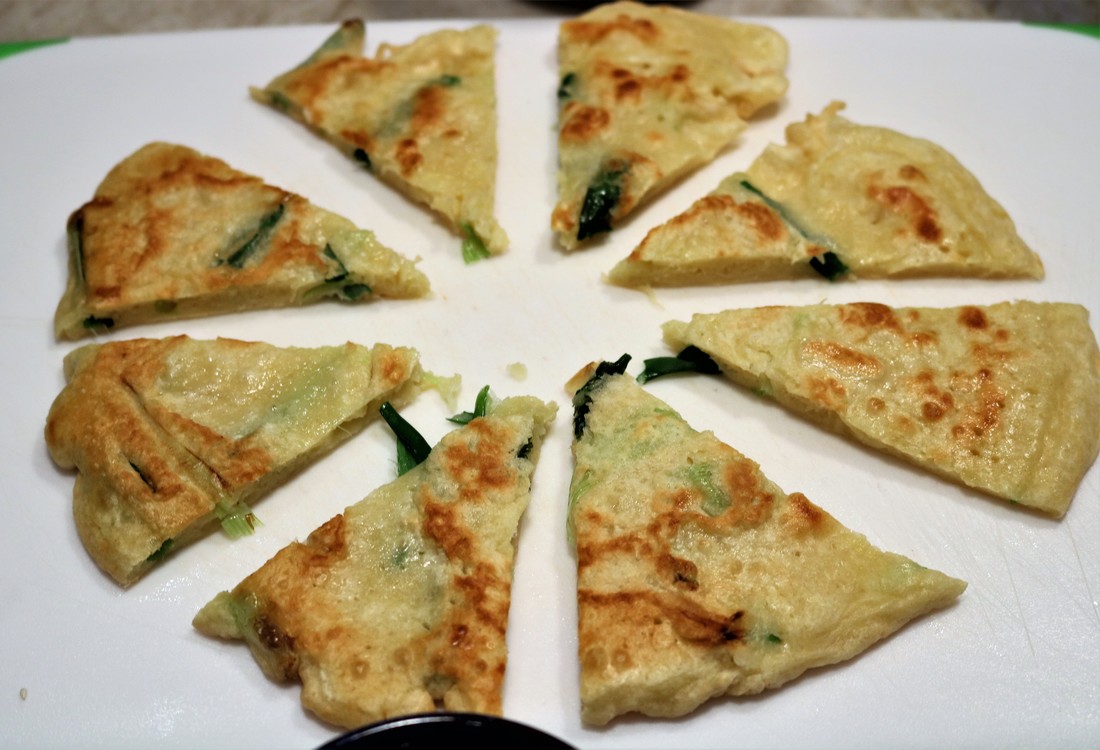
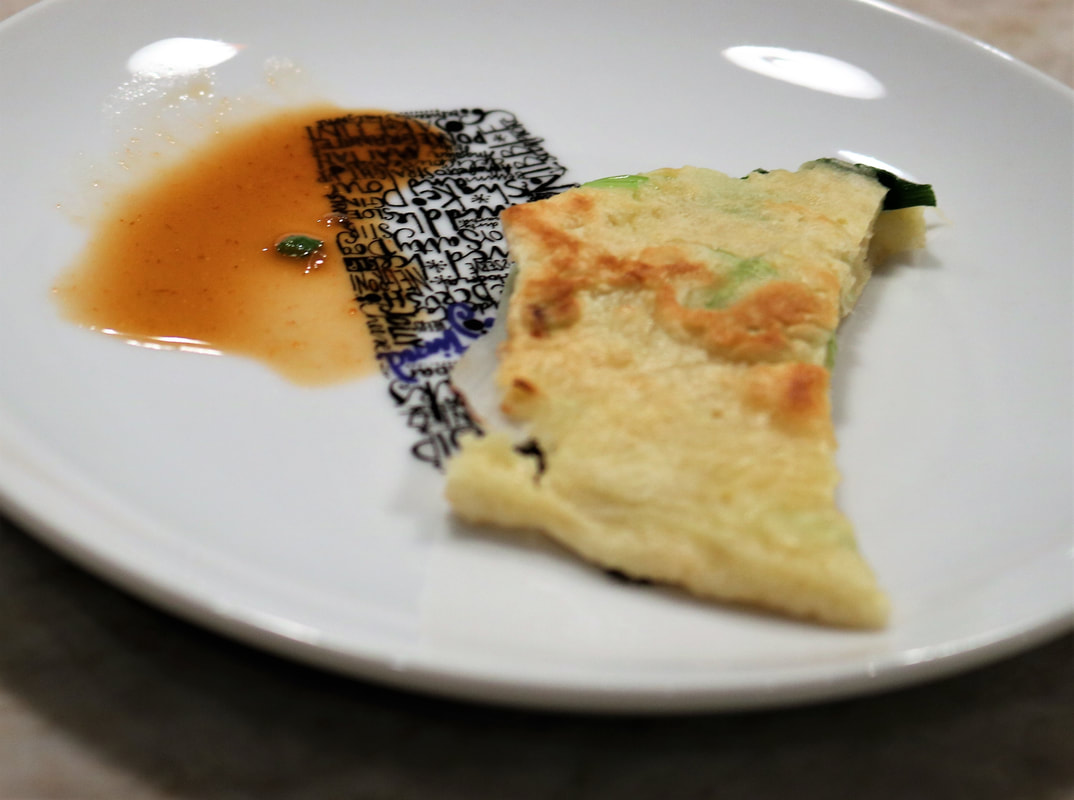
Serve With: We enjoyed a cocktail made with Pink Lady apples and soju (sweet potato liquor, similar to vodka) and scallion pancakes with dipping sauce to start things off right.

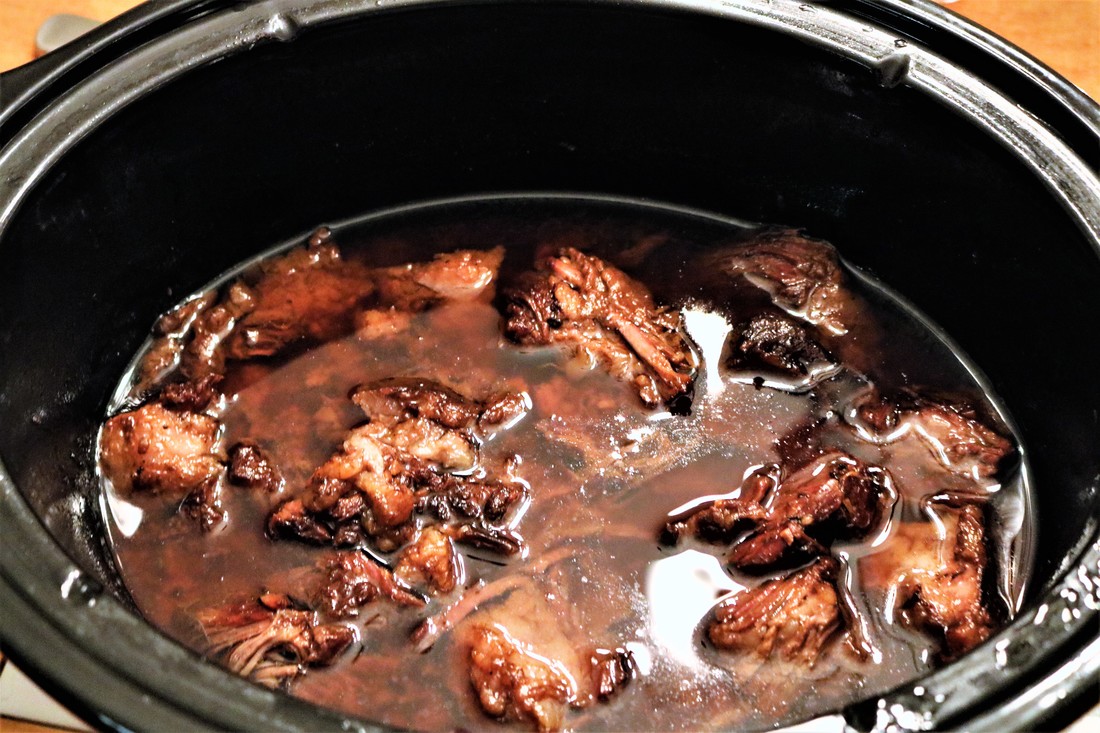
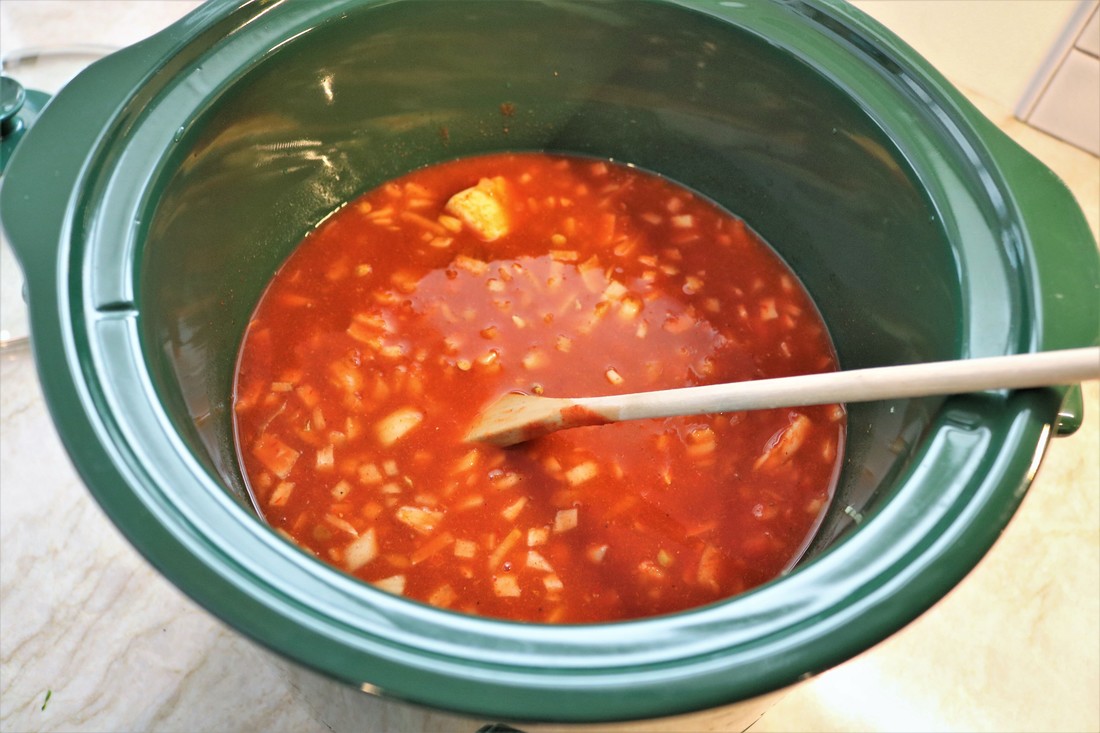
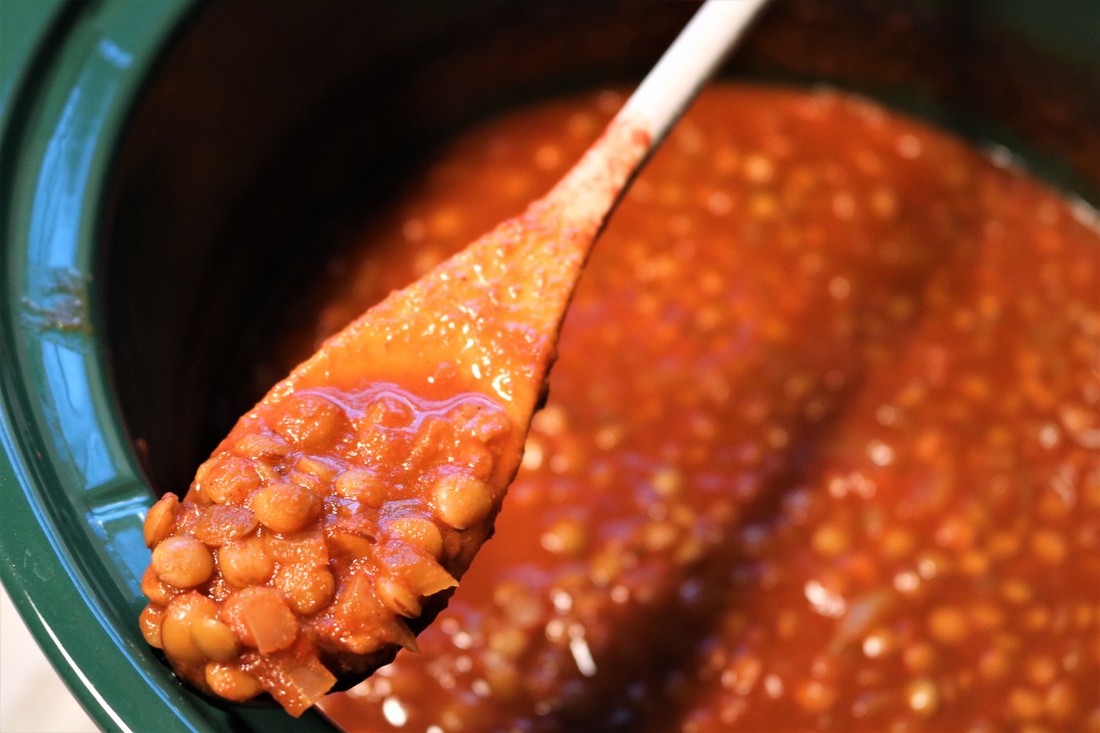
​For the main course Jenna brought some luscious Korean short ribs made in the crockpot. Wowee wow wow, so flavorful and satisfying! The chap chae served alongside helped to soak up all those yummy beef juices. Mmmmmmm! 

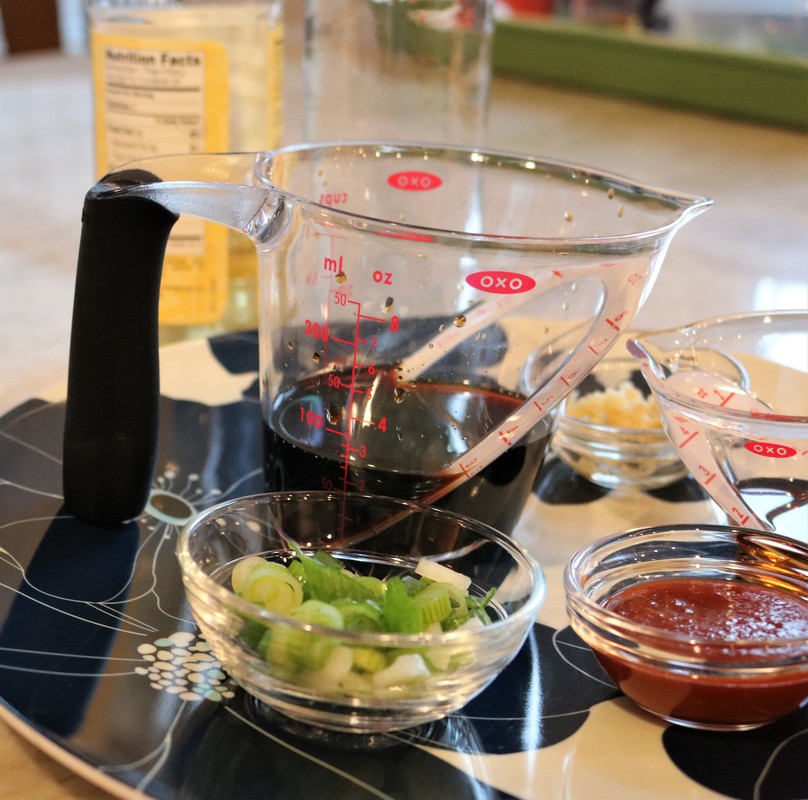
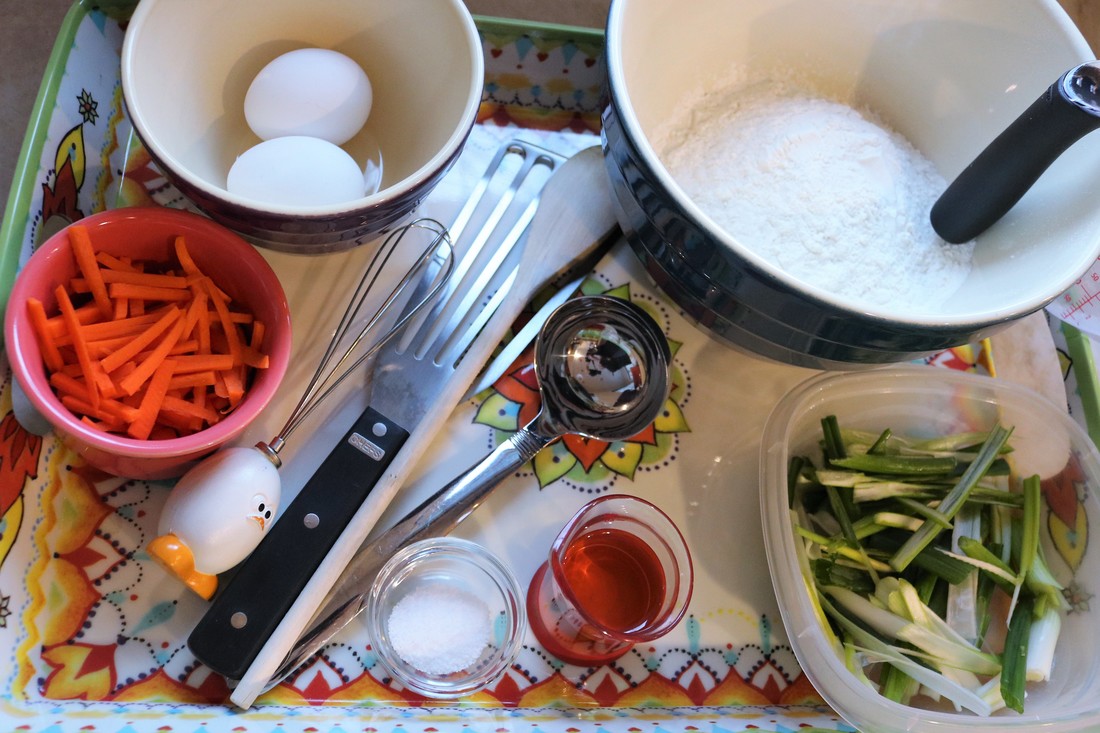
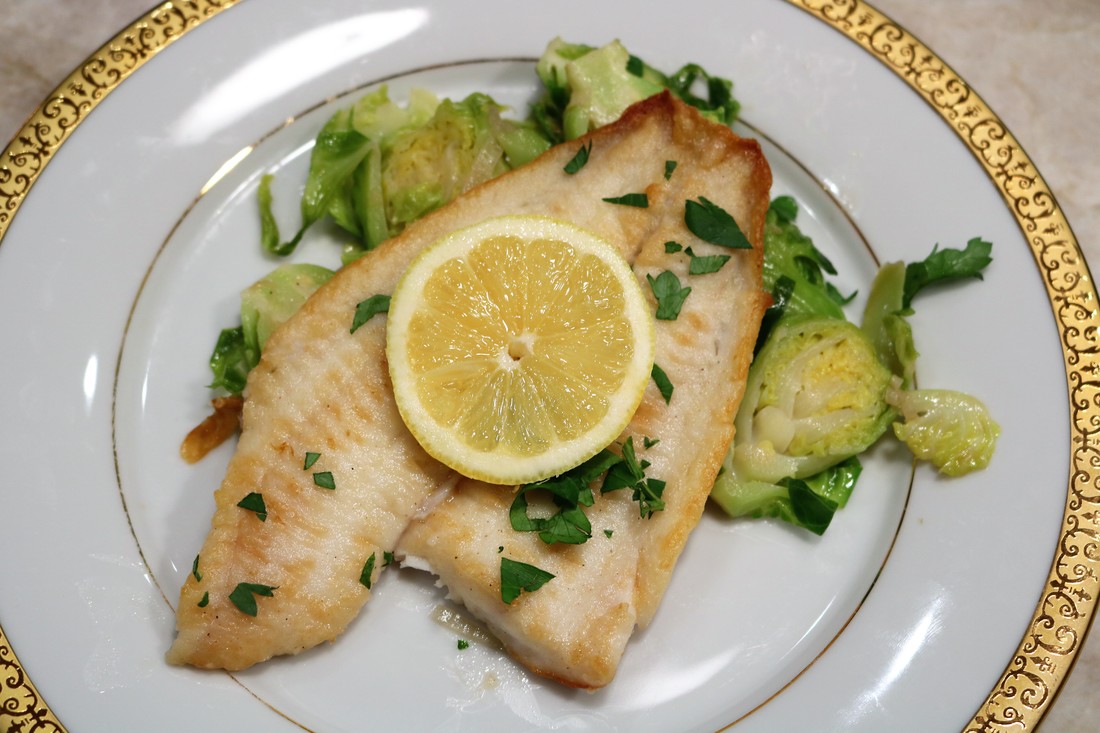
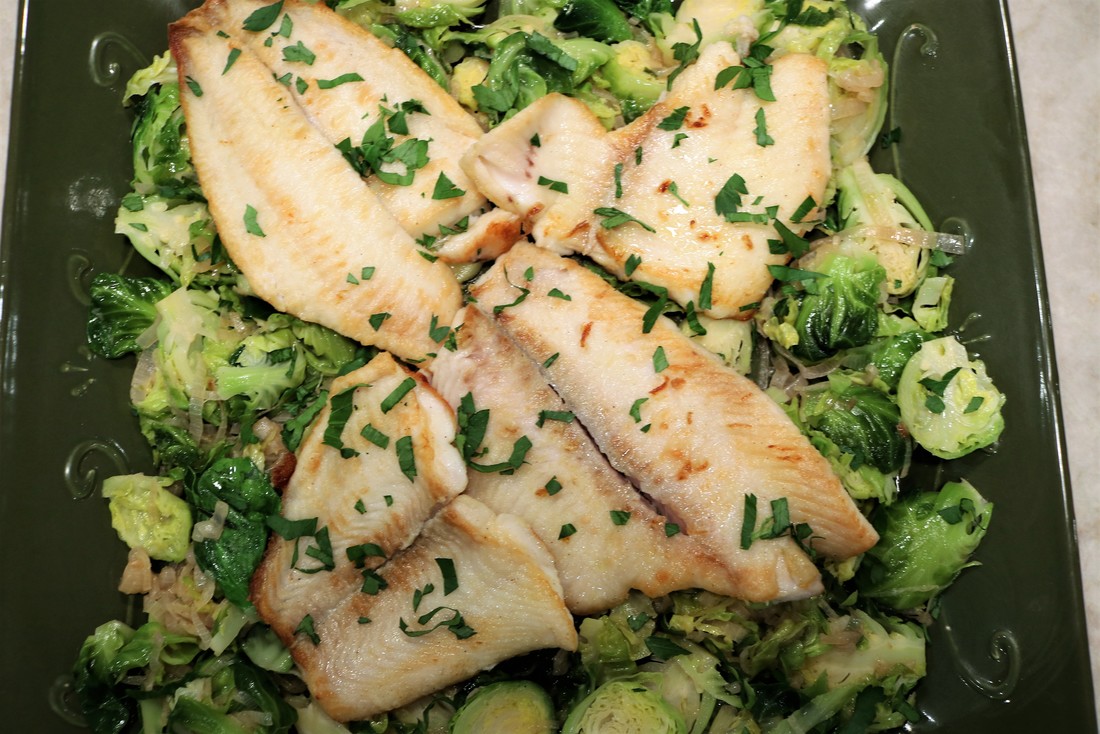
The scallion pancakes, called Pa Jun, made a great appetizer served hot from the pan. We would make a few refinements next time, such as adding more liquid to the batter for thinner pancakes and slicing the scallions more finely. We added carrots for the final pancake, which were a big hit. The spicy dipping sauce is excellent – you will find many uses for this tasty topping. Find recipes from The Spruce here. ​Click on the photos to enlarge them and read the captions.
Spicy Dipping Sauce for Scallion Pancakes
Korean Scallion Pancakes (Pa Jun)
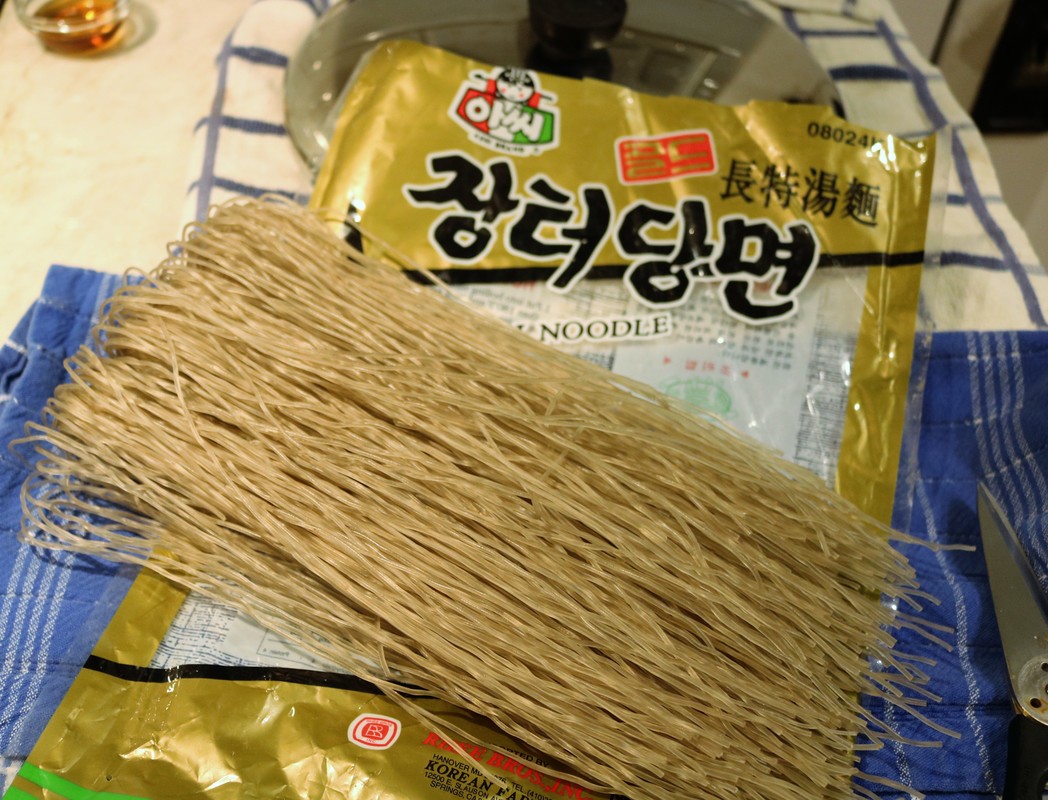
Kitchen Tips: I thought it would be easy to find the sweet potato noodles needed for chap chae. Chicago is an ethnically diverse city with robust international food aisles in most grocery stores and two different “Chinatown” areas with shops and products from all over Asia. Nevertheless I had to do some scouting to find the right product. Thank you to Dong-ah Food in Lincolnwood.

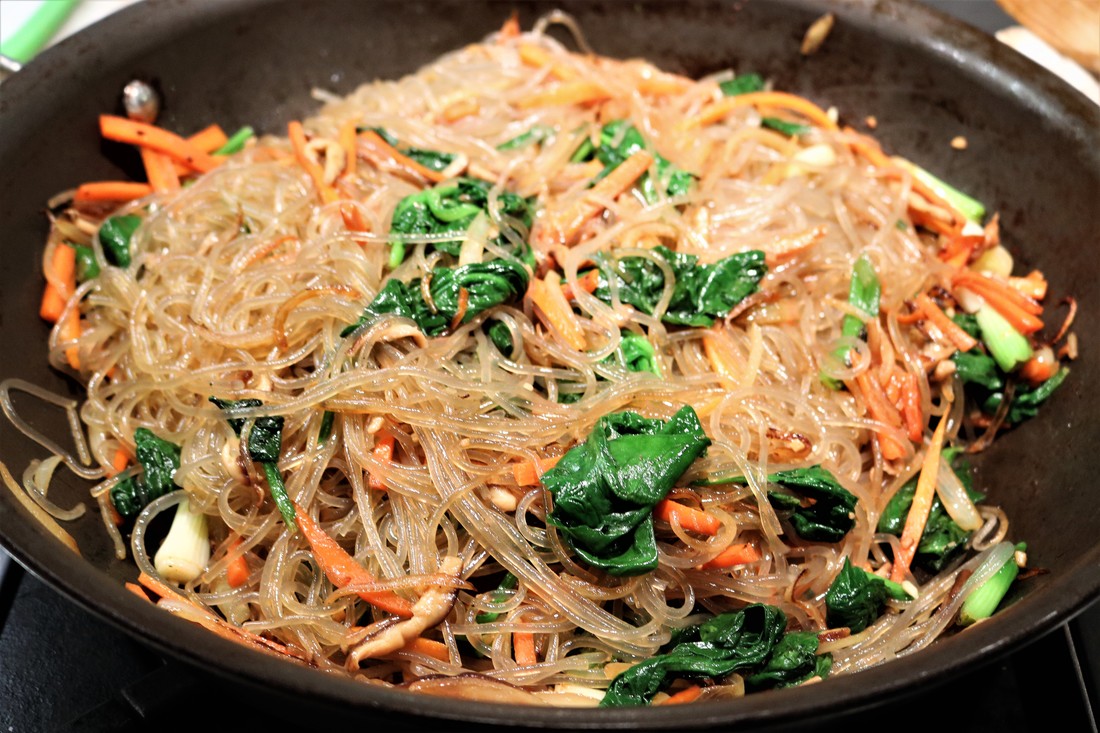
The Verdict: Handling the glass noodles is a little tricky, but worth the effort. Once cooked, you must cut them with kitchen shears into manageable lengths. We loved this veggie-laden dish and did not miss the meat. We needed a little extra flavor though, and drizzling the spicy sauce from the scallion pancakes on top of the chap chae made it perfect. Olympics or not, we will definitely make this dish again.

​Click on the photos to enlarge them and read the captions.
Korean Glass Noodles (Chap Chae)
Korean short ribs cooked in the crockpot
Korean Glass Noodles (Chap Chae)
Print The Recipe- Korean Glass Noodles or Chap Chae
File Size: 228 kb
File Type: pdf
Download File

Korean Glass Noodles (Chap Chae)
Recipe source: Steamy Kitchen
 
INGREDIENTS:
  • 1/2 pound dried Korean sweet potato noodles
  • 3 1/2 teaspoons sesame oil, divided
  • 1 tablespoon cooking oil
  • 3/4 cup thinly sliced onions
  • 2 carrots, cut into matchsticks
  • 2 cloves garlic, finely minced
  • 3 stalks green onions, cut into 1" lengths
  • 1/2 cup dried* or fresh mushrooms, thinly sliced (shiitake, wood ear)
  • 1/2 lb spinach, washed well and drained
  • 2 tablespoons soy sauce
  • 2 teaspoons sugar
  • 1 tablespoon sesame seeds
*Rehydrate the mushrooms if you are using dried

DIRECTIONS:
  • Boil a large pot of water. When water is boiling, add the noodles and cook for 5 minutes. Immediately drain and rinse with cold water. Drain again and then use kitchen shears to cut noodles into shorter pieces, about 8 inches in length. Toss with 2 teaspoons of the sesame oil. Set aside.
  • Mix soy sauce and sugar together in a small bowl. Set aside.
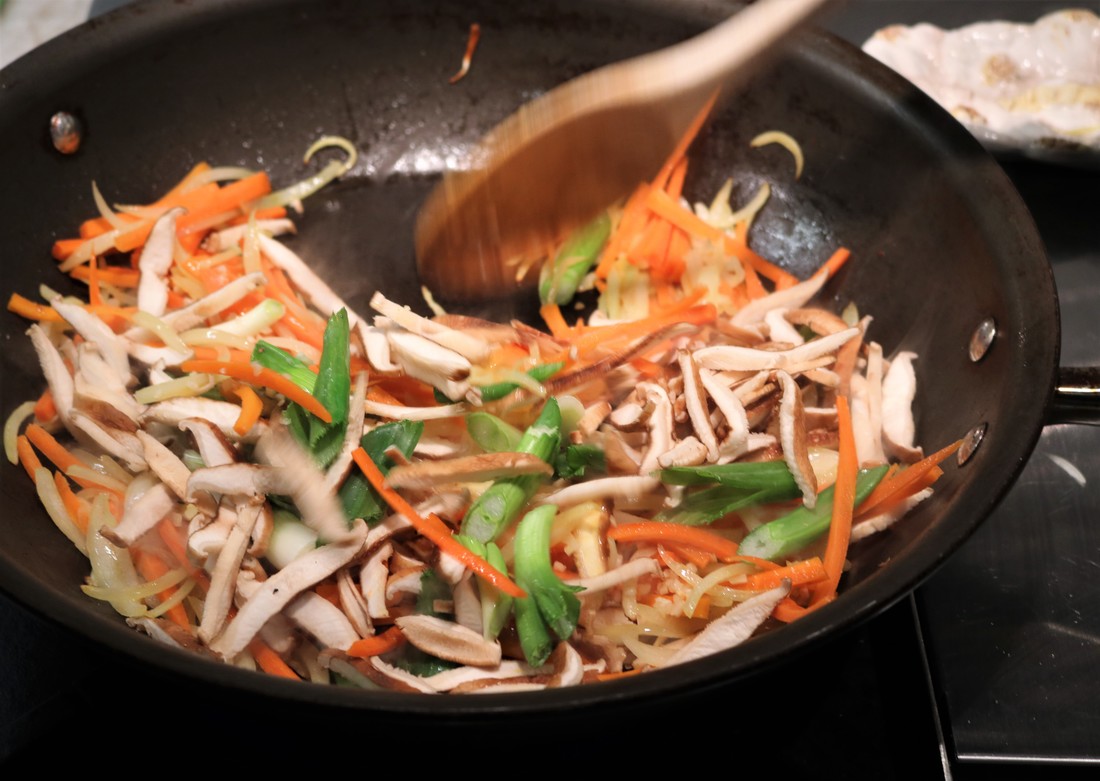
  • Add the cooking oil to a wok or large sauté pan on high heat and swirl to coat. When the cooking oil is hot but not smoking, sauté onions and carrots, until just softened, about 1 minute.
  • Add the garlic, green onions and mushrooms, sauté 30 seconds.
  • Then add the spinach, soy sauce, sugar and the noodles. Cook 2-3 minutes until the noodles are cooked through.
  • Turn off heat, toss with sesame seeds and the remaining 1 1/2 tsp of sesame oil.
 
Soju-Apple Cocktail
0 Comments

Fish for Dinner: Petrale Sole with Lemon-Shallot Brussels Sprouts

2/22/2018

0 Comments

 
Petrale Sole with Lemon-Shallot Brussels Sprouts
You'll sing for your supper when it's Petrale Sole with Lemon-Shallot Brussels Sprouts
The Fish for Dinner feature chronicles my education in the ways of fish-cookery. I grew up avoiding fish other than sticks and was well into adulthood before adding the real deal into my diet, usually at a restaurant. The impetus to cook more fish at home comes from joining a sustainable fish program through Hooked on Fish. I’ll tell you what we made and how we liked it, plus occasionally a few tips and tunes too.
O sole mio! O sole my-o -- Why don’t we all go -- Back to Ohio! For some reason, that nonsensical verse comes to mind every time I think about cooking or eating sole. What can I say, I’ve got some silly habits. Sorry not sorry.

I’ve always thought of sole as a restaurant dish, not suited for home cooking. Boy, was I wrong! This recipe was super-easy and awesomely-delicious. 
The Occasion: Petrale Sole with Lemon-Shallot Brussels Sprouts is quick and easy enough for a weeknight family supper, and pretty enough for company dinner. 
Petrale Sole with Lemon-Shallot Brussels Sprouts
The Recipe: Recipes from Bon Appétit always capture my attention thanks to their attention to detail. Some websites share incomplete recipes with confusing steps, but I find Bon Appetit to offer information that is of consistent high quality and which (almost) always leads to tasty and good-looking meals. Find the original Bon Appétit recipe for this dish here.

What Makes It Special? The Brussels sprouts are so creamy and buttery-tasting even though there’s only 1 tablespoon of butter in the entire dish. IMO Brussels sprouts can be kind of ‘iffy’ in a recipe, but have no fear! They are AMAZING in this treatment.
Petrale SoleBeautiful and sustainable petrale sole fillets from Hooked on Fish
Fish Fun Facts: Petrale sole is a fish from the Pacific waters, as opposed to Dover sole which comes from Mediterranean waters up to Denmark.

A member of the flounder family, petrale sole is known for being delicate, mild and sweet in flavor, with a medium-firm texture. 

Serve With: All this dish needs is a grain dish on the side, maybe a brown rice pilaf or toasted couscous with herbs. 


Click on the photos to enlarge them and read the captions.
Petrale Sole with Lemon-Shallot Brussels Sprouts
The Verdict: I was surprised by how much I liked this dish. As mentioned in the foreword to this blog post, I am not a lifelong seafood fan, and honestly do not love all my attempts to cook fish at home. (Those are the fish dinners I don’t post about. We stand behind all the recipes that appear on Entertain The Possibilities.)

Petrale Sole with Lemon-Shallot Brussels Sprouts is not only quick and easy to prepare, but also yields plate-licking good results that are restaurant-worthy. (But not at the same time – we promise we do not lick plates in restaurants. Not very often. Not anymore.) Try this dish!
Print The Recipe- Petrale Sole with Lemon-Shallot Brussels Sprouts
File Size: 237 kb
File Type: pdf
Download File

Petrale Sole with Lemon-Shallot Brussels Sprouts
Recipe source: Bon Appétit
Yield: 2 servings

INGREDIENTS:
  • 1/4 cup all-purpose flour
  • 2 teaspoons finely grated lemon peel
  • 1 teaspoon coarse kosher salt
  • 1/2 teaspoon ground white pepper plus additional for seasoning
  • 3 tablespoons olive oil, divided
  • 12 ounces petrale sole fillets
  • 3/4 cup thinly sliced shallots
  • 6 ounces Brussels sprouts, trimmed and thinly sliced lengthwise
  • 1 cup vegetable broth
  • 1 tablespoon unsalted butter
  • 1 teaspoon chopped fresh Italian parsley

DIRECTIONS:
  • Combine flour, lemon peel, coarse salt, and 1/2 teaspoon white pepper in shallow bowl.
  • Heat 1 tablespoon olive oil in each of 2 large skillets over medium heat. (The fish fillets are large and thin; you’ll need plenty of room.)
  • Coat fish in flour mixture and shake off excess.
  • Add fish to skillets and cook until opaque and golden brown, 1 to 2 minutes per side.
  • Remove from heat and season to taste with salt. Cover loosely with foil and set aside.
  • Wipe out 1 skillet. Add remaining 1 tablespoon olive oil and heat over medium heat. Add shallots and sauté until almost translucent, about 2 minutes.
  • Add Brussels sprouts and broth. Increase heat to medium-high and cook, stirring occasionally, until Brussels sprouts are tender and liquid is almost completely absorbed, about 8 minutes.
  • Remove from heat. Stir in butter. Season to taste with salt and white pepper.
  • Spoon Brussels sprouts onto plates. Top with fish, sprinkle with chopped parsley, and serve.
Petrale Sole with Lemon-Shallot Brussels Sprouts
What's your favorite fish dinner? Tell us, please, in the Comments
0 Comments

What’s for Dinner? Crockpot Red Curry Lentils

2/16/2018

0 Comments

 
Crockpot Red Curry Lentils
When you're craving something warm and a little spicy, Crockpot Red Curry Lentils will turn up the heat
My crockpot usage has amped way up over the past few months. I’ve owned one forever but use it only a couple times each year. Why? The better question: Why not use it more often and save some effort?

The Occasion: When your crockpot repertoire needs some new talent, Red Curry Lentils are here to spice things up. Make a batch on Sunday for workday lunches or simple suppers. This is probably not a company dish … unless your guests are fans of flavor over presentation. (The smart ones are!) 
The Recipe: We’ve enjoyed many recipes from the food blog Pinch of Yum, and this is a new favorite.  This site features a wide range of yummy food – mostly vegetarian meals and scrumptious desserts – and is linked to their other venture providing business tips for budding blog-trepreneurs. Check ‘em out!

What Makes It Special? Set it and forget it = crockpot love. This could not be easier. Plus Red Curry Lentils is essentially a vegan and gluten-free meal. I added the optional butter, so no vegan for me, but you get the point.
The Playlist: Top of the list when I searched on songs with Spicy in the title, this catchy tune from electronica musician Shawn Wasabi – Spicy Boyfriend – has me completely addicted. You’ve been warned. 
Fun note: Instead of traditional instruments or digital rig, Shawn “plays” a custom 64-button controller with arcade buttons called the Midi Fighter 64. Pretty cool. Read more here and peep his videos here.
Click on the photos below to enlarge them and read the captions.
Crockpot Red Curry Lentils
The Verdict: Even when served over rice, this is not an attractive meal, not Instagram-ready by any means. But I’m here to say looks aren’t everything, and this dish packs a flavor wallop that you won’t soon forget.

The recipe from Pinch of Yum yields 16 servings so I made a half batch, which is reflected in the recipe below. I adjusted only a few things to suit our taste – more curry and an extra splash or two of coconut milk. You should feel free to modify at will too. Red Curry Lentils is a flexible and forgiving dish, able to accommodate a variety of substitutions. 
Print The Recipe- Crockpot Red Curry Lentils
File Size: 244 kb
File Type: pdf
Download File

Crockpot Red Curry Lentils
Recipe source: Pinch of Yum
Yield: About 8 servings
 
INGREDIENTS:
  • 2 cups brown lentils (yellow or green are also fine, as long as they are whole lentils, not split)
  • 1 onion, diced
  • 3 cloves garlic, minced
  • 1 tablespoon fresh ginger, minced or shredded
  • 2 tablespoons butter (Note: You can substitute vegan butter if desired or omit it completely)
  • 3 tablespoons red curry paste – Add another teaspoon if you like it spicy
  • 1 tablespoon garam masala
  • ¾ teaspoon turmeric
  • 1 teaspoon sugar
  • 1/8 teaspoon cayenne pepper
  • 1 large can tomato puree (28 ounces)
  • ½ teaspoon salt
  • ½ cup coconut milk Note: Do not get light coconut milk; it will be too watery
  • Chopped cilantro or parsley as garnish
  • Steamed basmati rice (other varieties of rice are fine) for serving

DIRECTIONS:
  • Rinse the lentils and place them in a large crockpot. Add the diced onions, garlic, ginger, butter, curry paste, garam masala, turmeric, sugar, and cayenne. Stir to combine.
  • Pour 1/2 can of tomato puree over the lentils. Add 4 cups water to the crockpot. Lentils should be covered with liquid. Stir. Cover and cook on high for 4-5 hours or low for 7-8 hours.
  • Check once or twice during cooking to add more water or tomato puree if the lentils are soaking up all the liquid. Ultimately, the amount of liquid you add depends on how soupy you want your lentils to be. You will probably use the remainder of the tomato puree and perhaps another ½-cup or so of water.  
  • Lentils will be tender when they are done cooking. Taste and season with salt at the end.
  • Stir in the coconut milk and sprinkle with chopped herbs just before serving.
  • Serve over rice or naan bread.
Crockpot Red Curry Lentils
What's your favorite Not-Pretty-But-Oh-So-Good dish? Tell us in the Comments, please!
0 Comments

Sweet Bites: Gingerbread Molasses Chocolate Chip Bars

2/11/2018

1 Comment

 
Gingerbread Molasses Chocolate Chip Bars
Is it a brownie, gingerbread, cake, or fudge? YES!
If you like your sweet bites counter-balanced with a generous dose of spice and an umami undertone, then this is the recipe for you. Ilise made Gingerbread Molasses Chocolate Chip Bars for an office party where they made quite an impression.
​
Bold flavors, dense, fudgy cake – this is gingerbread taken to the extreme, and extremely good it is too! 
Picture
The Occasion: These bars are perfect for after-school snack, your potluck contribution, or office treats. Assertively spice-forward, they may not ring the bell for everyone. Let the chips fall where they may. Chocolate chips in this case, and plenty of them.

The Recipe: This one comes from Averie Cooks, a food blog that serves up real food for real people who want amazing meals done fast and easy. Isn’t that all of us?  

What Makes it Special? The deep, dark molasses in the batter combines with semi-sweet chocolate chips to create a new, fudge-like taste sensation. Abundant spices. If you’re not a fan of bold flavors, find another treat. 
The Playlist: Like the dessert, this track might be an acquired taste. But if you dig skillful scat singing against some jumping jazz – and I do – you’ll find a lot to like in Kurt Elling's rendition of jazz standard Gingerbread Boy.
Serve With: A glass of milk or cup of coffee. Click on the photos to enlarge them and read the captions. 
Gingerbread Molasses Chocolate Chip Bars
The Verdict: Deeply delicious, devilishly divine. This tastes like a cross between a brownie, fudge, ginger snaps, a chocolate chunk cookie, and a jolt of something dark and sweet. Go ahead. Give in to the dark side. You won’t regret it. 
Print The Recipe- Gingerbread Molasses Chocolate Chip Bars
File Size: 284 kb
File Type: pdf
Download File

Gingerbread Molasses Chocolate Chip Bars
Recipe source: Averie Cooks
 
INGREDIENTS:
  • 1/2 cup unsalted butter (1 stick), melted
  • 1 large egg
  • 1 cup light brown sugar, packed
  • 1/2 cup unsulphured light or medium molasses (not blackstrap)
  • 1 tablespoon vanilla extract
  • 3 teaspoons ground ginger
  • 2 teaspoons cinnamon
  • 1 teaspoon ground cloves
  • 1 teaspoon ground nutmeg
  • Pinch of salt
  • 1 1/4 cups all-purpose flour
  • 1 1/2 cups semi-sweet chocolate chips, divided

DIRECTIONS:
  • Preheat oven to 350˚F. Line an 8-by-8-inch baking pan with aluminum foil, spray with cooking spray; set aside.
  • In a large, microwave-safe bowl melt the butter, about 1 minute on high power.
  • Let the butter cool for a minute before adding the egg so it doesn’t become scrambled. Add the egg, brown sugar, molasses, vanilla, ginger, cinnamon, cloves, nutmeg, and salt. Whisk until smooth.
  • Add the flour and stir until just combined, don’t over mix.
  • Stir in 1 1/4 cups chocolate chips.
  • Turn batter out into prepared pan, smoothing the top lightly with a spatula.
  • Evenly sprinkle remaining 1/4 cup chocolate chips over the top, pressing them down very lightly with a spatula.
  • Bake for about 35 minutes, or until done. Start checking at 30 minutes; it may take longer. A toothpick inserted in the center should come out clean, or with a few moist crumbs. It may be hard to find a clean patch to test because of all the chocolate, so give it your best guess.
  • Allow bars to cool in pan for at least 30 to 60 minutes before slicing and serving. They are even better after resting overnight so the flavors marry and the chocolate fully sets.  
  • Bars will keep airtight at room temperature for up to 1 week, or in the freezer for up to 6 months.
Gingerbread Molasses Chocolate Chip Bars
Do you like 'spicy' mixed into your baked goods? Tell us in the Comments
1 Comment

Sweet Bites: Apple-Pear-Cranberry Crisp

2/6/2018

0 Comments

 
Apple Pear Cranberry Crisp
Good and good for you, this Apple-Pear-Cranberry Crisp can be made with vegan and/or gluten-free ingredients. Sweet!
Since January 1st, many of us have attempted to stick with good-for-you resolutions, be it diet, fitness, quality time with loved ones, better work habits, whatever. I’m here to say it’s important, it’s worthwhile, but it ain’t easy. Right about now, a month into the new year, I am tempted to abandon it all and sink back into the familiar cocoon of my bad habits with a hunk of chocolate cake. Maybe you too?

Don’t do it! Hold on, my friend. Change is possible, especially when you keep the end goal firmly in mind. Lose weight for your good health? Gain strength so you can move mountains or at least run up and down one? Organize your work life for improved productivity and less stress? Worth the effort.

But surely a small reward in recognition of your willpower so far is in order, right? Yes.
Apples
The Occasion: When you crave a sweet treat that won’t undermine your hard work this Apple-Pear-Cranberry Crisp is just the ticket. It’s fruit! And fruit is our friend.
​
This rustic, homespun dessert is perfect for a family meal and maybe even for company. We served a large Apple-Pear-Cranberry Crisp as part of a dessert buffet (on a warming tray with a big bowl of Cinnamon Whipped Cream available alongside). Not the prettiest dessert on the table, but man oh man, was it good!

The Playlist: In memory of the recently departed Dolores O’Riordan whose distinctive, crystal clear voice fronted many great songs by Irish rock band The Cranberries, please enjoy an acoustic version of their hit Dreams. 
The Recipe: We used Gena Hamshaw’s recipe from The Full Helping as the basis for our crisp, making only a few modifications per notes in the comments and tips from similar recipes. This website is great for newbies to a plant-based lifestyle as well as vegan veterans. For our dessert buffet, a vegan, gluten-free option was exactly what we wanted, but in my version (below) I have included notes for those who prefer a “regular” recipe.  
What Makes It Special? Apple-Pear-Cranberry Crisp is simple to prepare, can be made ahead, and is easily scalable to feed a crowd or just a hungry twosome. Super special!
Picture
Serve With: We offered cinnamon whipped cream on the side. 

​Vanilla ice cream is a classic go-with for any flavor of fruit crisp.

Pro tip: The leftovers are perfect for breakfast – think granola + fruit. Add yogurt for a breakfast parfait!

​
Note: Normally I would insert pictures here documenting the crisp-making process. Sadly, due to an overload of party planning details taking up space in my brain at the time I took no usable photos. Sorry! 
Picture
The Verdict: Yum yum yum. Nom nom nom. Yes, it’s dessert, yes, there’s some sugar in it, but all things considered, this is a satisfying treat which – consumed in moderation – will not negate your hard work for self-improvement.

​And if diet and fitness goals are not on your mind, even better, this dessert is still a wonderful example of tasty, fresh, clean-eating comfort food. Enjoy!

Print The Recipe- Apple-Pear-Cranberry Crisp
File Size: 246 kb
File Type: pdf
Download File

Apple-Pear-Cranberry Crisp
Recipe source: The Full Helping with only a few modifications indicated below
 
Note: This recipe may be prepared using vegan, gluten-free, or “regular” ingredients. Notes are included throughout where relevant choices can be made.

INGREDIENTS:

For the Fruit Filling:
  • 1½ pounds peeled and cubed apples
  • 1½ pounds peeled and cubed pears
  • 1 cup fresh cranberries
  • 2 tablespoons orange zest
  • 2 tablespoons freshly squeezed orange juice
  • 1 tablespoon freshly squeezed lemon juice
  • ½ cup sugar (cane sugar, brown sugar, sucanat, demerara sugar, and coconut sugar are all great options)
  • ¼ cup flour (Use oat flour, gluten-free all-purpose flour, or GF whole wheat pastry flour if desired)
  • 1 teaspoon ground cinnamon
  • Dash cloves

For the Topping:
  • 1⅓ cups flour (Use oat flour, gluten-free all-purpose flour, or GF whole wheat pastry flour if desired)
  • 1 cup rolled oats
  • ¾ cup brown sugar, cane sugar, or coconut sugar
  • ½ teaspoon salt
  • ½ teaspoon ground cinnamon
  • ½ teaspoon ground ginger
  • 1 stick (8 tablespoons) cold butter (Use Earth Balance, cut into small pieces, or ½ cup solid coconut oil [just keep it at a temperature lower than room temperature to keep it solid] if you want to make a vegan version)
  • 2 tablespoons cold water

DIRECTIONS:
  • Preheat the oven to 350 F and lightly oil a 9 x 13 rectangular baking dish or a 2¼ quart oval baking gratin.
  • To prepare the filling, toss all filling ingredients together in a large mixing bowl. Transfer them to the baking dish.
  • Place the flour, oats, sugar, salt, cinnamon, and ginger in a medium sized mixing bowl and whisk them together.
  • Add the butter (or Earth Balance or coconut oil) and use your fingers to work it into the dry ingredients, crumbling it until the butter (or Earth Balance or oil) is in very small pieces and the consistency of the mixture is even. Add two tablespoons of ice water. Keep crumbling the mixture together until large crumbs are forming.
  • Sprinkle this mixture over the crisp filling in the baking dish.
  • At this point, you can cover the unbaked crisp with plastic wrap and store it in the refrigerator for up to two days prior to baking, if desired. Bring it to room temperature before proceeding with the next step.
  • Transfer the baking dish to your oven. Bake for 25-40 minutes (this will vary based on your oven, so start checking at 25 minutes), or until the filling is bubbly and the topping is slightly browned.
  • Serve with ice cream, whipped cream, yogurt, or on its own.
0 Comments
    When home cooking becomes a special occasion - Recipes, playlists, table tips and more
    Picture

    ​
    Entertaining Vintage

    Vintage treasures for the kitchen, home, collectibles, and gifts

    Categories

    All
    Afternoon Dance Break
    Birthday Greetings
    Cookbook Road Test
    Cool Tunes
    Drinks
    Entertaining Vintage
    Fish
    Kitchen Reno
    Kitchen Tips
    National Days
    Party Planning
    Pop Culture
    Recipe
    Savory Bites
    Supper Club
    Sweet Bites
    The Arts
    Travel
    TV
    Video

    Archives

    May 2020
    April 2020
    March 2020
    August 2019
    June 2019
    May 2019
    April 2019
    March 2019
    February 2019
    January 2019
    December 2018
    November 2018
    October 2018
    September 2018
    August 2018
    July 2018
    June 2018
    May 2018
    April 2018
    March 2018
    February 2018
    January 2018
    December 2017
    November 2017
    October 2017
    September 2017
    August 2017
    July 2017
    June 2017
    May 2017
    April 2017
    March 2017
    February 2017
    January 2017
    December 2016
    November 2016
    October 2016
    September 2016
    August 2016
    July 2016
    June 2016
    May 2016
    April 2016
    March 2016
    February 2016
    January 2016
    December 2015
    November 2015
    October 2015
    September 2015
    August 2015
    July 2015
    June 2015
    May 2015
    April 2015

    RSS Feed

    Subscribe to our mailing list

    * indicates required
Proudly powered by Weebly