Entertain the Possibilities - Home cooking becomes a special occasion; Get recipes, photos, tips and playlists
  • Blog
  • About

Super Sides: Personal Corn Puddings

8/30/2017

0 Comments

 
Personal Corn Puddings
Personal Corn Puddings - Is it a super side dish or a meal in itself? YES!
The Occasion: These individual corn puddings are the perfect side dish for fancy feasts and down-home suppers alike. I’ve cooked the recipe twice now to rave reviews each time. Winner!

Make this soon while fresh corn is still in the market! Frozen corn is an okay swap but, as with most things, fresh is so much better.

The Playlist: We’ve got two tunes today. One for each ‘ear’ – get it?! Ooh That’s Corny by Homer & Jethro and Corny Love Song by Elle Michelle. Enjoy!

The Recipe: Ilise spotted Leah Eskin’s simple recipe for corn pudding in our local newspaper, the Chicago Tribune.

​Knowing that high-quality ingredients and simple treatments often yield the best results we gave it a try and were not disappointed.

A second go-round allowed me the chance to fiddle a bit with the recipe to achieve a smoother and fluffier pudding. My version appears below; you may find the Trib’s original recipe 
here.
Personal Corn Pudding
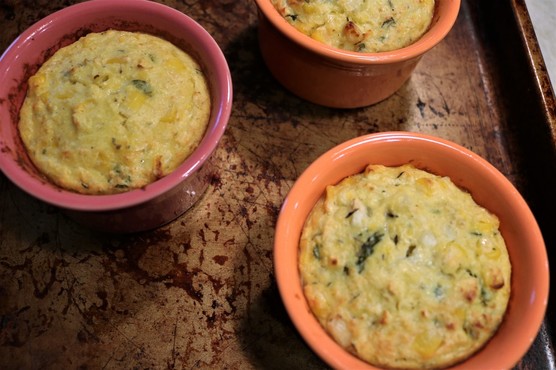
The perfect side dish!
Why It Works: Three elements:

A) Homey treatment (pudding or casserole) of
B) a familiar and delicious ingredient (corn) served
​C) in a personal-sized portion (ramekin).

​For every grown-up whose inner child has ever screamed “Mine!” when asked to share, this is good news for you.

​No sharing required.
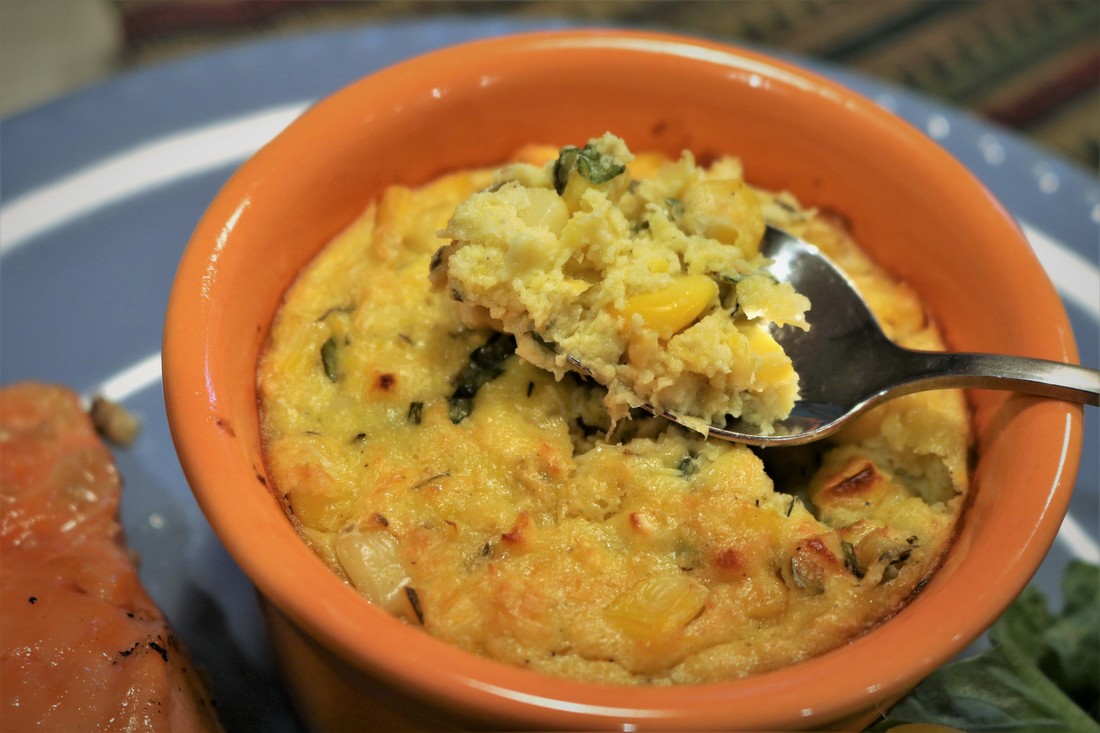
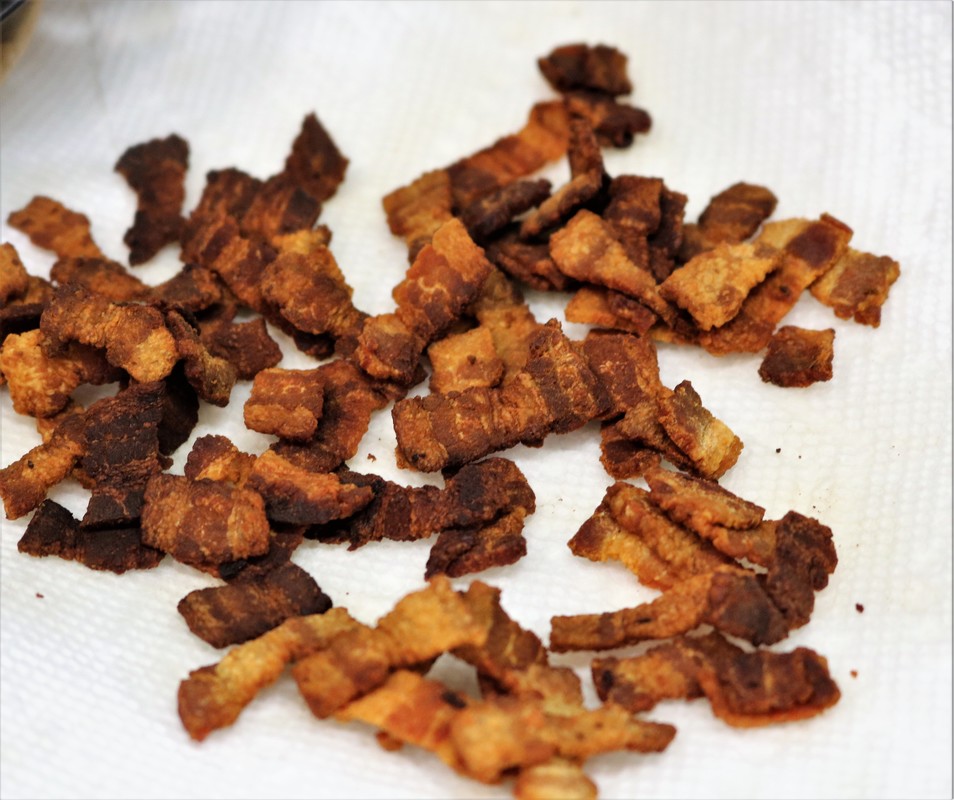
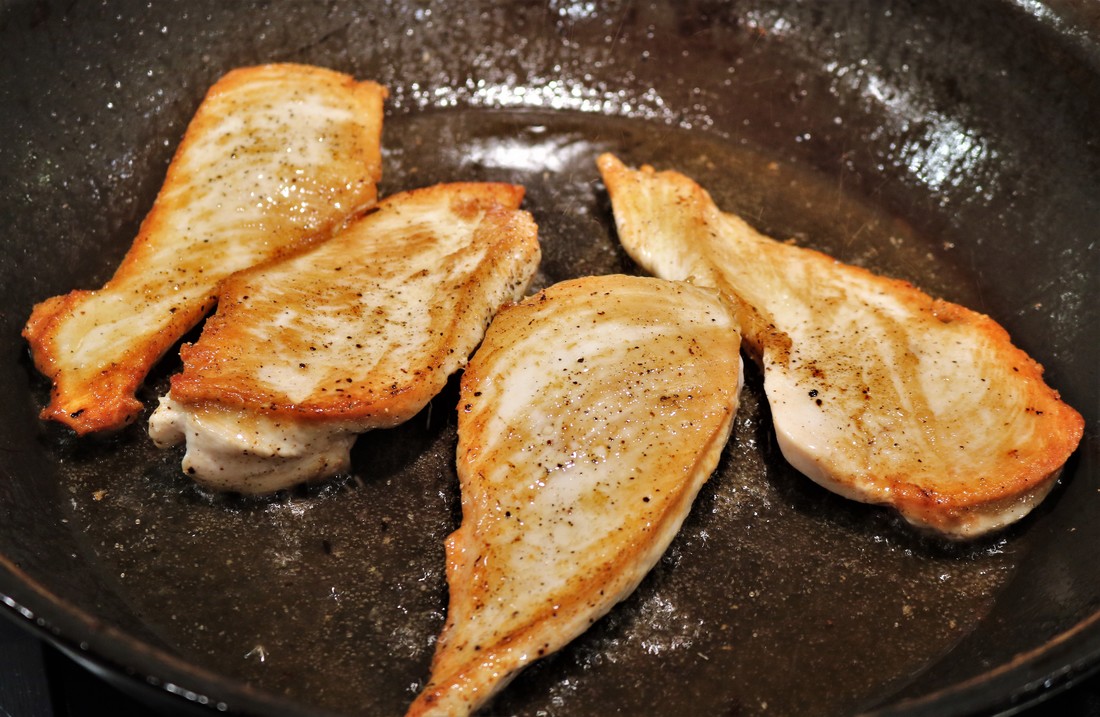
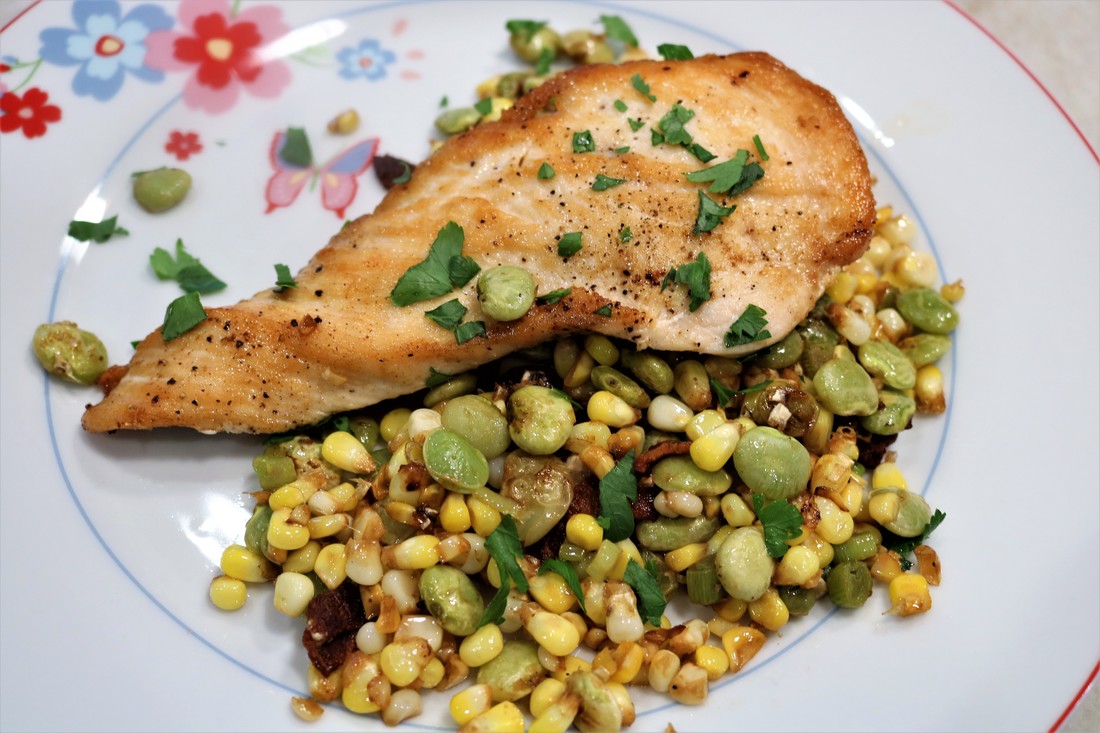
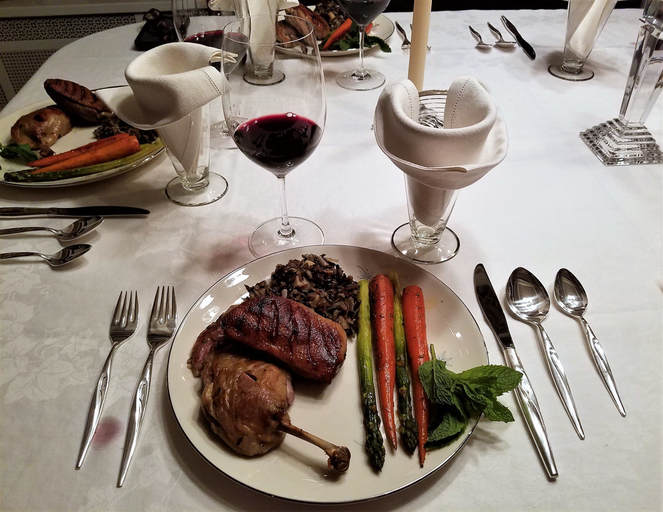
Serve With: In these pictures you can see that I’ve served the personal corn puddings as a side dish for seared salmon; it would be great alongside any other protein main course. Not pictured, we served the corn puddings with a southern style BBQ dinner of ribs and pulled pork and a big pot of collard greens. Mmm mm. Mouthwatering on both occasions.

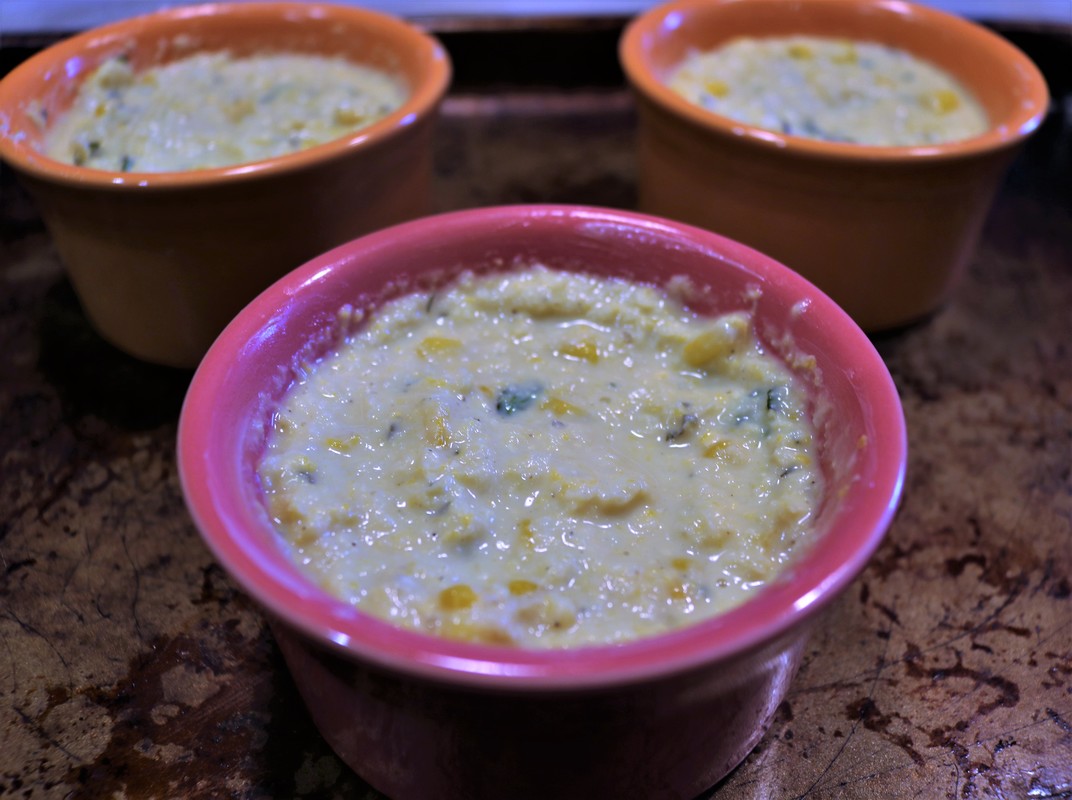
Table Tips: You can make one big corn pudding in a casserole or deep baking dish, if preferred. But individual ramekins (or small Pyrex bowls) feel a little more special in my opinion. And if you have picky eaters who cannot abide different foods touching each other, here is your answer. 
Click on the photos to enlarge them and read the captions.
The Verdict: This side dish truly elevates a meal to Special Occasion territory. The corn pudding is light and fluffy with tasty morsels of corn and savory bits of fresh herbs.

​Even better: you can make the pudding and fill the ramekins 2-3 hours ahead if desired. Place filled ramekins on a baking sheet, cover the whole thing with plastic wrap, and store in the refrigerator. About 30 minutes before baking, remove the pan from the fridge so the puddings can return to room temperature before going into the oven. 
Print The Recipe- Personal Corn Puddings
File Size: 555 kb
File Type: pdf
Download File

Personal Corn Puddings
Recipe source: Leah Eskin, Chicago Tribune
Yield: 2 or 3 servings

INGREDIENTS:
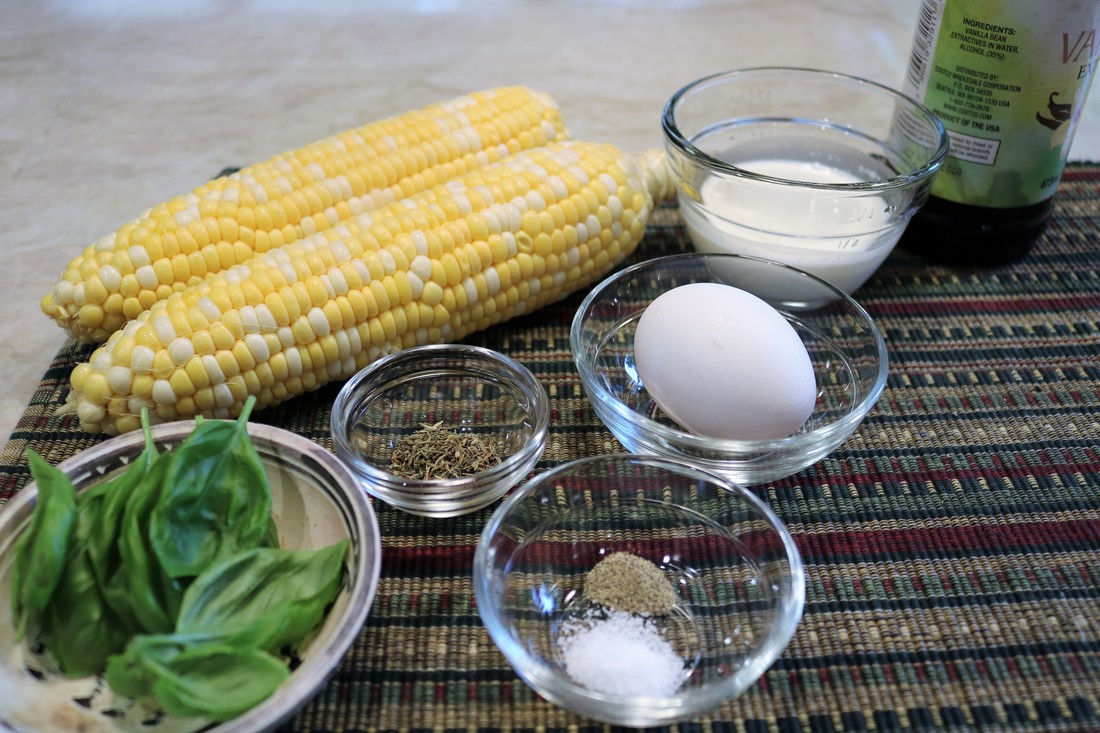
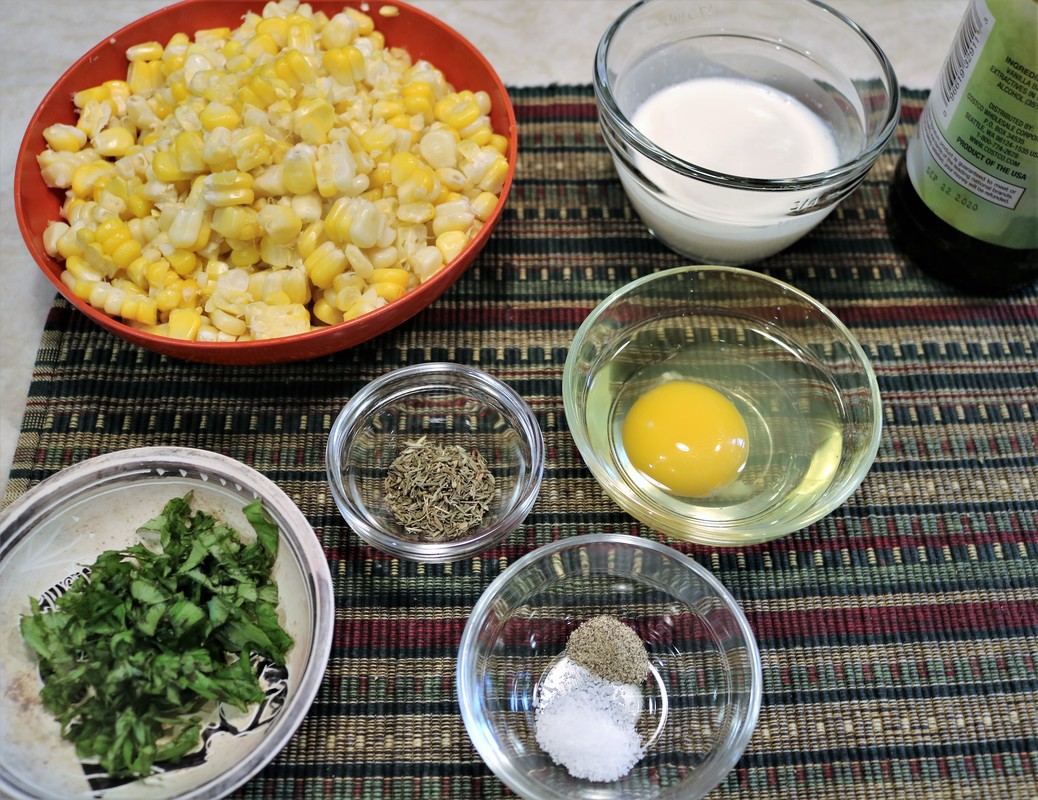
  • Butter, for ramekins
  • 2 ears of corn, shucked
  • 1 egg, lightly beaten
  • 1/3 cup cream
  • 1/4 teaspoon kosher salt
  • 1/8 teaspoon black or white pepper
  • 1 drop vanilla extract
  • 1 tablespoon chopped fresh basil
  • 1 teaspoon fresh thyme leaves
  • Optional: Pesto, purchased or homemade

DIRECTIONS:
  • Preheat oven to 400 degrees F. Generously butter two or three (1/2 cup) ramekins. Place ramekins on a baking sheet and set aside.
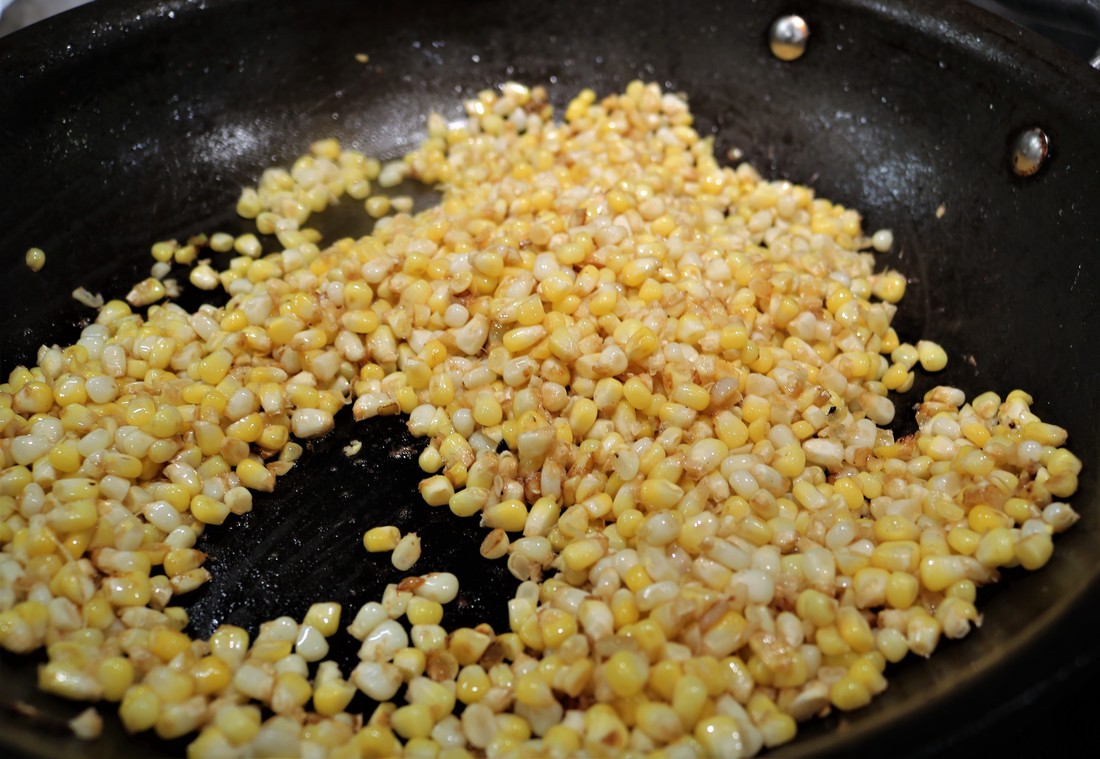
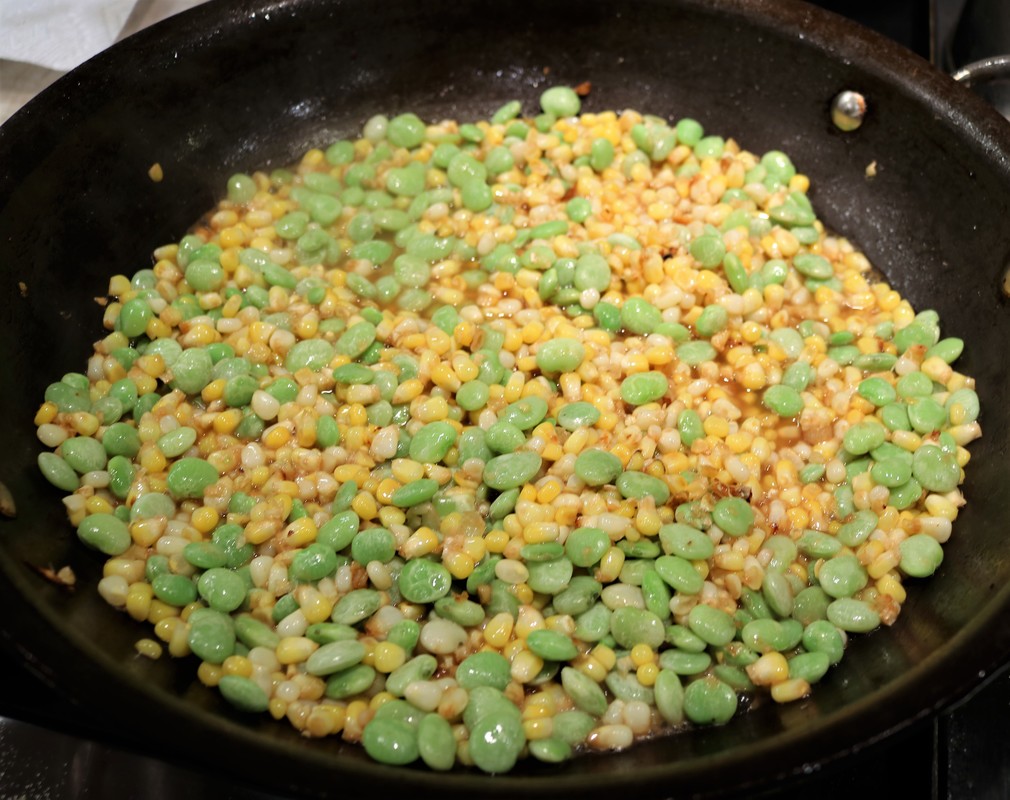
  • Bring a pot of water to a boil. Drop in corn. Cook until bright yellow and just tender, 5-6 minutes. Pull out corn and set aside. When cool enough to handle, cut kernels away from cobs.
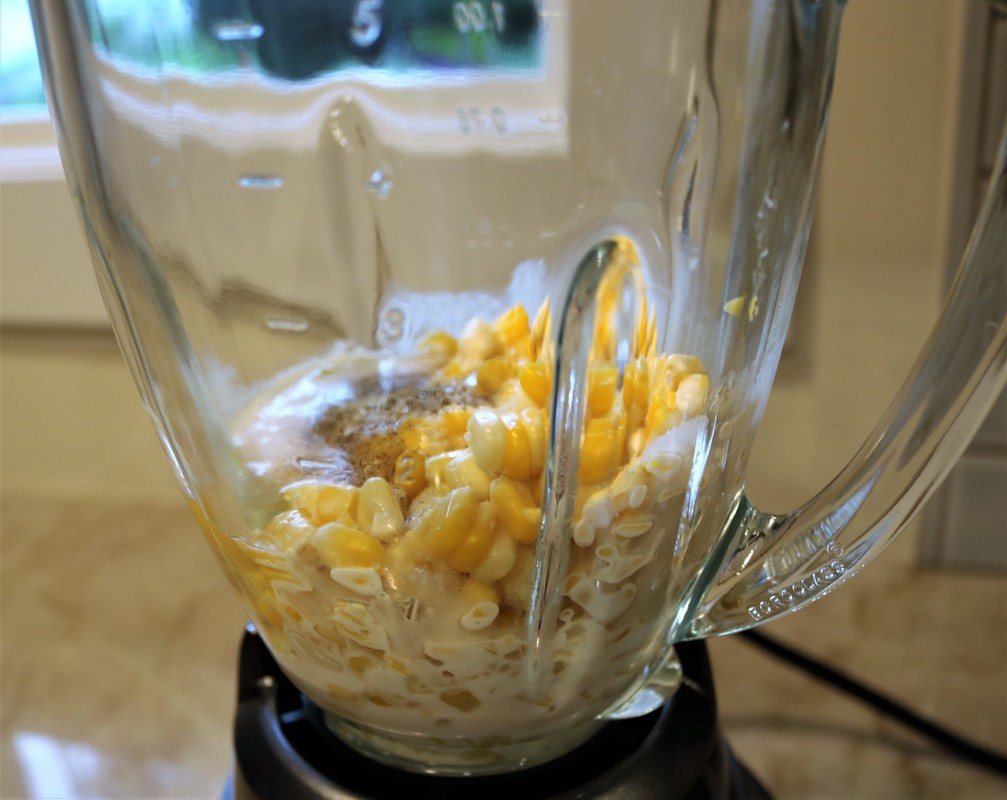
  • Drop three-quarters of the kernels into the blender. Add lightly beaten egg, cream, salt, pepper and vanilla. Blend thoroughly. I like the mixture to be smooth yet still retain a few lumps.
  • By hand, stir in remaining corn and the basil and thyme.
  • Pour the corn pudding batter into the prepared ramekins on the baking sheet. Bake at 400 degrees until puffed, golden and set, about 15-20 minutes. Start looking at 15 minutes, but mine took more like 20-22 minutes to become set. (Stab with a toothpick; it should come out clean.)
  • If desired, add a dollop of pesto on top of each pudding. 
Personal Corn Puddings
What do you think - is this a pudding or a casserole? Tell us in the Comments
0 Comments

Drinkies: The Pineapple’s Crown

8/24/2017

1 Comment

 
The Pineapple's Crown
The Pineapple's Crown - perfect for late summer sipping!
I’ve seen a meme making the rounds suggesting that folks should act like a pineapple: “Stand tall, Wear a crown, And be sweet on the inside”.

I like my version better: “Mix some whiskey with your pineapple, Wear the crown (because why not), and savor the sweet flavor. Then make another round.”
Ilise created this yummy cocktail – which tastes sort of like a piña colada but sans coconut – with a friend in mind who is allergic to rum. (Sad!) This drink features smoked whiskey – Stolen makes a good one – in place of the rum and adds a few other goodies.
Goody-goody is the appropriate reaction! Easy to make and even easier to enjoy with friends as we celebrate the final days of summer. Click on the photos to enlarge them and read the captions.
Print The Recipe- The Pineapple's Crown
File Size: 551 kb
File Type: pdf
Download File

The Pineapple’s Crown
Recipe source: Ilise Goldberg
Makes one drink

INGREDIENTS:
  • 1 ½ ounces Stolen Whiskey
  • ½ ounce Cointreau
  • ¼ ounce Tuaca liqueur, a brandy liqueur with vanilla spice flavor (optional)
  • 2 ½ ounces Pineapple Juice
  • 1 ½ ounces Cranberry Juice
  • ¼ ounce Lime Juice
  • Pineapple wedge for garnish

DIRECTIONS:
  • Combine all liquid ingredients in a shaker filled with ice. Shake very well – the mixture will become frothy with foam. 
  • Put several fresh ice cubes in a rocks glass and pour the strained mixture into the glass. 
  • Garnish with a pineapple wedge on the rim of the glass and serve with a straw if desired.
The Pineapple's Crown
Can you believe it’s the end of August already? What’s left on your Summer To-Do List?
1 Comment

What’s for Dinner? Pan-Seared Chicken Cutlets with Summer Corn Succotash

8/17/2017

0 Comments

 
Pan-Seared Chicken Cutlets with Summer Corn Succotash
Sufferin' Succotash - it's Pan-Seared Chicken Cutlets with Summer Corn Succotash!
The Occasion: Casual supper on the patio, watching the pink-streaky sky of a summer sunset. (Ssssorry, I couldn’t resist the alliteration!)

The Recipe: The recipe for chicken cutlets and summer succotash comes from Real Simple, a great lifestyle magazine in print and online. I’m a big fan of their carefree/no worries outlook, which comes through in their recipes as well as homecare tips. It was the photo that grabbed me and sent me shopping for ingredients.

What Makes It Special: Who can say No to sweet summer corn, no matter what the treatment? Especially when the treatment involves bacon! 
Pan-Seared Chicken Cutlets with Summer Corn Succotash
Serve With: A raw fresh vegetable – maybe sliced tomatoes? Carrot sticks? – is all you need to accompany this quick and easy meal. A glass of raspberry flavored iced tea might be nice alongside.

The Playlist: Seeking out the perfect tunes to pair with the posts here on Entertain the Possibilities is a great adventure which sometimes turns up the most delightful surprises. Today is one of those days. 

May I present to you Sufferin’ Succotash by the Music Machine led by Sean Bonniwell, an L.A. garage band from the late 60s with psychedelic overtones and a rebellious attitude. 
Per Wikipedia: The Music Machine is today considered by many critics to be a one of the groundbreaking acts of the 1960s. Their style is now recognized as a pioneering force in proto-punk. Go ahead, turn it up.  
Click on the photos to enlarge them and read the captions.
The Verdict: We loved this dish. It was tasty, hearty, satisfying, summery – everything you want at dinnertime. Meal prep was quick and easy. You can make swaps if you like – substitute fish fillets for the chicken, or exchange shelled edamame for the lima beans, for example. But keep the fresh, local corn! 
Print the Recipe- Pan-Seared Chicken Cutlets with Summer Corn Succotash
File Size: 586 kb
File Type: pdf
Download File

Pan-Seared Chicken Cutlets with Summer Corn Succotash
Recipe source: Robby Melvin, Real Simple, July 2017

INGREDIENTS:
  • 4 thick-cut slices bacon, chopped
  • 4 6-ounce chicken cutlets
  • 1 teaspoon kosher salt, divided
  • ½ teaspoon black pepper, divided
  • 5 scallions, thinly sliced, green and white parts separated
  • 3 cups fresh corn kernels (from about 4 ears)
  • 2 cups frozen lima beans, thawed
  • ¾ cup chicken stock
  • 2 tablespoons red wine vinegar
  • Parsley leaves, for serving
 
DIRECTIONS:
  • Cook the bacon in a large nonstick skillet over medium heat, stirring and turning occasionally, until crisp, about 6-7 minutes. Drain on paper towels, but leave the drippings in the skillet.
  • Season the chicken with ½ teaspoon salt and ¼ teaspoon pepper. Cook in bacon drippings over medium heat until golden and cooked through, about 3 minutes per side. Transfer to a plate.
  • Increase the heat to medium-high. Add the sliced scallion whites to the skillet and cook, stirring, until softened, about 1 minute.
  • Add the fresh corn and cook, stirring occasionally, until crisp-tender, about 5 minutes.
  • Stir in the lima beans and chicken stock. Cook, stirring occasionally, until liquid is reduced and nearly dry, 7-9 minutes. Remove pan from heat.
  • Stir in the vinegar, scallion greens, bacon, and remaining ½ teaspoon salt and ¼ teaspoon pepper.
  • Serve with chicken and top with parsley.
Summer Corn Succotash
Do you prefer to eat corn ON the cob or off?
0 Comments

Sweet Bites: Blueberry Crumb Bars

8/14/2017

2 Comments

 
Blueberry Crumb Bars
This is a pan full of deliciousness - Blueberry Crumb Bars, to be precise
The Occasion: Blueberry season – it doesn’t last forever, you know!

I went looking for a reason to make these Blueberry Crumb Bars. Thankfully Ilise had an office meeting to which she brought these snacks. (I cannot be trusted with a panful of these in the house. Sad.)

The Recipe: This recipe jumped out at me from Allrecipes, contributed by A. Beavers. It is easy to follow and delicious. I really appreciate the authenticity of the Allrecipes site – this is real food from real people sharing their know-how for some real great eats. 
What Makes It Special: Not pre-cooking the blueberry filling saves time and mess. In fact, the recipe does a good job overall simplifying potentially complicated steps – a big help for novice cooks, and those pressed for time. (Which is everyone, right?!)
Serve With: A smile. Seriously, these treats need nothing else. But if you want to be truly decadent, crumble a Crumb Bar into a bowl, heat it in the microwave for 10 seconds, and add a scoop of vanilla ice cream. Yup, you’re welcome. Click on the photos to enlarge them and read the captions.
The Verdict: There are many variations of this recipe out in the world. This version is flavorful, fast and easy – excellent qualities in a Crumble. But I’ll make a few small changes next time: A) Add texture to the topping with oats; and B) Prebake the bottom crust for about 7 minutes before adding the berries and topping.

DO bake these bars, my friends. Blueberry season will not last forever, but your fond memories of this dessert most certainly will!
Print The Recipe- Blueberry Crumb Bars
File Size: 635 kb
File Type: pdf
Download File

Blueberry Crumb Bars
Recipe source: A. Beavers at Allrecipes. We modified it only slightly - butter instead of shortening, mixing with a food processor rather than by hand, and pre-baking the crust.

INGREDIENTS:
  • 1 cup firmly packed brown sugar
  • 1 teaspoon baking powder
  • 3 cups all-purpose flour
  • 1 cup butter, chopped and chilled
  • 1 egg, room temperature, slightly beaten
  • 1/4 teaspoon salt
  • 1 pinch ground cinnamon
  • 4 cups fresh blueberries
  • 1/2 cup white sugar
  • 3 teaspoons cornstarch
  • Optional: ¾ cup oats
 
DIRECTIONS:
  • Preheat the oven to 375 degrees F (190 degrees C). Grease a 9x13 inch pan.
  • Place 1 cup sugar, 3 cups flour, baking powder, salt and cinnamon in the bowl of a food processor. Pulse several times to mix the ingredients together.
  • Add the cold butter to the dry ingredients and pulse until the ingredients start to come together. (10-12 one-second bursts, give or take.) You will see pea-sized crumbles.
  • Scrape down the sides of the food processor and add the beaten egg. Pulse again until thoroughly mixed and the dough has formed into a crumbly dough.
  • Pat half of dough into the prepared pan. Press it firmly to reach into the corners, and so there's an even thickness all over.
  • Bake the crust for 7 minutes. Let the pan rest on a cooling rack for 5 minutes.
  • Optional: You can increase the texture and flavor by adding oats to the crumb topping. Add ¾ cup oats to the remaining dough in the food processor. Pulse several times to mix well. Set the topping aside.
  • While the crust is pre-baking and then resting, in another bowl, stir together the sugar and cornstarch. Gently mix in the blueberries.
  • Once the crust has cooled a little, sprinkle the blueberry mixture evenly over the crust. Crumble remaining dough over the berry layer, scrunching it with your fingers to make firm nuggets dropped randomly over the top.
  • Bake in preheated oven for 35-40 minutes, or until top is golden brown. Cool completely before cutting into squares.
Blueberry Crumb Bars
Do you like to bake/cook with your favorite summertime fruits, or just eat them by the handful?
2 Comments

The Foodies Take a Deep Dive Underwater

8/12/2017

2 Comments

 
Sous-vide Duck Breast and Legs, Sous-vide Vegetables, Wild Rice Salad
Sous Vide Duck Breast with Ultra Crispy Skin; Crispy Duck Leg Confit; Sous Vide Carrots and Asparagus; Wild rice pilaf
The Foodies (formerly known as the Supper Club) are a group of friends who love to cook, eat, drink, and laugh together at themed dinner parties. Our friends and family tell us they enjoy living vicariously through tales of our feasts so we’ll share the stories, pictures, and recipes here on the blog from time to time. Click here for previous Foodie Group posts, and here for the group’s origin story.

Yes, the theme for the evening was Underwater, hosted most graciously by Greg and Dan. We braved uncharted waters with our courses, tossed by the waves of indecision during the planning phase, but happily all went swimmingly at dinnertime – blue skies over calm seas all around.
​
When introducing the theme to the rest of us, Dan and Greg offered the following guidance:
​
Definition of underwater From Merriam-Webster.com:

​1
 :  lying, growing, worn, performed, or operating below the surface of the water underwater plants
2 :  being below the waterline of a ship
3a :  having, relating to, or being a mortgage loan for which more is owed than the property securing the loan is worth
3b :  having, relating to, or being a stock option for which the price of the option is higher than the current market value of the stock
​ 
Huh. I wonder what a Definition 3A dish would be – mortgage soup? Poor house pastry? No surprise that we all adopted the first definition for our courses, outlined below.
  • Drinks: Ilise & Ann – Cocktail: Sake To Me; Various wines including Sea Pearl, Cannonball, and other labels with water references
  • Appetizer: Ellyn – Grazing platter of Underwater Delights
  • Main course: Greg & Dan –Sous Vide Duck Breast with Ultra Crispy Skin; Crispy Duck Leg Confit; Sous Vide Carrots and Asparagus; Wild rice pilaf with dried cranberries, water chestnuts and lotus root  
  • Dessert: Kathleen & Karen – Underwater Wonderland
  • After-Dinner Drink: Ellyn – The Submarine Kiss
Are you onboard for a deep dive into our Underwater dinner party? Water wings at the ready? Check.

​Do you hear the sound of the sea, wild and hungry, breaking over the rocks?

No? Okay, well try this watery playlist of seaworthy songs that embrace the underwater theme from an indie pop perspective.

Hit the Play arrow and then read on for dinner details, recipes, and plenty of photos.
​The sea, once it casts its spell, holds one in its net of wonder forever. – Jacques Yves Cousteau
Sake To Me cocktailSake To Me
The Drinks: Ilise and I picked Drinks and came up with the Sake To Me cocktail. It took a little trial and error to get there, but well worth the effort. Because rice is grown underwater in paddies and sake is made with rice, we started with that as the base for the cocktail. 

I say “we” but Ilise is our house bar chef and takes the lead whenever we’re in charge of drinks. She loves to experiment, with infusions and flavored syrups. This time she tried a range of ingredients from coconut water to kaffir leaves to lemongrass in search of the perfect combo for the sake. 
Ultimately that flavor profile did not work as planned so onward we went to Plan B.

Cranberries are also grown underwater in bogs and, when paired with sake and a few other delightful ingredients, we had ourselves a winner! Ladies and gentlemen, please say Hello to your new best friend, the Sake To Me. 


Click the photos to enlarge them and read the captions.
Print The Recipe- Sake To Me Cocktail
File Size: 551 kb
File Type: pdf
Download File

Sake To Me Cocktail
Recipe source: Ilise Goldberg
Makes one cocktail

​INGREDIENTS:
  • 2 ounces Sake
  • 1 ounce Kurant Vodka
  • ½ ounce Cointreau
  • 2 ounces Cranberry juice
  • ¼ ounce Fresh Lime juice
  • 2 dashes Orange bitters
  • 3 strips of orange zest
  • 3 strips of lime zest

DIRECTIONS:
  • In a high ball or Collins glass zest two strips each of the orange and lime. 
  • In a cocktail shaker, mix all liquid ingredients with ice until chilled. 
  • Add fresh ice to the cocktail glass and pour the drink into the glass.
  • Garnish with one additional strip each of orange and lime zest.
Picture
The Appetizers: The long and short of it is – stuff happens. The tide rolls in, the tide rolls out. What we had here was a failure to communicate. Ob-la-di ob-la-da life goes on.

Up until oh about an hour before dinner time, Ellyn was sure she was assigned to Drinks and had worked hard to select a scrumptious cocktail. Once she discovered that, no, she was on the hook for Appetizers (and Drinks were already accounted for) she made a quick detour to Whole Foods and assembled a grazing platter of (mostly) underwater delights: shrimp, mozzarella balls, smoked trout dip, olives and pickles.

​We came up for air to share a laugh in recognition that everyone makes a goof like this now and again. Good news: Ellyn’s tasty cocktail made a welcome appearance as an after-dinner drink. Hold on to your flotation device, we’ll be back with the Submarine Kiss details a bit later.

Duck Breast, Duck Leg, and Vegetables - cooked sous-vide
Duck Breast with Ultra Crispy Skin, Crispy Duck Leg Confit, Carrots and Asparagus -- all cooked sous-vide
Have you heard the famous saying about ducks attributed to Michael Caine? “Be like a duck. Calm on the surface, but always paddling like the dickens underneath.” There’s a profound connection there to Dan and Greg’s hospitality, not only regarding the specifics of this dinner theme, but also in the way they prepare for each and every gathering. As hosts, they make it all look so calm and effortless, but we know they’re ‘paddling like the dickens’ behind the scenes to achieve the perfect presentation. Kudos to you, fellas, another job well done! Let’s hear from Greg about their process (and please note that the recipes are linked to the names of the dishes):
​
​We interpreted the theme two ways: Some items were cooked under water using the sous-vide technique and the Joule sous-vide tool. We also prepared some foods that are grown or found under water (wild rice, cranberries, water chestnuts and lotus root). Since the duck’s legs and breast are below the water level when they swim around, both interpretations of “under water” apply to the sous-vide duck legs and breast.
 
Dishes cooked sous-vide: using Joule immersion circulator sous-vide tool 
 
Duck Legs: Because the duck legs must cook 16 hours, we prepped this the evening before. In addition to the recipe’s recommended orange peel, fresh thyme and bay leaf, we added crushed juniper berries since they serve to counteract gaminess in wild meats. After cooking I drained and saved the juices, frenched the legs, removed the herbs and then placed the duck back in the bags and stored them in the refrigerator; later I returned the bags to the pot to gently warm up prior to the final broiling to crisp the skin before serving. I used the stripped leg skin along with the herbs and cooking juices to make a broth; I augmented this with some chicken broth to make enough for a gravy. I saved the duck fat from searing the duck breast for the roux for the gravy. After straining the broth and thickening it with the roux, we added some chopped fresh sweet cherries to make a cherry-flavored duck gravy to accompany the meal. Because the juices included the sugar-salt brining cure, the gravy can tend toward being a bit salty so taste and adjust as best you can.
 
Duck Breast: I used the side burner on the barbecue grill outside because searing the duck breast in a HOT skillet (I used a carbon steel skillet for searing the duck breast) creates quite a mess. Since the duck breast cooks at a lower temperature than the legs, we had to let the water cool down before cooking the duck breast sous-vide.
 
Carrots: We cooked these two days before and warmed them up in the sous-vide pot prior to sautéing in butter.
 
Asparagus: We cooked these two days before and warmed them up in the sous-vide pot prior to serving.
 
Foods that grow under water: Wild rice pilaf with dried cranberries, water chestnuts and lotus root 
Click the photos to enlarge them and read the captions.
Finally we come to dessert, a fantasia depicting underwater wonders and beachside cast-offs. Kathleen and Karen took their inspiration from a 2011 foodie group dinner – Pool Party was the theme – where Greg and Dan created personal swimming pools using crystal blue gelatin. I’ll let Kathleen explain further:
​
Inspired by Dan and Greg’s pool party dessert, we determined to create an underwater dessert featuring, you guessed it—blue Jello! We served it in a trifle dish and lightened the “natural” Jello blue by adding some unflavored gelatin, so that you could see the fresh fruit (grapes, strawberries, blueberries, and cherries) that composed the ocean floor and the Swedish fish swimming inside. We also stuck gummi worms (cut in half the long way) to the sides of the trifle dish to suggest seaweed/coral. Assuming that Jello would not particularly appeal, we doctored the water with Cointreau and a little brandy. 
 
We decided that we would also highlight those items washed up from oceans onto the world’s beaches. We used a base of blondies, with the addition of brandy-soaked Craisins, and covered the base with buttery crushed graham cracker crumbs. We then littered our beach with candy-coated chocolate sea shells and rocks, Nik-L-Nips, and gelt.
Click the photos to enlarge them and read the captions.
We rounded out the evening with a sweet and satisfying Submarine Kiss, Ellyn’s after-dinner cocktail which features a spirit called Crème Yvette. In 1915 it was described in New York Day by Day thusly:
“Sailors who come to Broadway for a touch of high life have invented a new drink called The Submarine Kiss. The liquid combination is a milky white above and purple below and the submarine effect is secured after drinking about three.” Talk about a deep dive! 
Click the photos to enlarge them and read the captions.
The Submarine Kiss
Recipe source: Cooper Spirits International
  • 1 part Crème Yvette
  • Top with Silver Fizz:
  • 2 parts Plymouth gin
  • ¾ part fresh lemon juice
  • ¾ part simple syrup
  • Egg white
  • Combine silver fizz ingredients in two-part shaker tin. Dry shake.
  • Add ice. Shake again.
  • Add Crème Yvette to the bottom of a hollow stemmed coupe or champagne flute.
  • Fine strain and layer silver fizz over Crème Yvette.

​So there we have it – a fantastic evening spent exploring the wonders of the deep blue sea. I am left to ponder the famous JFK quote: 
​
We are tied to the ocean. And when we go back to the sea, whether it is to sail or to watch - we are going back from whence we came. – John F. Kennedy

​Want to read about past Foodie Group dinners? You may find the recaps here.
2 Comments

What’s for Lunch: Fancy Egg Salad

8/9/2017

0 Comments

 
Picture
The Occasion: So many occasions for a nice salad plate! This fancy egg salad is just one part of what we like to call in my house a “poo-poo platter of delights”.
  • A salad plate is nice for a friends catch-up lunch, and serving it buffet style allows everyone to select what they like and exactly how much.  
  • I like to pack salad plate to-go lunches with a bed of lettuce in a lidded container and dollops of 2-3 veggie, fruit or protein salads.
  • Some evenings all I want is a salad plate supper in front of the TV. 
What Makes it Special: Crispy bacon and zesty capers. These ingredients will for sure kick plain old egg salad into tasty new territory. 
Serve With: As part of an easy luncheon menu, I served the fancy egg salad with store-bought chicken salad, homemade black bean confetti salad (recipe coming soon), fresh salad greens, a bread basket from the amazing Hewn bakery in Evanston, and refreshing cold-brewed raspberry iced tea. 
Salad Plate BuffetBig serving trays help keep it all together
Table Tips: I like to use large trays to corral serving dishes, especially in a buffet situation.

It keeps the go-withs together (such as salad and its dressing, or chips, salsa and guac).

Trays also help to contain any mess. 

The Verdict: Wow, so good! The savory elements add both depth (bacon and shallots) and brightness (briny capers and parsley) to the egg salad. This zesty salad would be great in a sandwich (perhaps on multi-grain toast) or on a bed of greens. Click on the photos to enlarge them and read the captions.
Print This Recipe- Fancy Egg Salad
File Size: 555 kb
File Type: pdf
Download File

‘Fancy’ Egg Salad
Recipe source: David Latt for NYTimes Cooking

INGREDIENTS:
  • 4 eggs
  • 1 tablespoon Italian parsley, finely chopped
  • 1 tablespoon capers, dried, finely chopped
  • 1 tablespoon finely chopped shallots
  • 1 slice of bacon, crisp, finely chopped
  • 1 ½ tablespoons mayonnaise
  •  Salt and pepper

DIRECTIONS:
  • Use your preferred method to hard boil the eggs. Here is mine:
  • Put the eggs in an empty pan. Cover with cool water to cover the eggs by one inch. Place pan, uncovered, over medium-high heat until water comes to a rolling boil – about 12 minutes for me.
  • Cover the pan, turn off the heat, and move the covered pan to a cold burner to sit for 16 minutes.
  • Drain the eggs and rinse repeatedly in cold water until the surface of the eggs has cooled somewhat.
  • Peel the eggs and chop.
  • Toss the eggs in a bowl with the parsley, capers, shallots and bacon. Season with salt and pepper to taste, then add the mayo and mix well.
  • Serve with fresh bread or crackers, on hearts of romaine, or in a salad.
Fancy Egg Salad
What are the Musts on your favorite salad plate? Tell us in the Comments
0 Comments

Drinkies: Spanish-Style Gin Tonics

8/3/2017

0 Comments

 
Spanish-Style Gin Tonic
Spanish-style Gin Tonic -- yes, that's a big glass for a big thirst!
Oh say, have you heard that we took an amazing trip to Spain this year? Regular readers are rolling their eyes right now as we’ve been none-too-shy about sharing our adventures and photos on the blog (Barcelona, San Sebastián, and Bilbao/Rioja wine region).
​
We’ve also prepared a few Spanish delicacies for our friends back in the States (and documented it of course): Strawberry-Watermelon-Tomato Gazpacho, Romesco Sauce with Grilled Veggies, and Patatas Bravas.
Today … today it’s time to take you deep into the world of serious gin and tonics. No, not the low-effort American version with a sad wedge of lime perched on the rim of the glass. We’re talking about Spanish-style cocktails so hardcore they eschew the “and”. It’s just gin tonic. We don’t need no stinkin’ ampersand!
The preparation of a good Spanish Gin Tonic is a cross between church and performance art. From the specialized glass* (a giant balloon) to the carefully curated aromatics paired with each specific gin (dozens available to choose from) to the dry ice (yes!) and the spritz of essential oils for awakening all the senses – there’s a good reason why gin tonics are the “it” drink in Spain, and the summertime cocktail of the season at our house!
​
* The Copa de Balon glass: A Copa de Balon is a type of glass that is perfect for drinking gin and tonics. The glass is typically bulbous in shape, like a balloon, and sits on a stem almost like a red wine glass. The Copa de Balon glass dates back to the 1700s in the Basque region of northern Spain. While the English would use a long Tom Collins glass, the Spanish – who are said to be the largest drinkers of gin in Europe – developed the ‘balloon cup’ instead.
                                                                                                                                    -- Metro.co.uk
Below are a few photos from La Gintoneria Donostiarra in San Sebastián – home of the very best GTs we had the pleasure of consuming while in Spain. We are all about the research, so in the name of science we sampled a few different versions: 
​
Monkey 43 gin: 1 blackberry; 2 juniper berries; 2 lime strips; 1 dash lavender bitters; Spritz of some essential oil inside the glass; Dry ice treatment

Blackwoods gin: 3 juniper berries; 1 small piece of cinnamon; 1 lime slice; 2 orange peel strips; 2 lime peel strips; 1 dash of lime bitters; Spritz of some essential oil; Dry ice treatment

Our favorite was made with a Spanish gin – Gin Mare – which features Mediterranean flavors. Recipe below.
Please click on the photos to enlarge them.

Naturally our House Bar Chef Ilise had to recreate this wondrous tipple at home. Here’s how she did it.
  • Gin = Gin Mare, a Spanish gin flavored with olives, thyme, rosemary and basil
  • Tonic = Fever-Tree NOTE: Fever Tree makes several flavors of tonic water. They’re all good and any would work well in this cocktail. We’re partial to the original blend, Fever-Tree Premium Indian Tonic Water. 
  • Aromatics = Arbequina olives; cardamom pods; juniper berries; fresh rosemary sprigs; lime and orange citrus strips
  • Bitters: Citron bitters are authentic; we used orange bitters which work just as well
  • Ice = Precisely 7 oblong cubes are used in the Spanish recipe. We took some liberties with the quantity and shape, but it is “A Must” to use large, solid, slow-melting ice cubes.
Please click on the photos to enlarge them and read the captions. Note: photos are from two different cocktail hours. I think you'll get the gist.
The Verdict: Due to the large glass, volume of tonic and number of cubes, the finished cocktail tastes light and refreshing like a spritzer rather than a heavy-alcohol drink. The blend of aromatics is subtle, complex, and entirely delightful. You can happily sip this gin-tonic for a good long time, which fits perfectly with the Spanish style of socializing, drinking, and dining – there’s no rush, sit and relax, take your time, and ENJOY!
Print The Recipe- Spanish-Style Gin Tonic
File Size: 578 kb
File Type: pdf
Download File

Spanish-Style Gin Tonic
Recipe source: Ilise Goldberg, based on technique observed at La Gintoneria Donostiarra in San Sebastián, Spain
Yield: One cocktail

INGREDIENTS:
  • 2 ounces Chilled Gin (for this recipe Gin Mare is the preferred gin)
  • 4 Juniper berries
  • 1 Small Spanish Green Olive
  • 1 Rosemary Sprig
  • 2 Cardamom Pods
  • 2 Strips of Orange Zest
  • 2 Strips of Lime Zest
  • 1 Dash Orange Bitters
  • 1 Bottle of Cold Fever-Tree Tonic Water (200ml approx. 6.8 ounces)

DIRECTIONS:
  • Place the juniper berries, cardamom pods, rosemary sprig and olive in the bottom of a Copa de Balon glass* or wide bottomed Burgundy/pinot noir glass. (Both glasses hold somewhere around 20-26 ounces). 
  • Pour the cold gin into the glass. 
  • Zest the orange and lime over the glass so the essential oils drop into the glass and blanket the glass; then drop the zest into the glass. 
  • Add many solid ice cubes (I have used six or seven 1-ounce square cubes or three-four 2-ounce round cubes).
  • Using a long spoon mix the ingredients well with the ice to chill and then run the spoon over the top of the glass. 
  • Slowly pour the tonic water into the glass. Using your long spoon gently stir the cocktail to mix the drink.  
Spanish ham, cheese, and olives
Spanish ham, salami, cheese and olives make a great accompaniment to Spanish-style Gin Tonics
0 Comments

Afternoon Dance Break – Boogie Blues

8/1/2017

0 Comments

 
Dancin' the Night Away (photo: Professor Bop)
Dancin' the Night Away - Photo by Professor Bop (click the photo to visit his site)
Afternoon Dance Break is a recurring feature that invites you to get up from the desk, crank up the tunes, and dance your fool head off for a few minutes before resuming the daily grind. Want more dancing? Find past ADBs here.

Yesterday was a special day for a special gal so we enjoyed a special night out (on a Monday no less!) to hear some damn fine blues music courtesy of The Cash Box Kings at Evanston’s premiere listening room, SPACE. They were so good – especially featured singer Oscar Wilson – we’re not quite done with it yet.

Please get your listening ears on and set your backfield in motion. The Cash Box Kings are on deck to help you boogie your blues away.
0 Comments
    When home cooking becomes a special occasion - Recipes, playlists, table tips and more
    Picture

    ​
    Entertaining Vintage

    Vintage treasures for the kitchen, home, collectibles, and gifts

    Categories

    All
    Afternoon Dance Break
    Birthday Greetings
    Cookbook Road Test
    Cool Tunes
    Drinks
    Entertaining Vintage
    Fish
    Kitchen Reno
    Kitchen Tips
    National Days
    Party Planning
    Pop Culture
    Recipe
    Savory Bites
    Supper Club
    Sweet Bites
    The Arts
    Travel
    TV
    Video

    Archives

    May 2020
    April 2020
    March 2020
    August 2019
    June 2019
    May 2019
    April 2019
    March 2019
    February 2019
    January 2019
    December 2018
    November 2018
    October 2018
    September 2018
    August 2018
    July 2018
    June 2018
    May 2018
    April 2018
    March 2018
    February 2018
    January 2018
    December 2017
    November 2017
    October 2017
    September 2017
    August 2017
    July 2017
    June 2017
    May 2017
    April 2017
    March 2017
    February 2017
    January 2017
    December 2016
    November 2016
    October 2016
    September 2016
    August 2016
    July 2016
    June 2016
    May 2016
    April 2016
    March 2016
    February 2016
    January 2016
    December 2015
    November 2015
    October 2015
    September 2015
    August 2015
    July 2015
    June 2015
    May 2015
    April 2015

    RSS Feed

    Subscribe to our mailing list

    * indicates required
Proudly powered by Weebly