
Image: Ilise Goldberg
Well, it’s official. Ilise and Ann’s big kitchen renovation project is finally all-the-way complete. We’re living in it, cooking in it, making a mess in it (some of us more than others, Ilise) – you know, just like normal. The major work was done in mid-November so we moved all the pots and pans and dishes and cereal boxes (so many boxes!) back into The New Kitchen … hereafter known simply as the kitchen. Window treatments and furniture arrived over the next several weeks and now the final-final punch list items have been checked off.
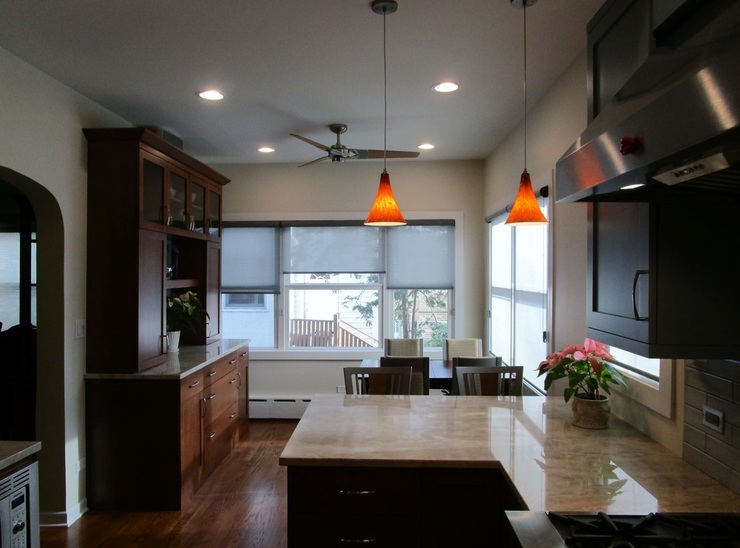
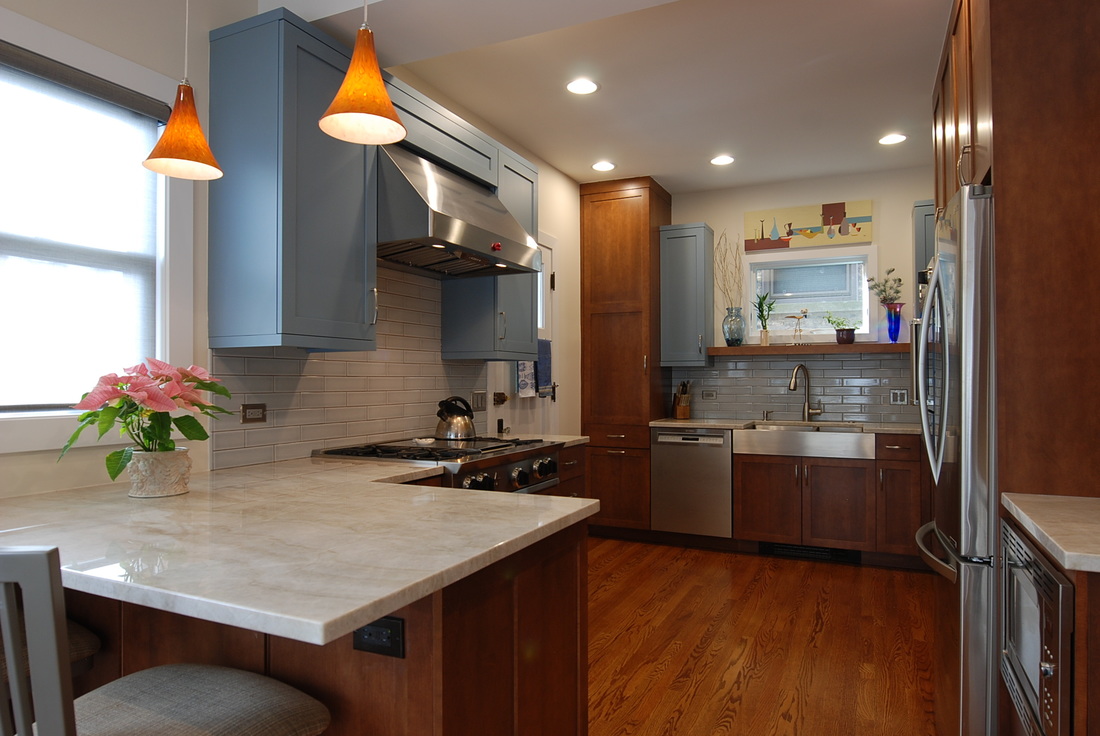
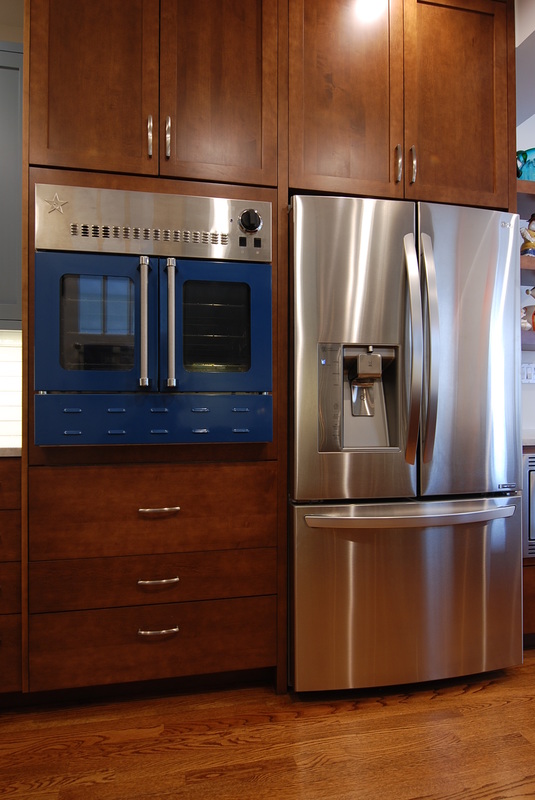
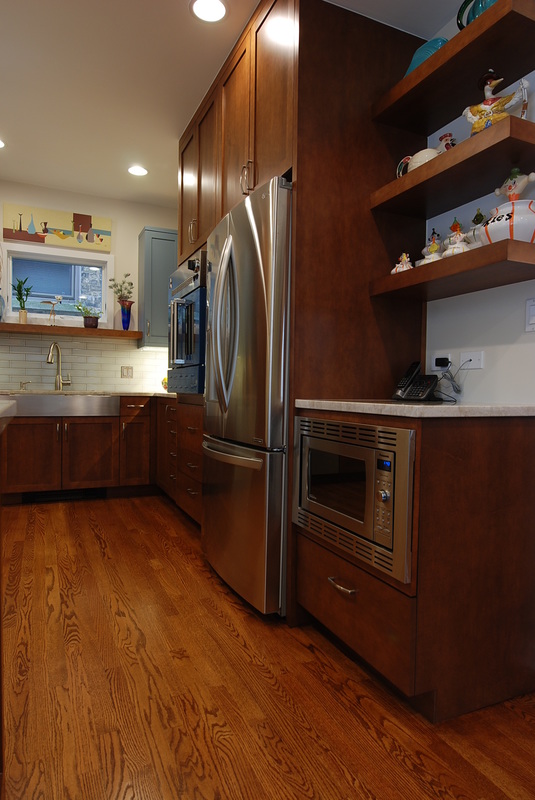
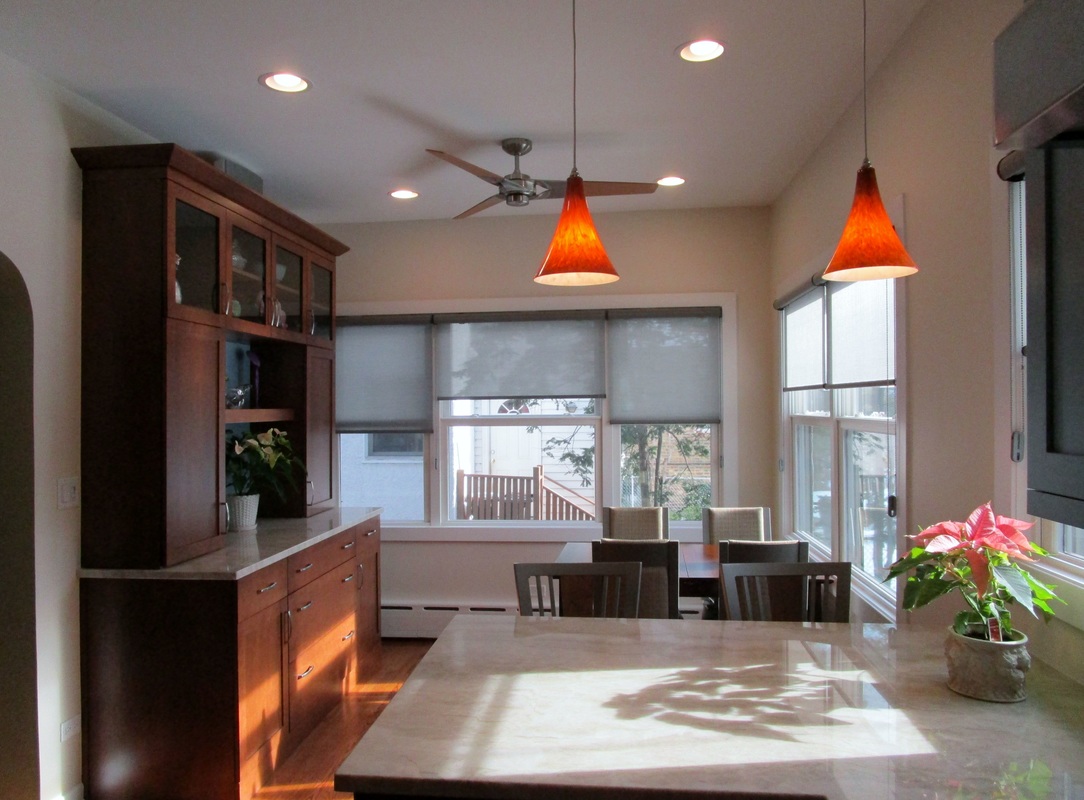
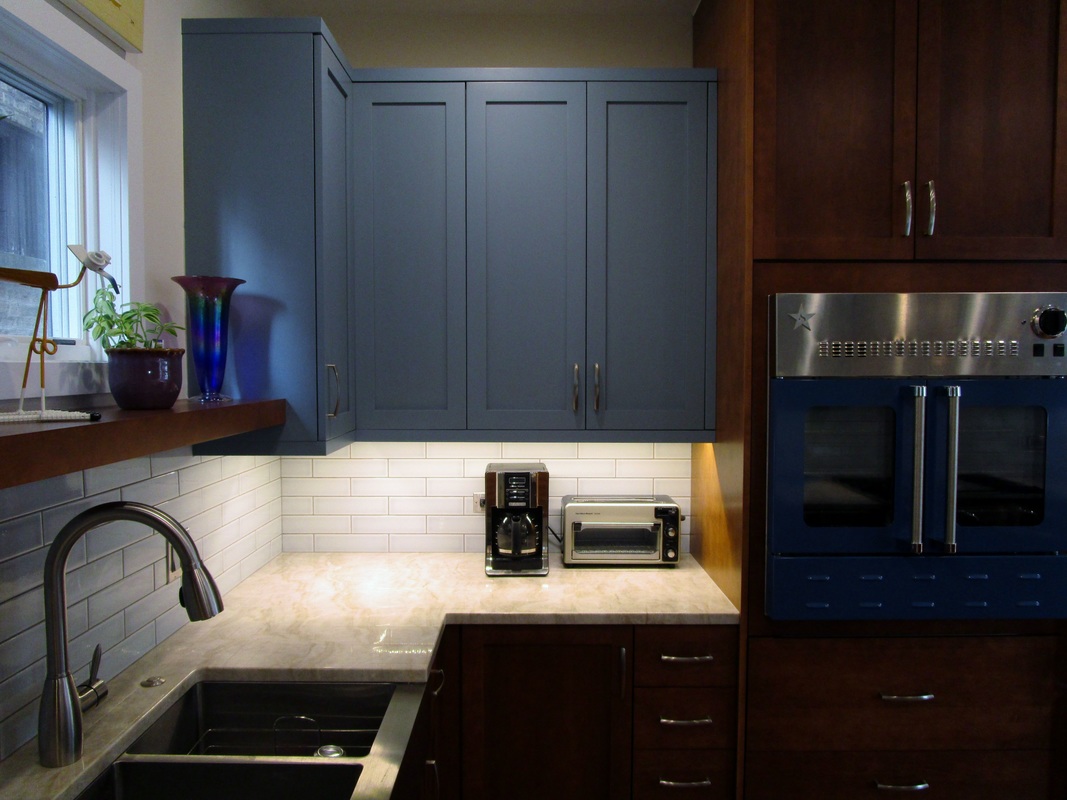
It turned out even better than we imagined. This kitchen has form and function. Not only do we like its looks but it also works like a dream. The flow between work spaces is so much more efficient – no more pardon me/’scuse me bottlenecks at the end of the peninsula! Storage to die for! Restaurant grade range and oven whose tricks we’re still learning. Lighting where we need it. We’re in love!
And guess what, you guys, our kitchen has paparazzi! Okay, fine, one paparazzo. The wonderful design team at Kitchens and Baths Unlimited wanted pix for their portfolio, so there was a professional photo shoot in early January. Check out the gallery with photos by Saundra LaLone. Click to enlarge the photos.


It’s been a full year since Ilise and I began our renovation journey. Time to reflect on the process, share some lessons learned, and offer a few tips for those who are considering your own renovation projects. Oh yes, there will be plenty more pictures too! (Click Read More below for the rest of the story.)
Just for grins, I’m going to break up the pearls of wisdom into two chunks: Lessons Learned (things that were a little bit surprising to us) and Tips (which you probably already know but please read anyway ).
Lessons Learned
Lessons Learned
- Carefully select your primary designer/contractor. It’s not just a transaction, it’s a relationship. Are you comfortable spending lots of time with this person? Could you have a difficult conversation with them? Do you share a similar design aesthetic? Do they get you? This one was not really a surprise, except for how much it matters to get it right.
- Think about add-on projects that utilize the same trades working on your primary renovation. This may be your chance to fix a few “get around to it eventually” jobs around the house. Talk to your contractor about potential add-ons early, don’t spring it on them once things are underway. Things will never cost less than when added to the scope on the front end of your project. For example, if you know you’ll have a drywaller coming out for the kitchen already, adding a drywall patch in the dining room will be a fraction of the cost to have someone come out just for that one wall. But you have to plan ahead.
- Be your own project manager. Although the pros are responsible for coordinating the workers and scheduling major phases of the project, you'll have a better experience during the process and a better final result if you are actively engaged. Many aspects of a renovation fall entirely into the laps of the homeowners – materials selection, etc. – and you need to keep yourself on track and on time. Ilise was our in-house PM, wielding spreadsheets and calendars like a boss. Her advice: “Lists are your friend for keeping on top of all your tasks and due dates.”
- Make a Use Plan for your new kitchen. Look closely at the blueprints/drawing/schematic that the design company creates. Make sure it matches up with how you plan to use your kitchen and the cabinets. What you see on the drawing is what will be ordered and how it will look. Before the cabinets are ordered make a plan for their use, determine what will go where. This will help you determine the number of drawers, types of pull outs, etc.
- Select the appliances early. If you want the custom built-in look, you’ll need to select your appliances and range hood before the cabinets are ordered so they can be manufactured to the correct dimensions. This goes for the sink as well.
- It may take a while between signing the contract and the “active start” of the project. We were surprised to have a full three months between writing the deposit check and the first day of demolition. Plenty was happening behind the scenes – mostly cabinet-related – but a good design/build firm will not start tearing apart your old space until the new items are ready for installation. We put the time to good use, researching and selecting project elements such as the sink, faucet, countertop, and backsplash tiles.
- Decision fatigue – the struggle is real. So many choices to make! Some are obvious - cabinet and wall colors, countertop and floor materials, etc. Others not so much – on which side of the sink should the soap pump be installed, preference among garbage disposal switches, and of course door pull placement. Aargh! Square away as many decisions as you can before construction starts; there will be plenty that crop up which you never even considered. Our designer gave us some free remnant floor tile for the mud room. It was kind of her but the best part was that we did not have to make one more frickin’ decision.
- Plan to be onsite as much as possible. Although this isn’t technically required and your work crew can do a lot without you, we found it advantageous to be on-hand for questions, real-time decision-making and streamlined communications. The bulk of our work - a down-to-the-studs everything-must-go renovation - was completed in 10 weeks, during which we worked from home most days. I feel certain it would have taken at least a third more time if we were less available.
- There will be more dust, debris and chaos than you can imagine. Even if you’ve got a vivid imagination, there will be more. You’ve just got to roll with it. We had an extensive plan for setting up a makeshift kitchen in the basement and where to store the displaced furniture during the demolition and construction phases. Hahahaha. We ended up with all manner of tables, chairs and cabinets crammed willy-nilly into the living room and ate a whole lot of take-out. Fine for the two of us, but if one has children in the home you’ll want a good plan for this.
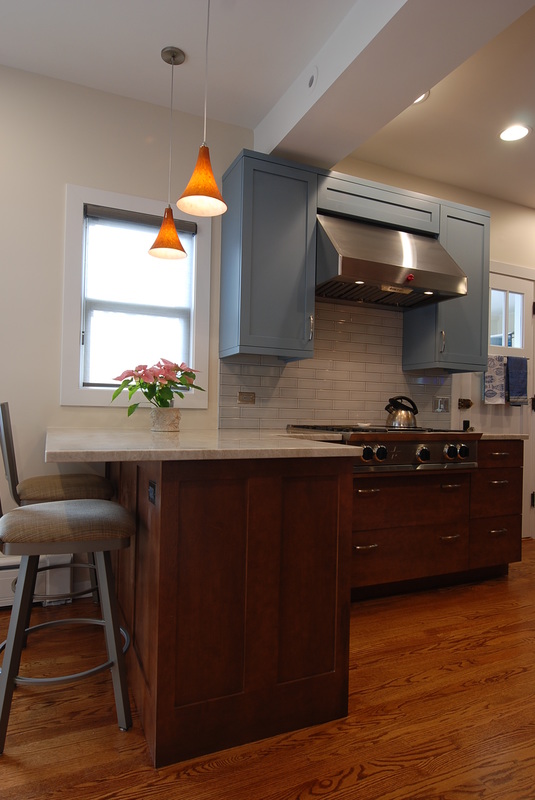
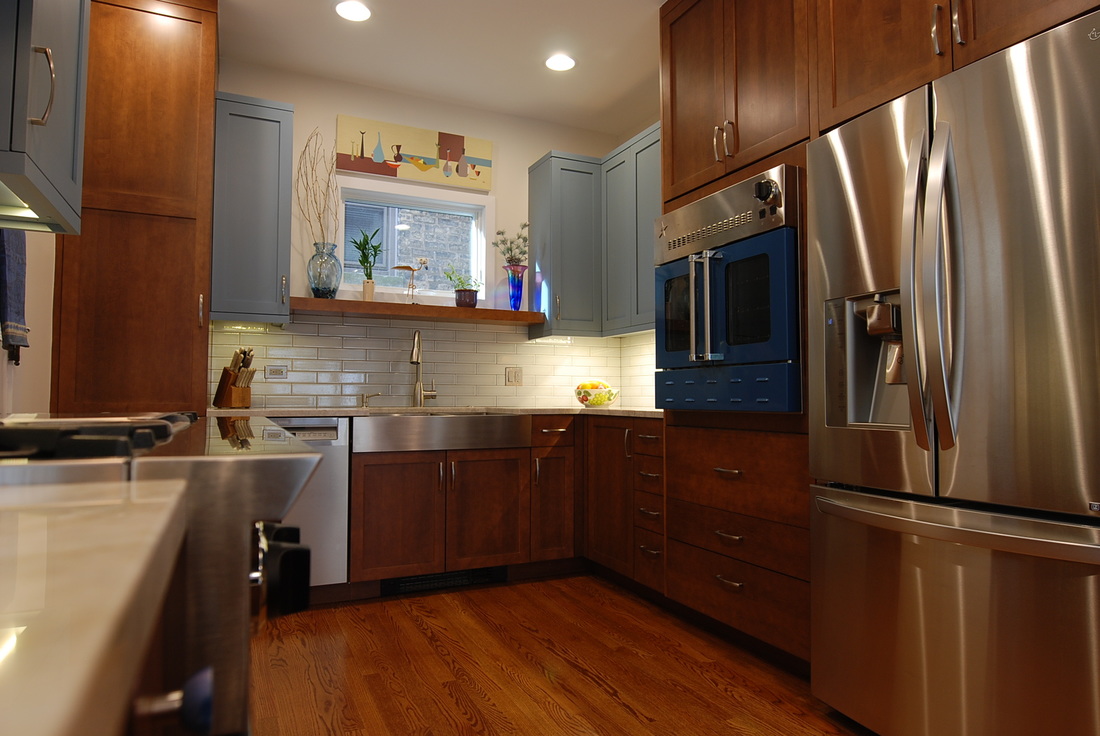
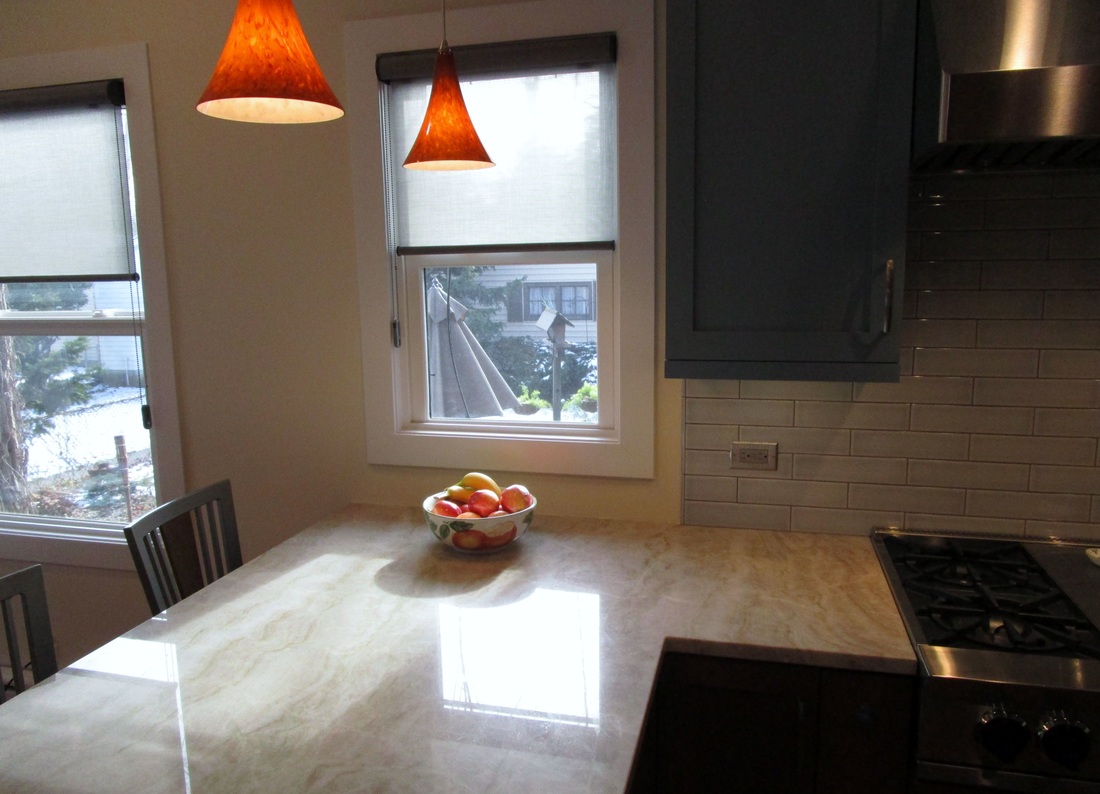
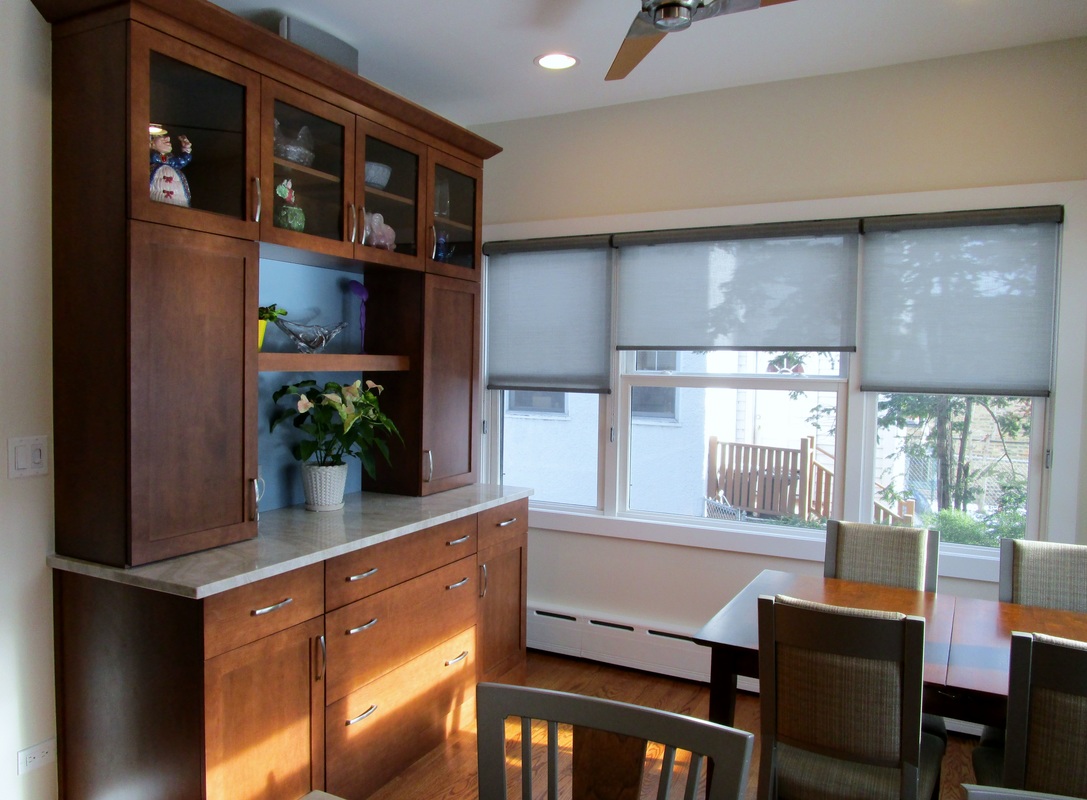
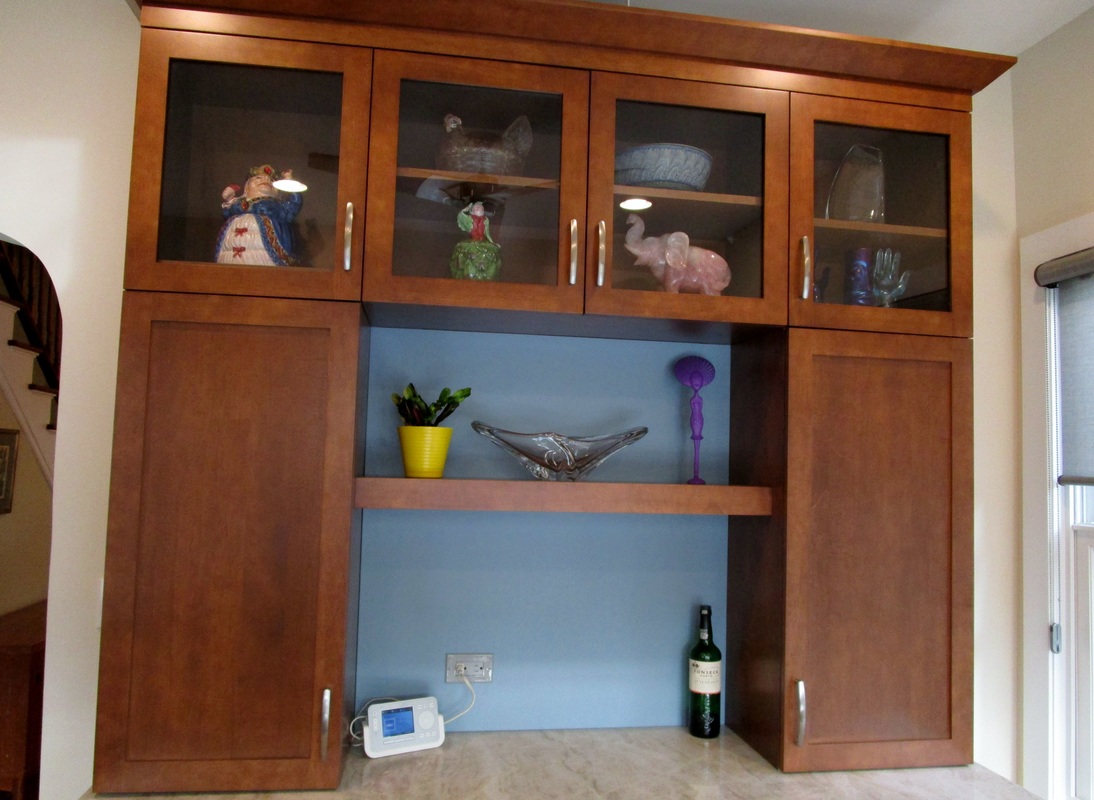
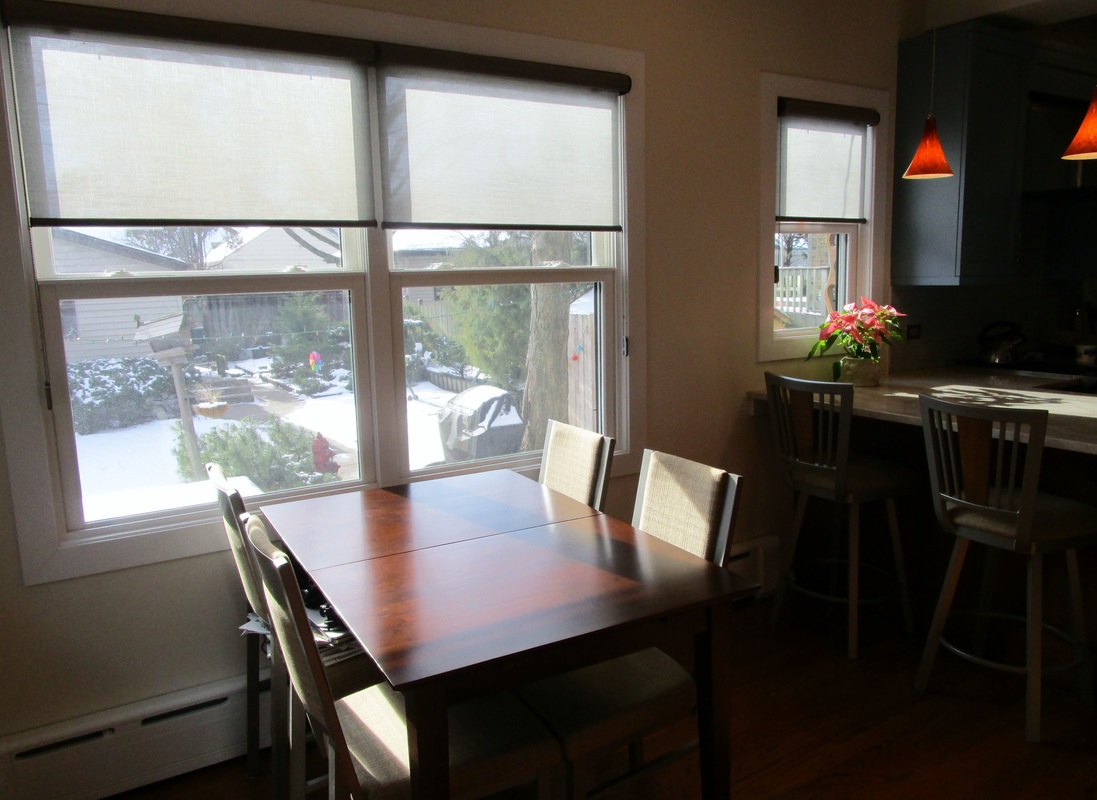
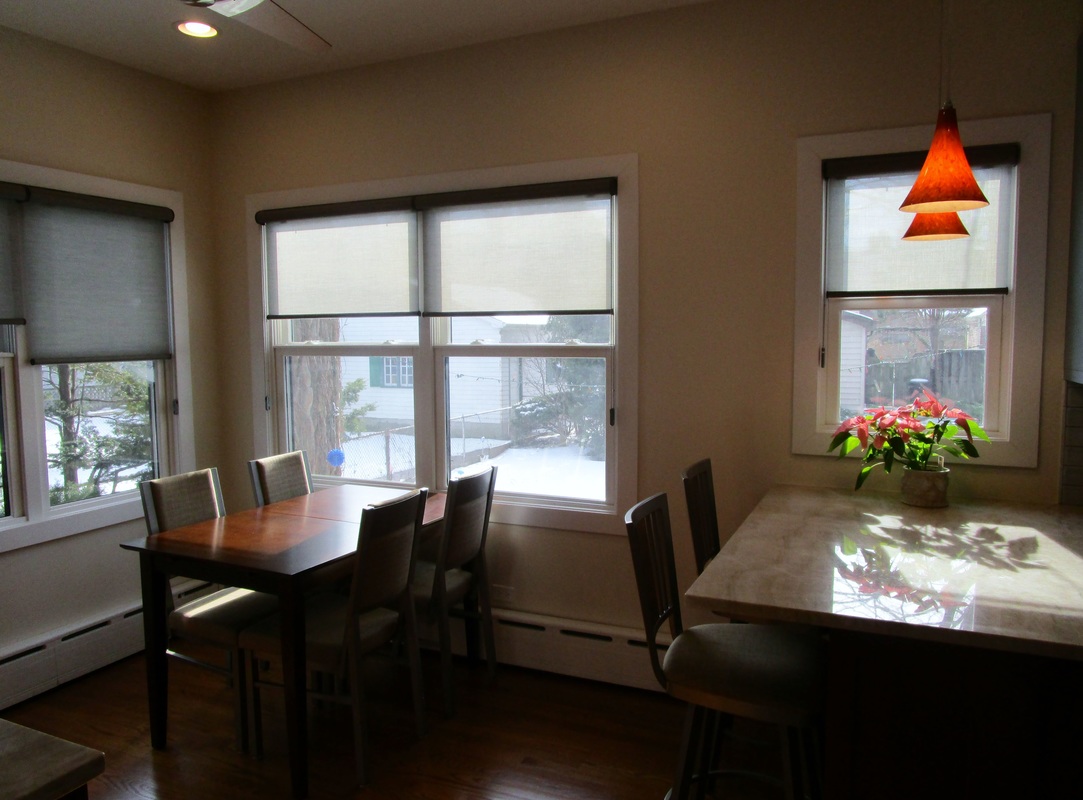
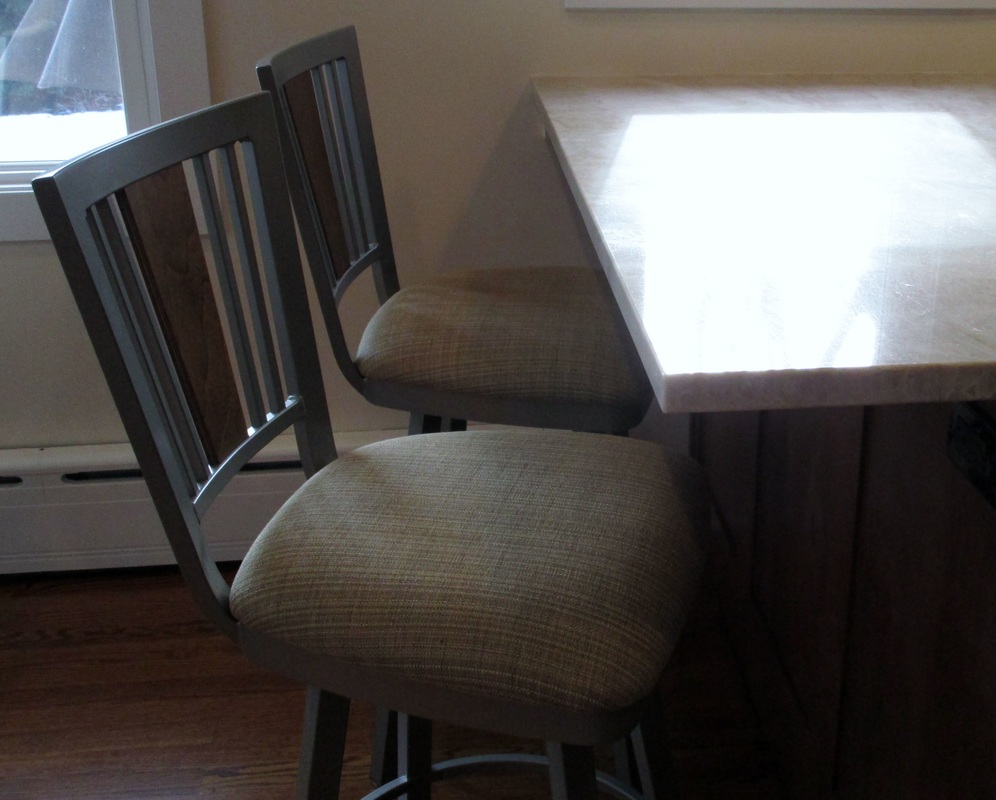
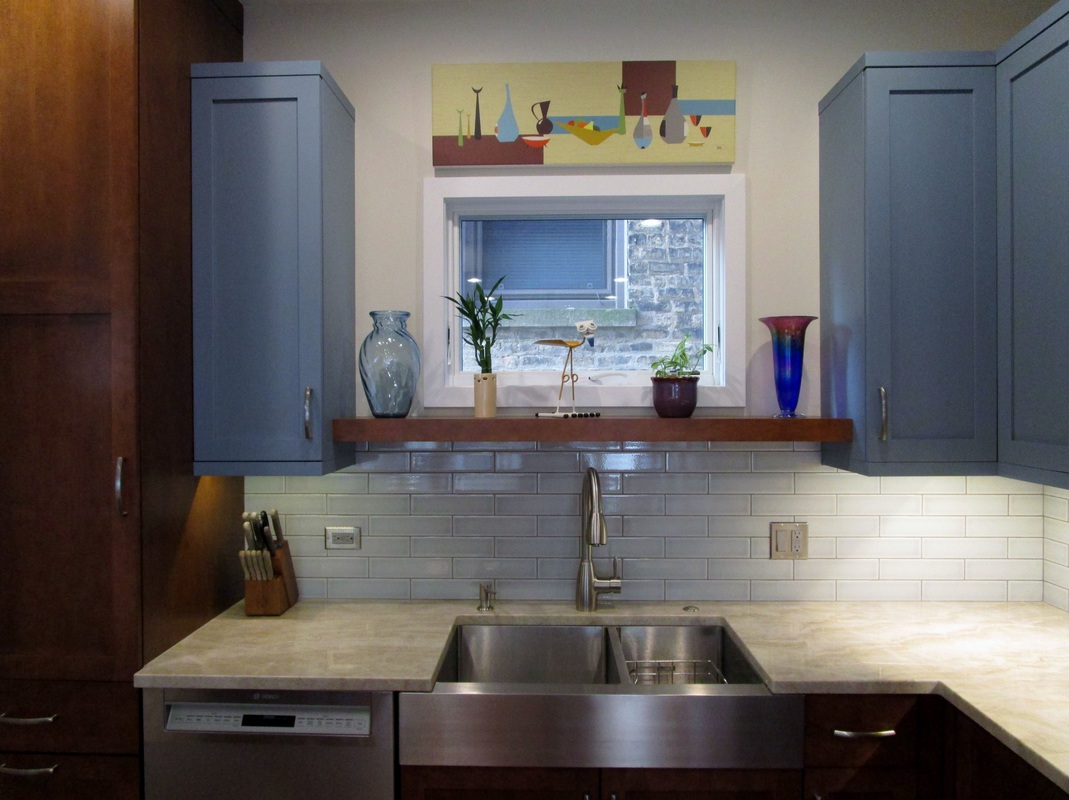
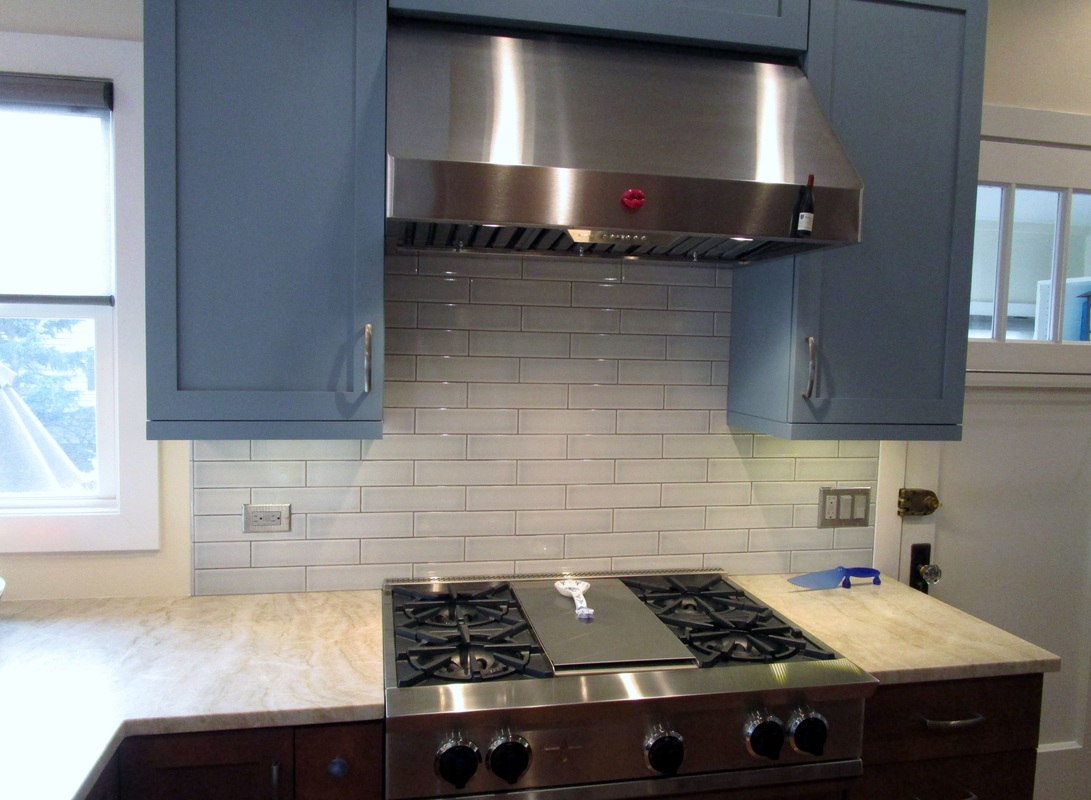
Please enjoy a few more photos taken by Ilise Goldberg. You can see the new counter stools, table and chairs, and window treatments. Click on the photos to enlarge them and read the captions.


Tips for Would-Be Renovators:
- Be clear about your priorities. Why are you undertaking this project? To gain more workable space? A love of cool gadgets? Recognizing what matters most will help you stay the course when all the shiny objects, bells and whistles of modern design conspire to distract you to go over budget. Be extra clear about your budget. An extensive planning/decision-making process early on will help you avoid in-the-moment changes during construction, when many jobs veer over budget.
- Research, research, and a little more research. Learn which design styles make you happy. Investigate the options for materials, appliances, etc. Have you given much thought to crown molding lately? Embark on a project like this and I promise you will! Explore different alternatives for doing the work (DIY, handyman-style contractor, full-service design-build firm – which is where we ended up). Houzz.com is a great website to view tons of design photos. You can assemble “look books” that represent your design aesthetic or of specific items you like – a great way to communicate with your designer. Visit design showrooms and appliance stores in your area to see the displays, get inspired, and solidify your own likes and dislikes. For me, the “Dislikes” were a lot easier to recognize. It’s okay, that’s still helpful. Ask your friends. Most people have a reno/rehab/design story to share. Don’t let the OMGs dissuade you, but learn from the mistakes – and victories – of others.
- Tape out your layout. Ilise did a genius move when she marked the floors and walls of our old kitchen with blue painters tape to indicate where the new elements would go. This helped us determine the correct height for our wall oven and the perfect amount of overhang for the peninsula countertop.
- Go beyond the paint chip. It’s nearly impossible to select the best color going off of a 2-inch square from the Home Depot paint department. We bought tiny cans of paint (so many tiny cans!) in order to compare and contrast them on the actual walls. Really helpful.
- Speak up. If there’s any kind of issue or lack of clarity, speak up sooner than later. We were probably the most talk-y clients our designer has ever worked with – lots of back and forth before signing the contract, during the planning phase, basically every step of the way. I suspect it was pretty annoying sometimes, I know it helped to get the job done right the first time. There was only one instance where we changed our minds mid-stream about a design decision (grout!) and by speaking up right away the workers were easily able to make the change. Had we waited another day or two to speak up, it would have been a much bigger problem.
- Ask questions. Similar to #5 but different. Ask your contractor what the next steps are, what the tradesperson is onsite to do, what you should expect at each phase of the project. It’s hard to speak up about a problem unless you know what’s supposed to be happening. Being engaged in the project will help with your timeline. A perfect example was when the plumber installed the gas line, wrapped up and was nearly out the door before Ilise asked about the gas line for our wall oven. It was clear from his response that this was the first he’d heard of it. Since 95% of homes install electric wall ovens, this detail had slipped our project manager’s mind and did not get relayed to the plumber. This was easily handled and no big deal, but could have been a huge pain to rectify later in the project.
- During the final phase make a detailed punch list, share it with your project manager, and update it frequently. No, it is not too much to expect that your job will be finished perfectly, to the nth degree, but you’ve got to itemize the issues and communicate. Get your designer/general contractor onsite to walk through with you frequently. All issues can be dealt with, but you’ve all got to be seeing/saying the same thing.
- Be nice to the workers. This should be a no-brainer, but from some of the stories the crew shared, sadly it is not. Provide beverages, offer snacks (very few helped themselves to the food but I know they appreciated the thought), give them a place to clean up and dry off at the end of the day. As previously mentioned, it’s not just a transaction it’s a relationship. These folks are in charge of delivering your dream renovation … be nice.
Many folks have asked: Now that you've lived through a major renovation project would you do it again? Honestly, I hope I don’t have to do a project of this scale anytime soon. Maybe never. There were a lot of negatives – noise, construction dust, people in your house every damn day, all the things noted above. The pluses include the highly educational and mostly fun process, and wow, how cool to see all the elements coming together. And now we get to live here. It’s ours! Forever!
So I think that tilts the scale towards Yes, if the end results of any future projects could be guaranteed to make us as happy as this kitchen does, we would someday consider another project. But first we’ll take time to recover, savor the kitchen, and start saving our renovation pennies all over again.
Thank you for following our kitchen renovation journey. If you missed any of the weekly recap posts, you may find them here. Got questions or your own renovation war stories to share? Leave them in the Comments.
 RSS Feed